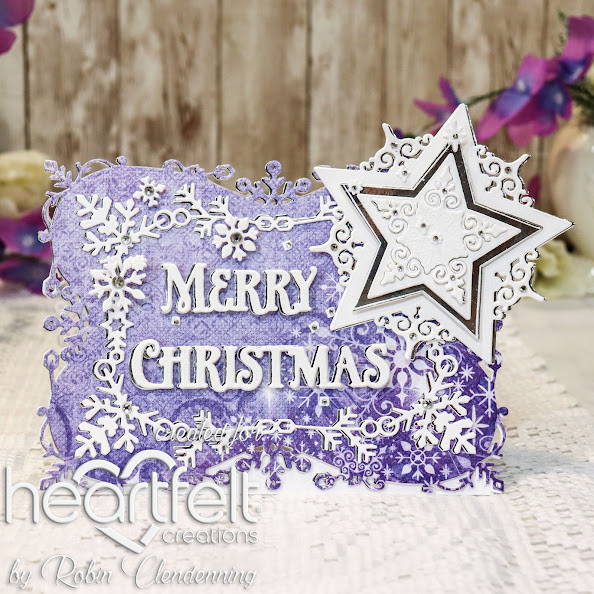
Good morning Heartfelt friends!
Card size: 5 7/8” X 8 1/8” (Includes overhanging star).
See video on making a shaped card and
follow instructions except do not cut all the way to the bottom for this Holiday
Snowflake Frame die as it is a little too delicate for standing on fine
edges. Leave a small amount of straight
cardstock at the bottom. Cut another
Holiday Snowflake Frame from Silver and 1 from purple decorative paper. Glue the siler to the card base then glue the
purple but off-set just a little bit.
Cut the inner Holiday Snowflake Frame from
silver and from white, glue them off-set then glue them to card front,
centering.
Stamp Holiday Star set using embossing ink
on white and on silver (Tip: use a “magic” powder pouch on the cardstock before
stamping so that embossing powder shakes off easily). Use white embossing powder, shake off excess
then heat emboss. Also stamp snowflakes
from the Large Holiday Star and Merry Christmas from Starry Holiday Greetings using
embossing ink, white embossing powder and heat emboss. Die cut all.
Die cut Merry Christmas and the outer Holiday star from Silver as well.
Die cut Merry Christmas from white foam.
Glue the silver Holiday Star under the
embossed white Holiday Star-off-setting, do the same with the Merry Christmas.
Add foam to the next layer of the stars (silver with white emboss), add foam
again then glue smaller white embossed star.
Last glue siler decorative snowflake inside white star then glue white
embossed snowflake design on top off-setting a tiny bit. Glue this stack to the upper right corner of
card front (it hangs over the edge side and top). Make sure there will be
enough room for the Merry Christmas.
Glue silver Merry Christmas under white
embossed Merry Christmas-offset then glue foam Merry Christmas under the stack then
glue it to the card front. Add foam tape
or dots to the decorative small, embossed snowflakes and glue them to the card
front as desired.


No comments:
Post a Comment
Thanks for stopping by! Your comments are so appreciated!!