Pages

Comments are welcome and very much appreciated!
Showing posts with label Basket. Show all posts

Wednesday, March 5, 2025

Elizabeth Craft Designs-Happy Easter Basket

Good morning crafting friends!

Today I have a very special basket to share.  Easter is fast approaching and this little basket would be a beautiful gift for anyone.  We start with the cute little bunny from the Cute and Whimsical Collection by Joset Van de Burgt for Elizabeth Craft Designs then add them to Paper Flowers Collection basket and flowers by Angelica Turner for Elizabeth Craft Designs.


In case you have not seen them yet, the 3D eggs by Angelica are very fun to do and make a great addition to this Easter Basket.  They have a honeycomb design to make them 3D.


The flowers around the outside are tiny tulips.


Other products: Purple cardstock, Blue cardstock, Green cardstock, 2 tone paper for eggs.
Oxide Inks and brushes.


Thanks for visiting today!
Robin


Friday, April 22, 2022

Amazing Paper Grace New Release


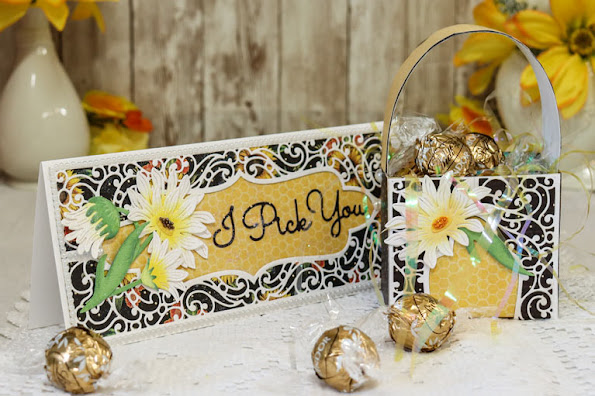
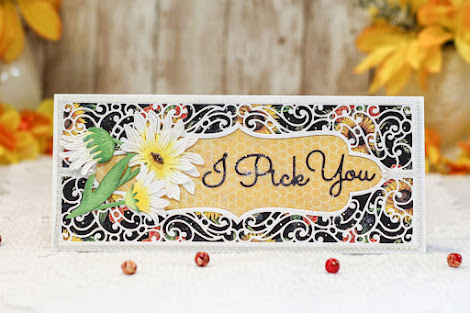
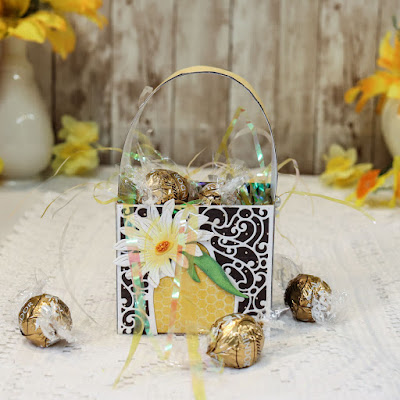
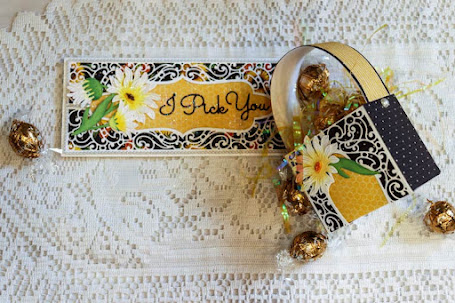
It is spring and that always makes me think of flowers and baskets, bees and daisies.  I wanted to make a card that reflected those ideas and what would be better than a pretty basket to go with a beautiful card.  I'm using new slimline dies from Amazing Paper Grace for these projects.

 
Projects for today's post were used with dies provided by Amazing Paper Grace.

My Projects for Today


Layered Fleur Bouquet Slimlines Availability:
These dies and plates are available from Spellbinders right now! Click here: Layered Fleur Bouquet Slimlines Collection 


Other Supplies: 
White cardstock, graphic 45 decorative paper, pearls, brown Prills, orange Prills, green cardstock

For more Layered Fleur Bouquet Slimlines Collection Inspiration

Visit each Creative Team blog linked below for their take on creative paper crafting ideas using the Layered Fleur Bouquet Slimlines Collection 

Follow me on Facebook!
Follow me on Instagram!

Thank you for visiting today!

Robin


Tuesday, May 11, 2021

Butterfly Gardens Easel

 Good morning!

Isn't this big butterfly beautiful!  

Wow, just think of all you can do with this beauty.

Today I've made it into an easel card.


Heartfelt Creations Products:

Large Floral Butterfly Die

Large Floral Butterfly Stamp Set

Sweet Magnolia Blooms Die

Sweet Magnolia Blooms Stamp Set

3D Magnolia Shaping Mold

Cheerful Notes Sentiments Stamp Set

Album Tags and Accents Die

Rock Candy Stamen-Small

Bright Pearl Stamen-Medium

Luxe Gold Cardstock

Deluxe Flower Shaping Paper Pack of 50-White

Rajni Chawla’s Crystal Clear

Opaque Embossing Powder-White

Metal Tip for Adhesive Bottles

Dries Clear Adhesive

Magenta Hue Archival Ink

Fern Green Archival Ink

Leaf Green Archival Ink

Other Products:

White cardstock-heavy weight, Peerless Watercolors, sheer ribbon, embossing ink (VersaMark used here), watercolor paper.

Videos:

For more ideas on creating with the 5 x 7 Decorative Frame Dies, watch the tutorial at https://youtu.be/qdBFA5VpmSo.

For more tips on creating with the flower shaping molds, watch the tutorial at https://youtu.be/FSdPL7nXvQE.

Instructions:

 Card size: 4 3/4 X 5 3/4".  Fold a piece of heavy weight white cardstock, 10 X 6, to measure 5 X 6.  Place the top of the outer Butterfly die just over the fold so that it will not cut away fold (about 1/4" over fold).  Score cut out butterfly again on the right side right at the intersection of top and bottom wing, fold down toward card inside to form the easel.  Cut another full outer butterfly from white and glue just the bottom half to the folded down bottom half of card base butterfly.

Use a piece of white watercolor paper (smooth as possible) about 5 X 6” and wet entire piece.  Use a large flat brush to “wash” paper with Fuchsia watercolor.  Let dry completely then dust the paper with non static pouch, ink Large Butterfly stamp with VersaMark or other clear embossing ink stamp washed paper, emboss with white powder then die cut.  Stamp another piece of white with the butterfly stamp, emboss then die cut for the inside of card.  Sponge the outer edges of inside butterfly with Magenta Hue.  Glue the inside down to inside of card and glue the watercolor washed butterfly to front of card.

Die cut the decorative butterfly out of Luxe Gold and out of white, glue them together slightly offset.  Cut out another gold head and antenna from the butterfly die (the one used to die cut the stamped image), glue the gold head to the stamped watercolor butterfly.  Glue the decorative gold and white butterfly to the body of stamped butterfly and gold head, leaving wings free. 

Stamp Magnolia Blossoms using Magenta Hue, sponge backs, die cut and shape in the mold.  Stamp leaves using Fern Green, sponge front and back with Leaf Green, adding in a bit of Magenta Hue at the tips, die cut and shape in the mold.  Glue 2 of each size blossom together to form each flower, insert gold and hot pink stamen.  Form a small arrangement for the inside of card to be placed just so that butterfly will stay open to desired position. 

Stamp sentiment using Magenta Hue and die cut using a small tag.  Glue a fuchsia bow to the top then glue the tag to the inside of card.

Finish card by glittering the body of the butterfly on the front and glittering the flowers inside.


My next project is a pretty basket just right for filling with candy treats or some other small surprises.


Heartfelt Creations Products:

Small Floral Butterfly Die

Small Floral Butterfly Stamp Set

Lattice Swirl Gateway Die

Tuxedo Black Memento Ink

Crystal Ultrafine Transparent Glitter

Metal Tip for Adhesive Bottle

Dries Clear Adhesive

Scor-Pal Measuring & Scoring Board

Spellbinders Tool N One

Stamp Mat Pad

5pc. Acrylic Block Set

Other Products:

White cardstock, Copic: R22, R21, RV10, RV02, RV04, YG11, YG05, Y11, Y15, B21, B24, V01, V12, V15, ribbon, Easter basket pearlescent grass, Acrylic Shimmer Additive

Instructions:

Size: 1 3/4" deep, 4 3/4" wide, 6 3/4" tall.  Cut 2 Lattice Swirl Gateway Dies from white.  Cut 1 piece of white 2 1/4" X 9” then score the strip at 2 1/2" and 6 1/2" leaving 2 1/2" end.  Score down both long sides at 1/4" making a 1 3/4" wide side and bottom of basket (this can really be any width you desire just be sure to add 1/2" for the tabs on the long sides [1/4” each] and the other scores would be the same).  On each side at the short score make a notch from edge to long side score line, this enables nice folds for a box without excess paper. 

Fold on all score lines then glue to 1 of the die cuts about 1/2" from the bottom (sides will tilt in slightly).  When completely dry, glue the other die cut so that bottoms, sides and tops match then glue the top “handle” together about 1” across but no further down the sides.

Stamp various butterflies from the Small Floral Butterfly set, die cut and color with preferred coloring method.  If you watercolor make sure to stamp butterflies on smooth watercolor paper to hold up to the water also use Archival or Versafine Claire to stamp with as Memento is best with alcohol inks and may bleed with water.  Add some shimmer to the wings mixed with a tiny bit of water.  Paint glue around the edges of butterflies and sprinkle with Ultrafine glitter.

Arrange butterflies on the front of basket and 1 for the inside of the back, seen from the front.   Glue onto basket then add a multi-loop bow to the top.  Stuff basket with pearlescent grass and it is ready to fill with treats.

Thanks for visiting today!

Robin

Instead, be kind to each other, tenderhearted, forgiving one another, just as God through Christ has forgiven you. 


Monday, May 1, 2017

ODBD May New Release Blog Hop

Good Morning!
Welcome to the May Release Blog Hop!
Look at these fun new stamps and dies!!!  Just in time for some Teacher appreciation cards & gifts!


End of the school year gift set for your favorite teacher.

Gift basket
ODBD stamps: Seeds of Knowledge
I made my basket and used the Americana Quilt paper for the insets.  I filled the basket with some iridescent filler (like what is used in Easter baskets) then stamped, die cut and colored 3 of the large teacher's apples.  I attached floral picks to the backside and stuck them into the "grass".
I then made a tag with a combo of words from the Seeds of Knowledge stamp set.

Matching card.
ODBD stamps: Class Act
ODBD dies: Clipboard Set, Notebook Paper (stamp/die set), Alphabet
I used a light blue and red (like the tag on my basket) to make my card base.  Added a strip of decorative paper from the Americana Quilt collection and buttons and bow to match my basket.
I then used a brownish card stock for the clipboard and silver mat for the clip part (I cut two of them so that I could pop the top one up at an angle just like a real clipboard. I cut the pencil and ruler from a matching blue (medium) and stamp then fussy cut my stack of books.  I stamped and die cut the notebook paper, stamped my words on it and then die cut the ABC to go on the top of the paper.


This card is for a Sunday School teacher appreciation.
Your Sunday School teacher can even use the cross for a book marker as it is easily detached.
ODBD stamps: Sunday School Teacher

I used a recent SplitCoastStampers sketch for my layout, I really liked it.
After getting my base layers on I stitched around the layers with my sewing machine. I then added the cross and sentiment panel.
I happen to have a ton of tassels so I punched a hole at the top of my cross and attached the tassel...The color was a perfect match to the ODBD Shabby Rose Collection paper background color.

For a chance to be one of 3 winners, please visit each design team member and comment on their New Release blog post.
Cathy * Kathy * Dawn *Sandee * Angie * Julie
 * Lisa * Chris Diana * Robin 
Sabrina * Helen * Lori


Prize Information: 
Three randomly selected winners will each receive a $25 Gift Code to the ODBD Website  just for commenting on the Design Team cards!  You have until May 2, 2017 at 9:00 p.m. EDT to leave your comments on the Designers Blogs for a chance to win!  The Winners will be posted on the ODBD Blog on May 3rd so be sure to check back there to see if you won!

ODBD Products Used


Romans 5:6-8


New King James Version

[ Christ in Our Place ] For when we were still without strength, in due time Christ died for the ungodly. For scarcely for a righteous man will one die; yet perhaps for a good man someone would even dare to die. But God demonstrates His own love toward us, in that while we were still sinners, Christ died for us.


New Living Translation TwitterNew Living Translation FacebookNew Living Translation


Tuesday, March 24, 2015

ODBDSLC231-Religious Spring and Easter Inspiration

 Good morning!
Today is the start of our new challenge. See the photo below for the inspiration photo.
This week is Religious Spring and Easter Inspiration.


ODBD paper used: Soulful Stitches Collection
Well, my card this week is a little Easter, a little inspirational and a whole lot spring.
My basket is 3-D and FULL of flowers!! I used a craft stick as a gift card holder (my gift card in this case is a ticket to invite you to God's priceless gift of salvation.). Easter is the time when we celebrate the risen Savior.  I also added a cross "charm" to the basket with the bow. The basket sits on a pretty crochet doily but it is still on an outside table that is why we have our friend, Mr. Hummer visiting! I used the top border to represent a trellis or lattice work. 
I used a lot of dimensionals on this card to pop up the basket, some flowers the hummer, and etc. I'm not sure how practical it would be to send in the mail but if you have a church friend or someone you can hand deliver it to, then it would be perfect!

Please visit my design team sisters for more inspiration.

To see all the projects created for ODBDSLC231 or to join the challenge click here. You have until March 29, 2015 at 8:00pm EDT to join us. By participating in the challenge, you have a chance to win a  $15 ODBD Gift Certificate good towards the purchase of stamps in the “stamps column” on the ODBD website, or to be spotlighted on the ODBD Blog at our next challenge. The random prize winner will be posted on our next challenge post. Please do not post on Flicker as many of us do not have the ability to comment on your cards nor can we spotlight your cards on the blog.

God's priceless gift...do you know what that is?  John 3:16 says that God so loved the world that He gave His only son, that whoever believes in Him should not perish but have eternal life.
v. 17
For God did not send His son into the world to condemn the world, but that the world through Him might be saved.
Saved from what you might say. Well no matter what the "world" tells you, there are consequences for wrong doing (sin). His word says that the wages of wrong doing is death.  But the gift God gives us eternal life (not death) by believing in His only son Jesus Christ and believing He died for us and rose again from the dead and we can live forever with Him in paradise. Romans 6:23.
Please read for yourself and check out what I've told you. You should never except what another says about God without checking His word for yourself.
I hope you have enjoyed this little devotional.  Thank you so much for stopping by!
Robin