Pages

Comments are welcome and very much appreciated!

Friday, January 27, 2017

ODBD Inspiration Post

Good morning!!

Today we have some new inspiration in the ODBD Gallery
and this is my card for today.
I've used the Center Step card from ODBD


I stamped the flowers and die cut using a tiny bit of the "Out of the Box" cutting toward the bottom.  I colored the flowers using the colors from the paper I had selected and then embellished with some various colors of Liquid Pearls.
I stamped, die cut and colored my butterflies to also match the paper.
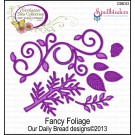
The pretty foliage flourish was added to complete the sides along with some rhinestone "butterfly trails". 
I used a tool that is called Magic Matter, (it is a bitty piece of round metal with a hole in the center to trace around anything you would like to make a 1/4" mat for.) I used it to trace around the Vintage Labels (as I used the largest die) to make my purple mat.
I also die cut the Happy Birthday to go along the bottom in the same purple as my mat and then started to assemble my card.
I wings are bent up slightly to give some more dimension.

I hope you enjoy the cards and projects today for extra inspiration!!
Go enjoy your crafting my friends!
Thanks for visiting!!
Robin

John 8:31-32New King James Version (NKJV)

The Truth Shall Make You Free

31 Then Jesus said to those Jews who believed Him, “If you abide in My word, you are My disciples indeed. 32 And you shall know the truth, and the truth shall make you free.”


Saturday, January 21, 2017

Robins for Robin

Good morning!
Hey these guys are callin for breakfast!
I used the Buebird with Babies stamp and made it a robin.
No problem especially when I only use a part of the image as was the case here.
No tail to tale on me!
This is one of my favorite stamps because I LOVE birds!
I have a giant encyclopedia of birds at home that I use to get the right colors and patterns when I want to color a bird.
This card was submitted to the card sketch on SplitCoastStampers as well as my blog today.
The sentiment is from Bible Verse 2 .
The dies are from (round) Lifestyles, Rectangle and heart from Spellbinders and the small hearts are from a corner punch (McGill I think, it's very old).
I used Copic markers for coloring my image.
See more images at Blue Knight Rubber Stamps.

Thanks for visiting today!
Robin

Friday, January 20, 2017

ODBD January Release Reminder

Good morning!

Today we are taking a look back at Our Daily Bread Designs January Release, here is the project I created using the new Bountiful Basket die, Whimsical Flowers Paper Collection and some other ODBD favorites, Pretty Posies, Fancy Foliage, Asters and Leaves, Bitty Blossoms, Trois Jolies Papillons, Trois Papillons Dies and Butterfly & Bugs stamp set, Butterfly & bugs die. For more inspiration using the January Release be sure to visit the ODBD Blog.


I cut the basket from white and cut the insets from the Whimsical Flowers paper and then glued the basket together.  I punched holes for the handles and used brads to attach them so that they are free to move back and forth.
I filled the basket with iridescent cello shreds and then started making my flowers and leaves.  Each flower in the basket has a bit of Stickles on the petals and Prills in the centers.  My butterflies are stuck in with Acetate and I've attached some rhinestone flourishes for trails.  I used florist sticks cut in half to stick my flowers in the cello.


I also made a card using the Z Fold from ODBD.  I stamped A Happy Hello flowers all over 3 panels of glossy card stock using VersaMark and then used clear powder to heat emboss to create a resist.  I then sponged Peacock Feathers and Wilted Violets Distress Ink onto the panels.


I Used the Leafy Edged Border die to cut the 2 panels that fold out and then cut my resist panels to match.  I also cut the decorative Leafy Border from white to match the curves.


I used the Vintage Labels to cut out the sentiment after I had stamped the same flower design on it with purple and then the sentiment in black. The small God Bless was cut with the Vintage Labels as well.


I added a pocket inside gluing just the bottom and the straight side of the Decorative Corner die cut.  You could put a note or a gift card, whatever you'd like in the pocket.
That's it, done!

For more inspiration check out my sister breadsticks
Cathy * Robin (me) * Helen * Kathy * Angie * Julie 
Sabrina * Sandee * Lori * Dawn * Diana

The ODBD products I've used today


Wednesday, January 18, 2017

NorthCoastCreations January New Release

Good morning!

Today I am using the new Little Monsters and Monster Dies
to create my cards for the NorthCoastCreation Blog Hop.

Isn't he just adorable!!  Your kids or any kids (or kids at heart) are going to love getting a card with these creatures on it.
I cut out my frames with the Double Stitched Rectangles and my hearts are from the Ornate Hearts set (ODBD).
My Little Monster is colored with Copic markers and die cut with Monster dies then popped up over the Ornate Heart center.
I just love these guys! The whole set is just adorable!


My second card uses the same Little Monsters set and Monster dies from North Coast Creations

There are a bunch of funny saying to go with these guys.
"Eye love you", "I have my eye on you"  
Just a couple of samples.
I added green Baker's Twine for my Pennant Row at the top.  The Birthday Brights paper is perfect for this birthday card and design.

Please visit my design team sisters for more inspiration!
Dawn * Sandee * Robin(that's me) * Julie * Lori

See a lot of great new stamp ideas and inspiration, along with another fun set of stamps and matching dies when you hop along with us.

NCC New stamp and die sets I used

I also used ODBD dies and paper


Thanks for visiting today!!
Comments are very welcome!
Robin


Tuesday, January 17, 2017

ODBDSLC282 Reminder

Good morning!
This is my card for the reminder...you still have plenty of time to join in the challenge.  I love these colors...
There will be a random winner for the $15 certificate and a winner for the Shining The Light Award.
You have until February 5th to join in the fun.
Remember to use ODBD, Artistic Outpost or North Coast Creations
to make your card.
Use ODBD stamps for the Shining The Light Award.


Inside-a place to write a note and stamp 
and encouraging scripture

I took the tag out of the front pocket to show.

I started with the white Z fold card from ODBD and altered the edges with the Leafy Edged Border die (the plain curve, no design) I cut my paper to match and also cut some gold trim to match with the same die.
After gluing my paper on all the panels, I glued the bottom and short side of the last fold to the second to form my pocket (see first photo of the front).
I stamped, water colored and die cut my tag using the Find Refuge stamp and the large tag from the Tag Trio. I had to make it longer than the tag so I only cut the top 3/4 and then moved the die down and turned it around in the machine and die cut the bottom to meet where I had left off cutting. (See this post for directions.)
I used a little tool called magic matter to trace a 1/4" border around the entire tag and then I hand cut it and trimmed with Gold Leaf Pen. Added a tassel and now I have a gift to go with  my card.
I stamped the scripture with VersaMark and embossed with Gold detail powder then I die cut it using the Layered Lacey Ovals. I placed it inside the card.
I also cut out one of the butterflies from this fantastic paper and glued it inside the card on the side that I would write a note.


For more inspiration please visit my design team sisters
Make sure to check out the ODBD blog for all the details and designs
AND to check on the winner.

ODBD products


Thanks for visiting today!

Robin

John 8:31-32

The Truth Shall Make You Free

31 Then Jesus said to those Jews who believed Him, “If you abide in My word, you are My disciples indeed. 32 And you shall know the truth, and the truth shall make you free.”


Monday, January 16, 2017

ODBD Special February Pre-Release

Good morning!
Welcome to our February pre-release
You can find wonderful bundle deals right now at Our Daily Bread Designs for our February release.


I used a heavy weight black card stock to make my Glorious Gable Box. Smooth card stock worked the best for me on this project.
I left the front without an inset so that it is solid, making my red and white frilly heart stand out better, it was made with the Layering Hearts, and the Tulip Heart.  For the sides I used the Heavenly Hearts inset along with the Layering Hearts and inside part of the Heavenly Hearts inset.
I finished my box with a tag (for my hubby) using the Mini Labels and To My Favorite stamp set, edging with red and tying a red cord to the label, through a hole I punched, and the box handle. 
I wanted a card to go with my box so I stayed with the red, black and white color scheme. I used the Tulip Heart and Layering Hearts with a stamp in red from Hugs and Kisses which has a line from my husband and my favorite song, "All of me loves all of you" so this card has special meaning for my husband and I.
I also used the Art Deco die at a diagonal in black.
My card is a definite CAS card for me.  I usually love lots of layers and frills.
But I like it!

Here are the bundles that you can buy now.


                                                 Come hop along with
the Breadsticks
 Lisa * Grace * Cathy * Lori * Diana * Robin (that's me) * Julie Dawn * Helen * Chris

Go to ODBD blog site to see all the deals and all the wonderful projects
for this release.

February ODBD products


Thanks for visiting today, make sure you see all the creations from my talented design team sisters. 

Robin