Pages

Comments are welcome and very much appreciated!
Showing posts with label Christmas Tree. Show all posts

Monday, October 9, 2023

Product focus-Dies

 Hello crafty friends!

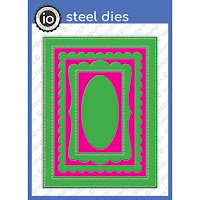
Today we are show-casing Dies. Impression Obsession has so many cute dies, here are just a few.


I stamped on kraft cardstock and then colored with pencils.  The background red piece was embossed with a Swiss Dot folder.


My next card is from the same stamp set, awesome, right?
I used the very cute All in One Frames with this cute Christmas tree image.
The words are dies too, really! 
I used Nuvo drops for the ornaments.


Blog links:

Hey, thanks for visiting today!!
Please visit the other design team members for more inspiration.

Robin


Thursday, November 4, 2021

Amazing Paper Grace Die of The Month Pop Up 3D Vignette Christmas Tree


What a magical sight to see a beautifully decorated Christmas tree with gifts piled high around its trunk! The Pop Up 3D Vignette Christmas Tree includes a set of graduated trees for a full dimensional design, along with details of presents, bows, and ornaments to complete this set. Change up the colors for an elegant or casual look. Best of all, it folds for easy mailing. Use just the elements to work with a flat card format from A2 to A7. Detailed die cuts make it easy to personalize for the holidays. The choice is yours!


Dies for my creations today were supplied by Amazing Paper Grace.


There are 21 dies included in the Pop Up 3D Vignette Christmas Tree.


My Project Today using Pop Up 3D Vignette Christmas Tree
I made a White and Silver Metallic 3D Christmas Tree plus a White and Metallic Silver Christmas tree card to go with, I added bits of Silver Glitter paper for accents.   I plan to give this set to my sister because she loves white/crystal/silver Christmas trees!
 
Designer Tip:  #1 Decorate the front of Christmas Tree stand before putting it all together.
#2 I put my tree spacers on as I went to make sure the heights were all about the same (the spacers keep each tree section from falling into each other while on display.


Paper: Metallic Silver, Glitter paper silver, white on white or silver on white print from my stash.

 
For more Pop Up 3D Vignette Christmas Tree Inspiration
Visit each Creative Team blog linked below for their take on creative paper crafting ideas with Pop Up 3D Vignette Christmas Tree, the Amazing Paper Grace November 2021 Die of the Month!
 
 
The Amazing Paper Grace Die of the Month is available exclusively at Spellbinders Paper Arts during November 2021. Pop Up 3D Vignette Christmas Tree at the special kit club price, along with other membership perks.
 
View this month's Amazing Paper Grace Die of the Moth video HERE.

Would love to hear from you! Comment on how will you use the dies!
Follow me on Facebook!
Follow me on Instagram!

Thanks for visiting today!
Robin

Wednesday, August 30, 2017

Heartfelt-Winter's Cozy Fire Tunnel Card

Good morning!
We have exciting news for today...a special release!
Along with these new fantastic tunnel cards and shadow box cards 
are sets of wonderful Oval dies and Circle dies to match.
They are just what we've needed and now they are here for all of us to play with!
There are 2 sets of each the circles and the ovals so that you can make really nice layers.
My card features the Oval Tunnel Card, The Winter's Eve Collection and the Festive Holly Collection.

This top page is actually an oval opening as well but the window stamp and die set covers it.
I fussy cut the angel girl and the tree so that I could use them on separate pages.


For this little book card I covered the last, smallest oval with my image so that I could use the last page as a place for tags and a personal message from me.

Heartfelt Creations- Winter's Cozy Fire Tunnel Card

Products:

Instructions: Other Products: Pearls, Copic Markers (YG03, YG23, YG15, R21, R24, R29, E00, E01, E53, E33, E35, E50, E93, Y21, Y24, Y31, Y11, Y15, Y38, BV20, B00, B02, RV10, RV02, W02, W03, C02, C03), Memento Inks (Rose Bud, Angel Pink-for stamping and sponging color on Poinsettisa), Spellbinders Rectangles Nestabilities.

Instructions: Construct 5 X 7 layered card then cut designer paper for each side of each page (sponge edges of all pages).  The first page is the largest oval and they get smaller as you go.  For the first page, in order for the window frame to fit, you need to cut the designer paper with a rectangle (large enough for the window) a bit smaller than the opening.  Before gluing front piece of designer paper, glue a piece of ribbon about 8 or 9" hanging over the edge, then glue your "cover" page on. Stamp and die cut the window from white card stock, die cut Window Box Elements (decorative pieces) and cut the larger decorative piece in half lengthwise (these will be the shutters). Glue window, shutters and topper onto the front cover. Stamp, die cut and color holly and cardinal (several pieces are used throughout), form slightly then add the Crystal Clear glitter. Stamp, die cut and color the sled, add some bakers twine as a pull rope. Pop the sled up against the "wall" next to the window. Add the holly and cardinal to the left side of the cover.  On the inside, glue the window to the opening, add a holly garland and double pocket at the bottom.  Page 2, cut the oval from designer paper and glue to page.  Add a holly garland and the little girl (she is looking at the tree!) add another double pocket at the bottom and stamp "Twas the night before Christmas", die cut with Spellbinders A2 Rectangles. The back of the 2nd page is just designer paper and Poinsettias (stamp, die cut and sponge poinsettias with Angle Pink then form flowers and add Prills). The third page has the Christmas tree in the oval and poinsettias also a little sentiment "ticket". The back of page 3 has one of the Regal borders and some holly.  Page 4 has one of the Regal borders and more holly, also the fireplace glued to the oval opening.  The back of page 4 has a double Blossom Corner and the last page has a single Blossom corner. Both the double and single are pockets.  Cut tags from designer paper.  Add a poinsettia to the top right.  The back cover has another piece of ribbon glued between layers.  Tie little "book" closed.

Thanks for visiting!
Robin
See all the designer samples HERE.

Jeremiah 29:11New Living Translation

11 For I know the plans I have for you,” says the Lord. “They are plans for good and not for disaster, to give you a future and a hope.

Wednesday, August 9, 2017

Heartfelt- Winter's Eve - Merry Christmas!


Good morning!
Winter's Eve New Release
Don't you just love these wonderful colors!  Such beautiful papers in this collection and they also coordinate with the Festive Holly Collection, yippee!

So this card is basically a gate fold card made fancy with Heartfelt's beautiful Decorative Medallion die from the Wedding Collection...I love how you can mix and match several Heartfelt collections together!  This card was inspired by Emma Lou's video where she shows how to make these wonderful gate "doors".  I did mine a bit wrong (all one piece) but it turned out well anyway!

I used the other die in the Decorative Medallion die set to cover the open oval on the inside.  I love the look of the dark red with the crisp white.


Heartfelt Creations- Merry Christmas

Products: 

Instructions: Other products: Spellbinder label die, Cuttlebug Embossing Folder, Star Dust Stickles, 3-M Foam Tape, Copic Markers: R21,R24,R29,R59,E00,E01,E93,BV20,YG03,YG23,YG17,RV000,RV02,RV10,E42,E43,E44,E53,E33,E35,Y00,Y11,Y15,YR23,YR24,Y21,E50,W03,W03,C02,C03 and Inka Gold.  

Instructions: Card size: 5 1/2" X 5 1/2".  Cut White linen card stock to 11 X 5 1/2" and score along horizontal edge at 2 3/4" and 8 1/4" (this leaves 2 3/4" ends on both sides, making a Gate-fold).  Use the Decorative Medallion Rectangle shaped die on both end pieces, straight edge about 1/4" off the score line (front edge of die should be at the edge of card stock). Use the solid backing part of the die on two pieces of pink designer paper as lining for the Decorative flaps created.  Cut another piece of pink designer paper for the inside 5 1/2 X 5 1/2 section.  Cut the paper a bit smaller to accommodate the scores and to leave a small white border top and bottom.  Cut a piece of white linen 5 X 5 and emboss it with an embossing folder, now layer these to the inside and cut an oval from dark red card stock and cut two Decorative Medallions (the semi-circle looking one)to layer on top of the red oval. Glue these to the center of the inside.  Stamp Winter's Eve fireplace, Christmas Tree/Angel girl, Festive Holly & Cardinals pieces (except lantern), Sparkling Poinsettia (the smallest flowers (X 4), and Merry Christmas from Celebrate the Season.  Color with Copics (all pieces) and die cut or fussy cut all.  Glue fireplace/floor and Christmas Tree/Girl to the inside, add Merry Christmas to the top.  Slightly form Holly and Cardinals, form flowers and use Inka Gold on petals, leaves and berries.  Use a cloth to shine gold.   Add gold Prills to centers of flowers and Stickles to berries.  Foam tape/glue leave, berries and flowers to the outside flaps.   

Thanks for visiting!  See this card and others from the new collection HERE.

Comments are most welcome, thanks!
Robin

For unto us a Child is born, Unto us a Son is given; And the government will be upon His shoulder. And His name will be called Wonderful, Counselor, Mighty God, Everlasting Father, Prince of Peace.
Luke 2:10-14
10 Then the angel said to them, “Do not be afraid, for behold, I bring you good tidings of great joy which will be to all people. 11 For there is born to you this day in the city of David a Savior, who is Christ the Lord. 12 And this will be the sign to you: You will find a Babe wrapped in swaddling cloths, lying in a manger.”
13 And suddenly there was with the angel a multitude of the heavenly host praising God and saying:
14 “Glory to God in the highest,
And on earth peace, goodwill toward men!”[c]


Tuesday, November 22, 2016

ODBDSLC280-Challenge Reminder

Good morning!
This is my reminder for our challenge this month!
It's a great sketch challenge but as you can see, it may be interpreted in your own way or direction.


sketch
I decided to make my circle elements ovals and triangles (the tree) on this card. But basically this is the same sketch.
I used an embossing folder from Cuttlebug for my background and a previously made background panel was used to die cut the Vintage Borders, tree and mat behind the embossing. I made the teal panel with Color Burst watercolors. I die cut the string of lights and put Stickles on the bulbs.  The tree is white embossed.  My star for the top of the tree is from the Holy Night Nativity die set.
I just added a nice sheer teal ribbon bow on the side and Liquid Pearls to the embossed background to top it off.
Please visit my design team sisters for more inspiration

You may use any Our Daily Bread Designs, Artistic Outpost or NorthCoast Creations stamps to create you card and then submit it to the ODBD blog HERE.

There will be a $15 gift certificate  toward stamps for one random winner as well as one winner for the Shining the Light Award (you must use at least one ODBD stamp to be eligible for the Shining The Light Award).

ODBD produsts used. Find them HERE.


Psalm 95:1-2
Oh come, let us sing to the Lord!
Let us shout joyfully to the Rock of our salvation.

Let us come before His presence with thanksgiving;

Let us shout joyfully to Him with psalms.


Saturday, December 20, 2014

Christmas At Our House

Good morning all!! 
Wanted to show a few photos of our usual Christmas decor (part of it anyway). We do garland and Sugar Pine Cones (16"-24" cones) on our windows. I put up my Tole painting (the very little I have left) and our Christmas tree with about 4000 lights and over 1000 ornaments.  Yes, they are 3 and 4 deep on each branch.  Lots of crystal, shiny ornaments that reflect the lights and clear ornaments.  Nothing dark.  It really sparkles at night!

Christmas at our house!
We sometimes have snow too!!! We love it when that happens. This is the front and back of my house.
 This is a Father Christmas I made a few years ago.  I painted the eyes and made his body and outfit.  My sister, Vicki, chalked and fired his face and hands.
I used real fur (from a thrift shop) for the fur trim on his vest, boots and real mink on his hat (Also from a thrift store).
I also glued on all the hair, beard, eyebrows, etc.
There is so much on this guy and part of his outfit it
is impossible to show it all in photos.


The watch is set for 10 minutes till midnight.
The vest is lined with brocade.  The cord, lace, trim etc. is extensive.  The jewelry is all found objects from my mother's jewelry chest or a thrift store except for the cross which was an ornament.
Of course we decorate the rest of the dining, living room too with garland and Pine cones.  We live very close to the large Sugar Pine trees so it is an annual thing to collect some. 
Merry Christmas every one!