Pages

Comments are welcome and very much appreciated!
Showing posts with label Tutorial. Show all posts

Wednesday, November 20, 2024

Special Fold Tutorial at Elizabeth Craft Designs


Hello crafting friends!

Today I am sharing Fun Fold Tutorial


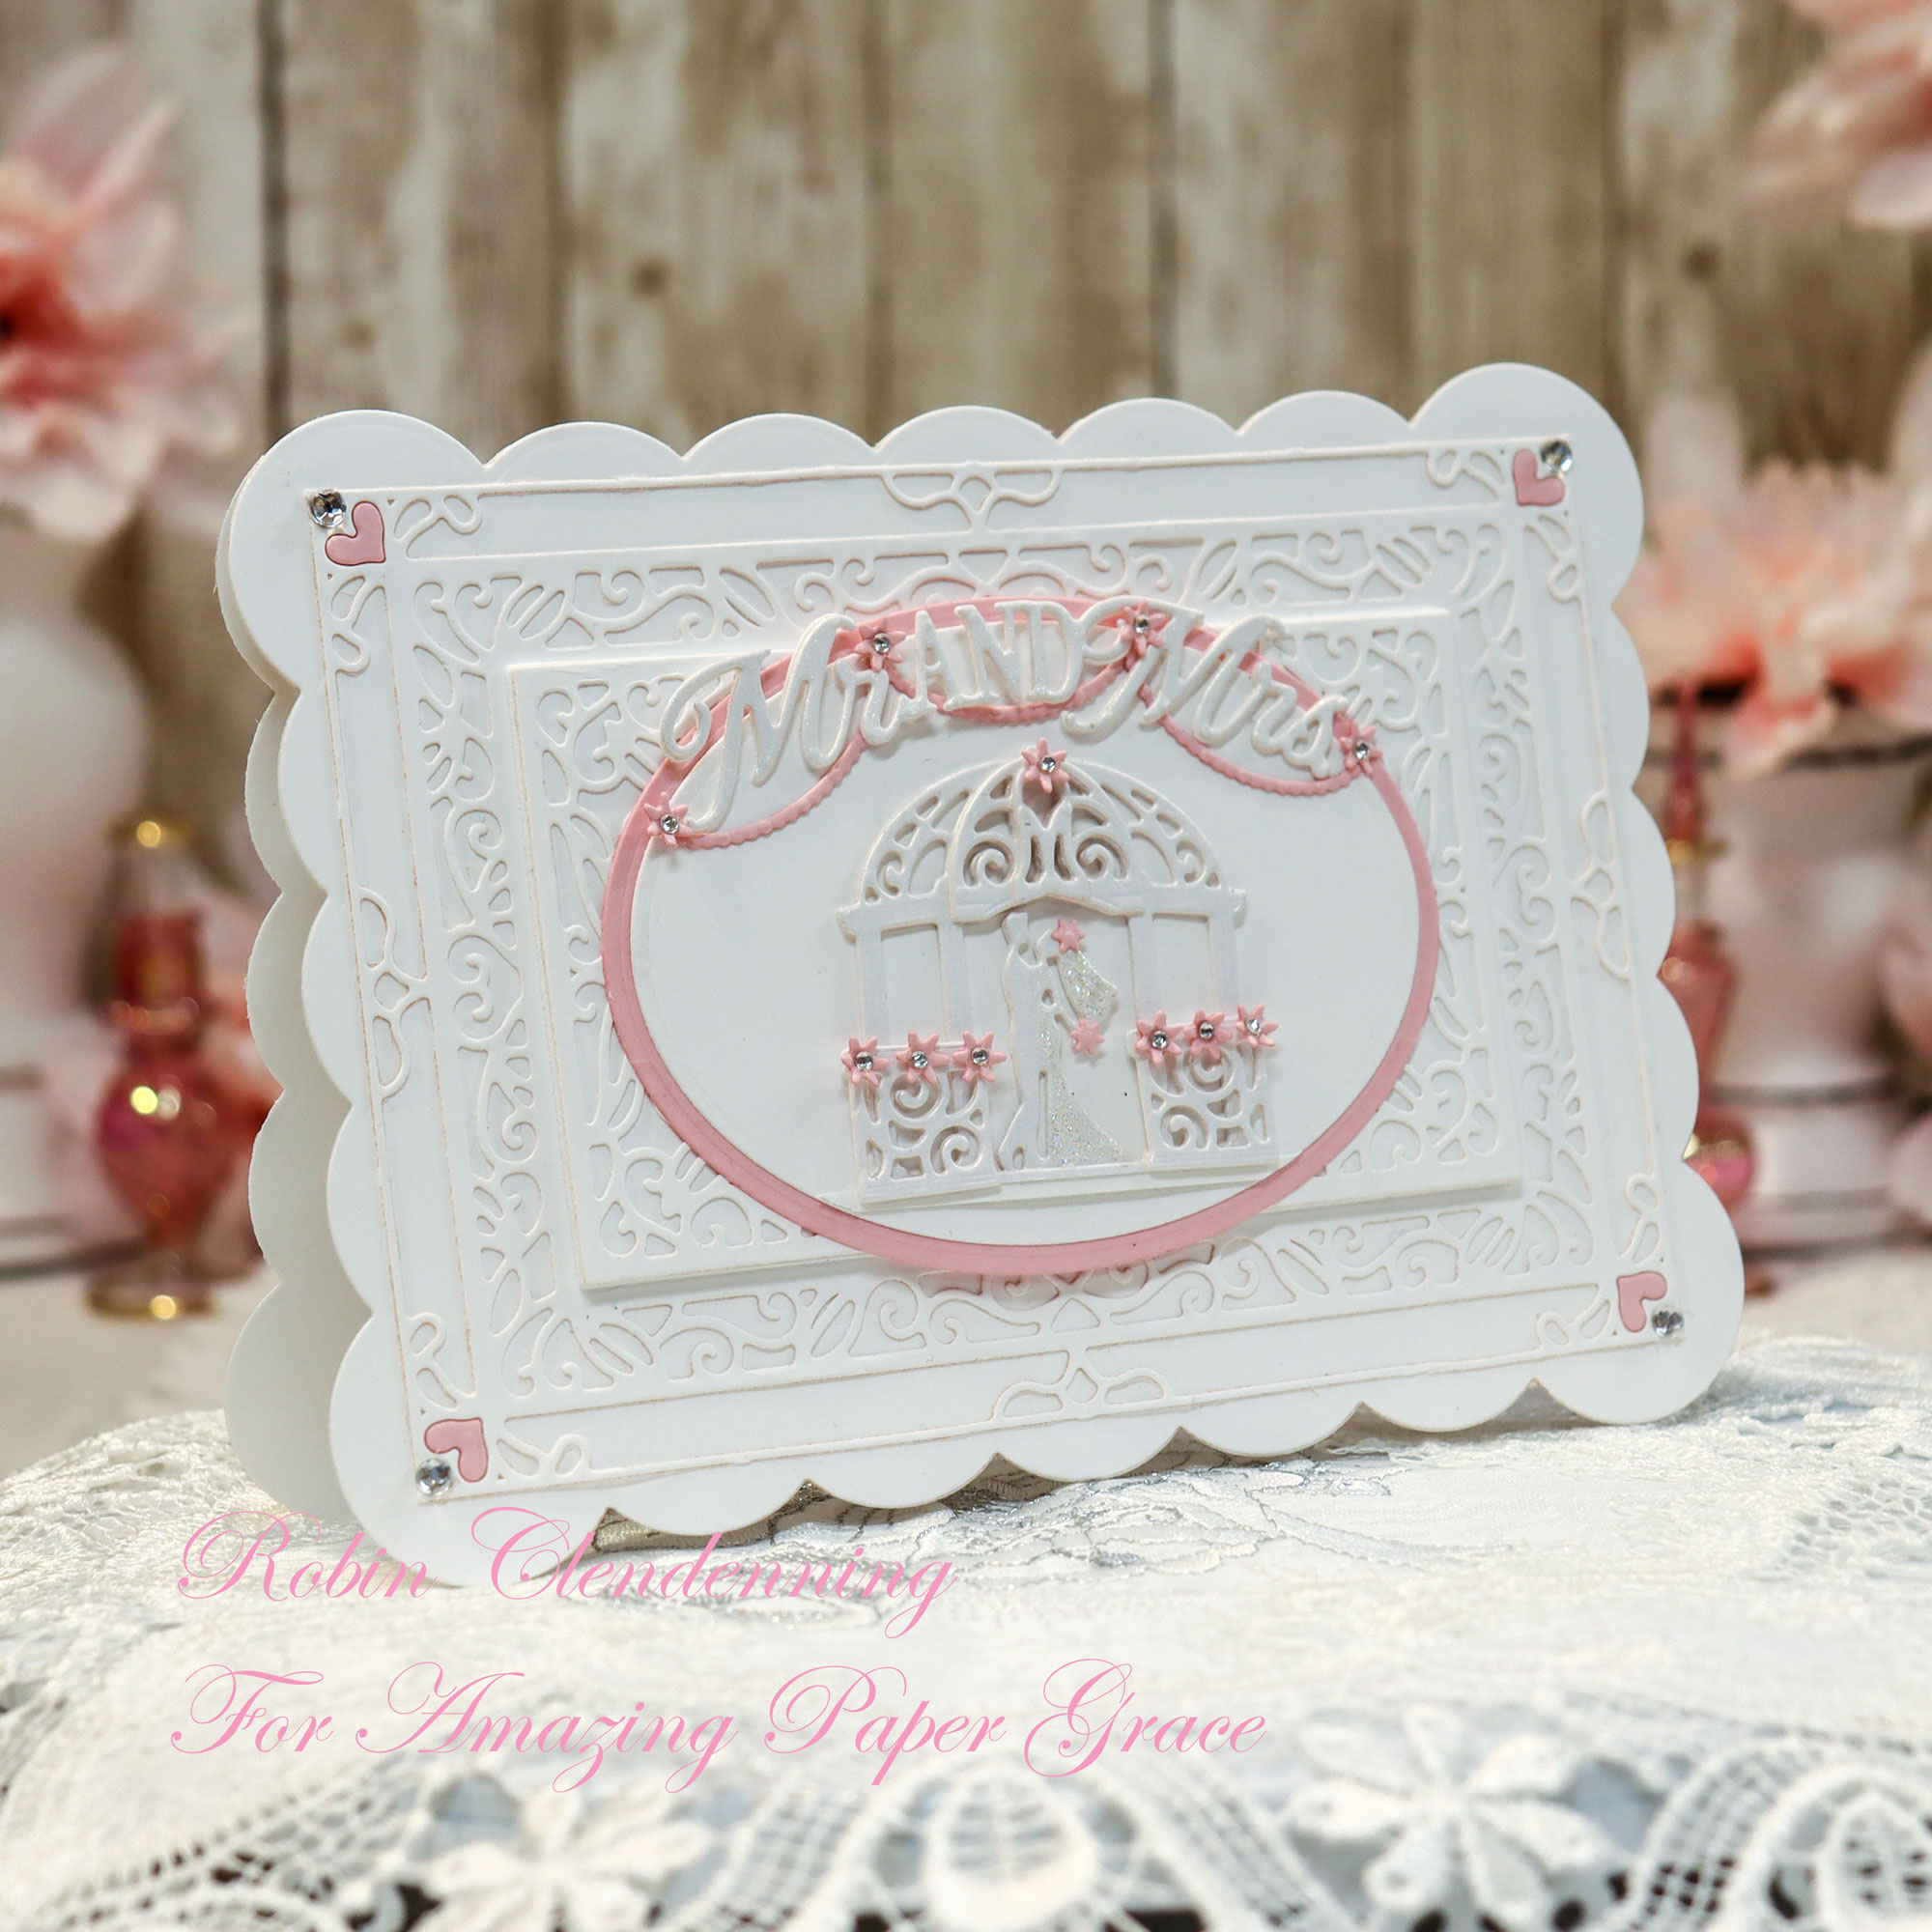
Here is my finished project


Pattern for this project.
Cut lines are solid, score lines are dashes.


What you will need: 
6 X 12" decorative heavy weight paper or solid cardstock (sample uses paper from Autumn Harvest), 1 sheet Soft Finish Cardstock, 1 piece 1 X 12" coordinating color cardstock for border plus 4 X 6 for corners, 1 piece of gold metallic cardstock for border and some for corners, Prills or stamen for flower centers, Diamond Glaze, loose glitter, Elizabeth Craft Designs dies: Elegant Decorative Borders, Autumn Fancy Corners, Autumn Foliage, Florals 31, Florals 32, Everyday Words 2.
All leaves and flowers are cut from Soft Finish Cardstock, die cut then brushed with Oxide ink for color.

Step 1: Make cuts in decorative 6 X 12" paper 1" in from long edge and starting at the 5" mark, cut to the 11" mark on your cutter. Do the same along the bottom long edge as shown in the photo above.
Step 2: On a scoreboard, with long edge at the top, score card at 4" and 8" from top to bottom.  Score between cuts at 5", 6 1/2", 9 1/2" and 11". Fold on score lines starting with a valley fold at 4", mountain fold at 5" (fold between cut lines, DO NOT fold above or below cut lines. Keep folding valley, mountain etc. until all score lines have been folded and folds creased tightly using a bone folder.
(Important: the only score lines that go from top to bottom is 4" and 8" like a trifold card).


Step 3: Cut the border and corners out of color cardstock and then again out of gold metallic cardstock.  To make a continuous 12" border, place the top cutting plate so that it does not go over the end of the die, after running die through machine, move the die down (match die to previously cut paper  as shown above making sure top plate is not on top of die end of previously cut paper) then run it through the machine again.

Step 4: Glue the borders together slightly off-set so that you can see gold edging, same with corners then glue the border to the top of card and corners on the left and right bottom of card.
Tip: score borders at 4" and 8" before gluing to card to help it fold with the card easier.

Step 5: Cut Thankful mat from color cardstock and thankful word from Gold then glue them together and set aside.

Step 6: Cut and color all the foliage (you may have left over foliage, if so yay, you have a head start on your next card). 

Step 7: Cut out and color flowers from Florals 31 with Worn Lipstick and Lumberjack (or similar).

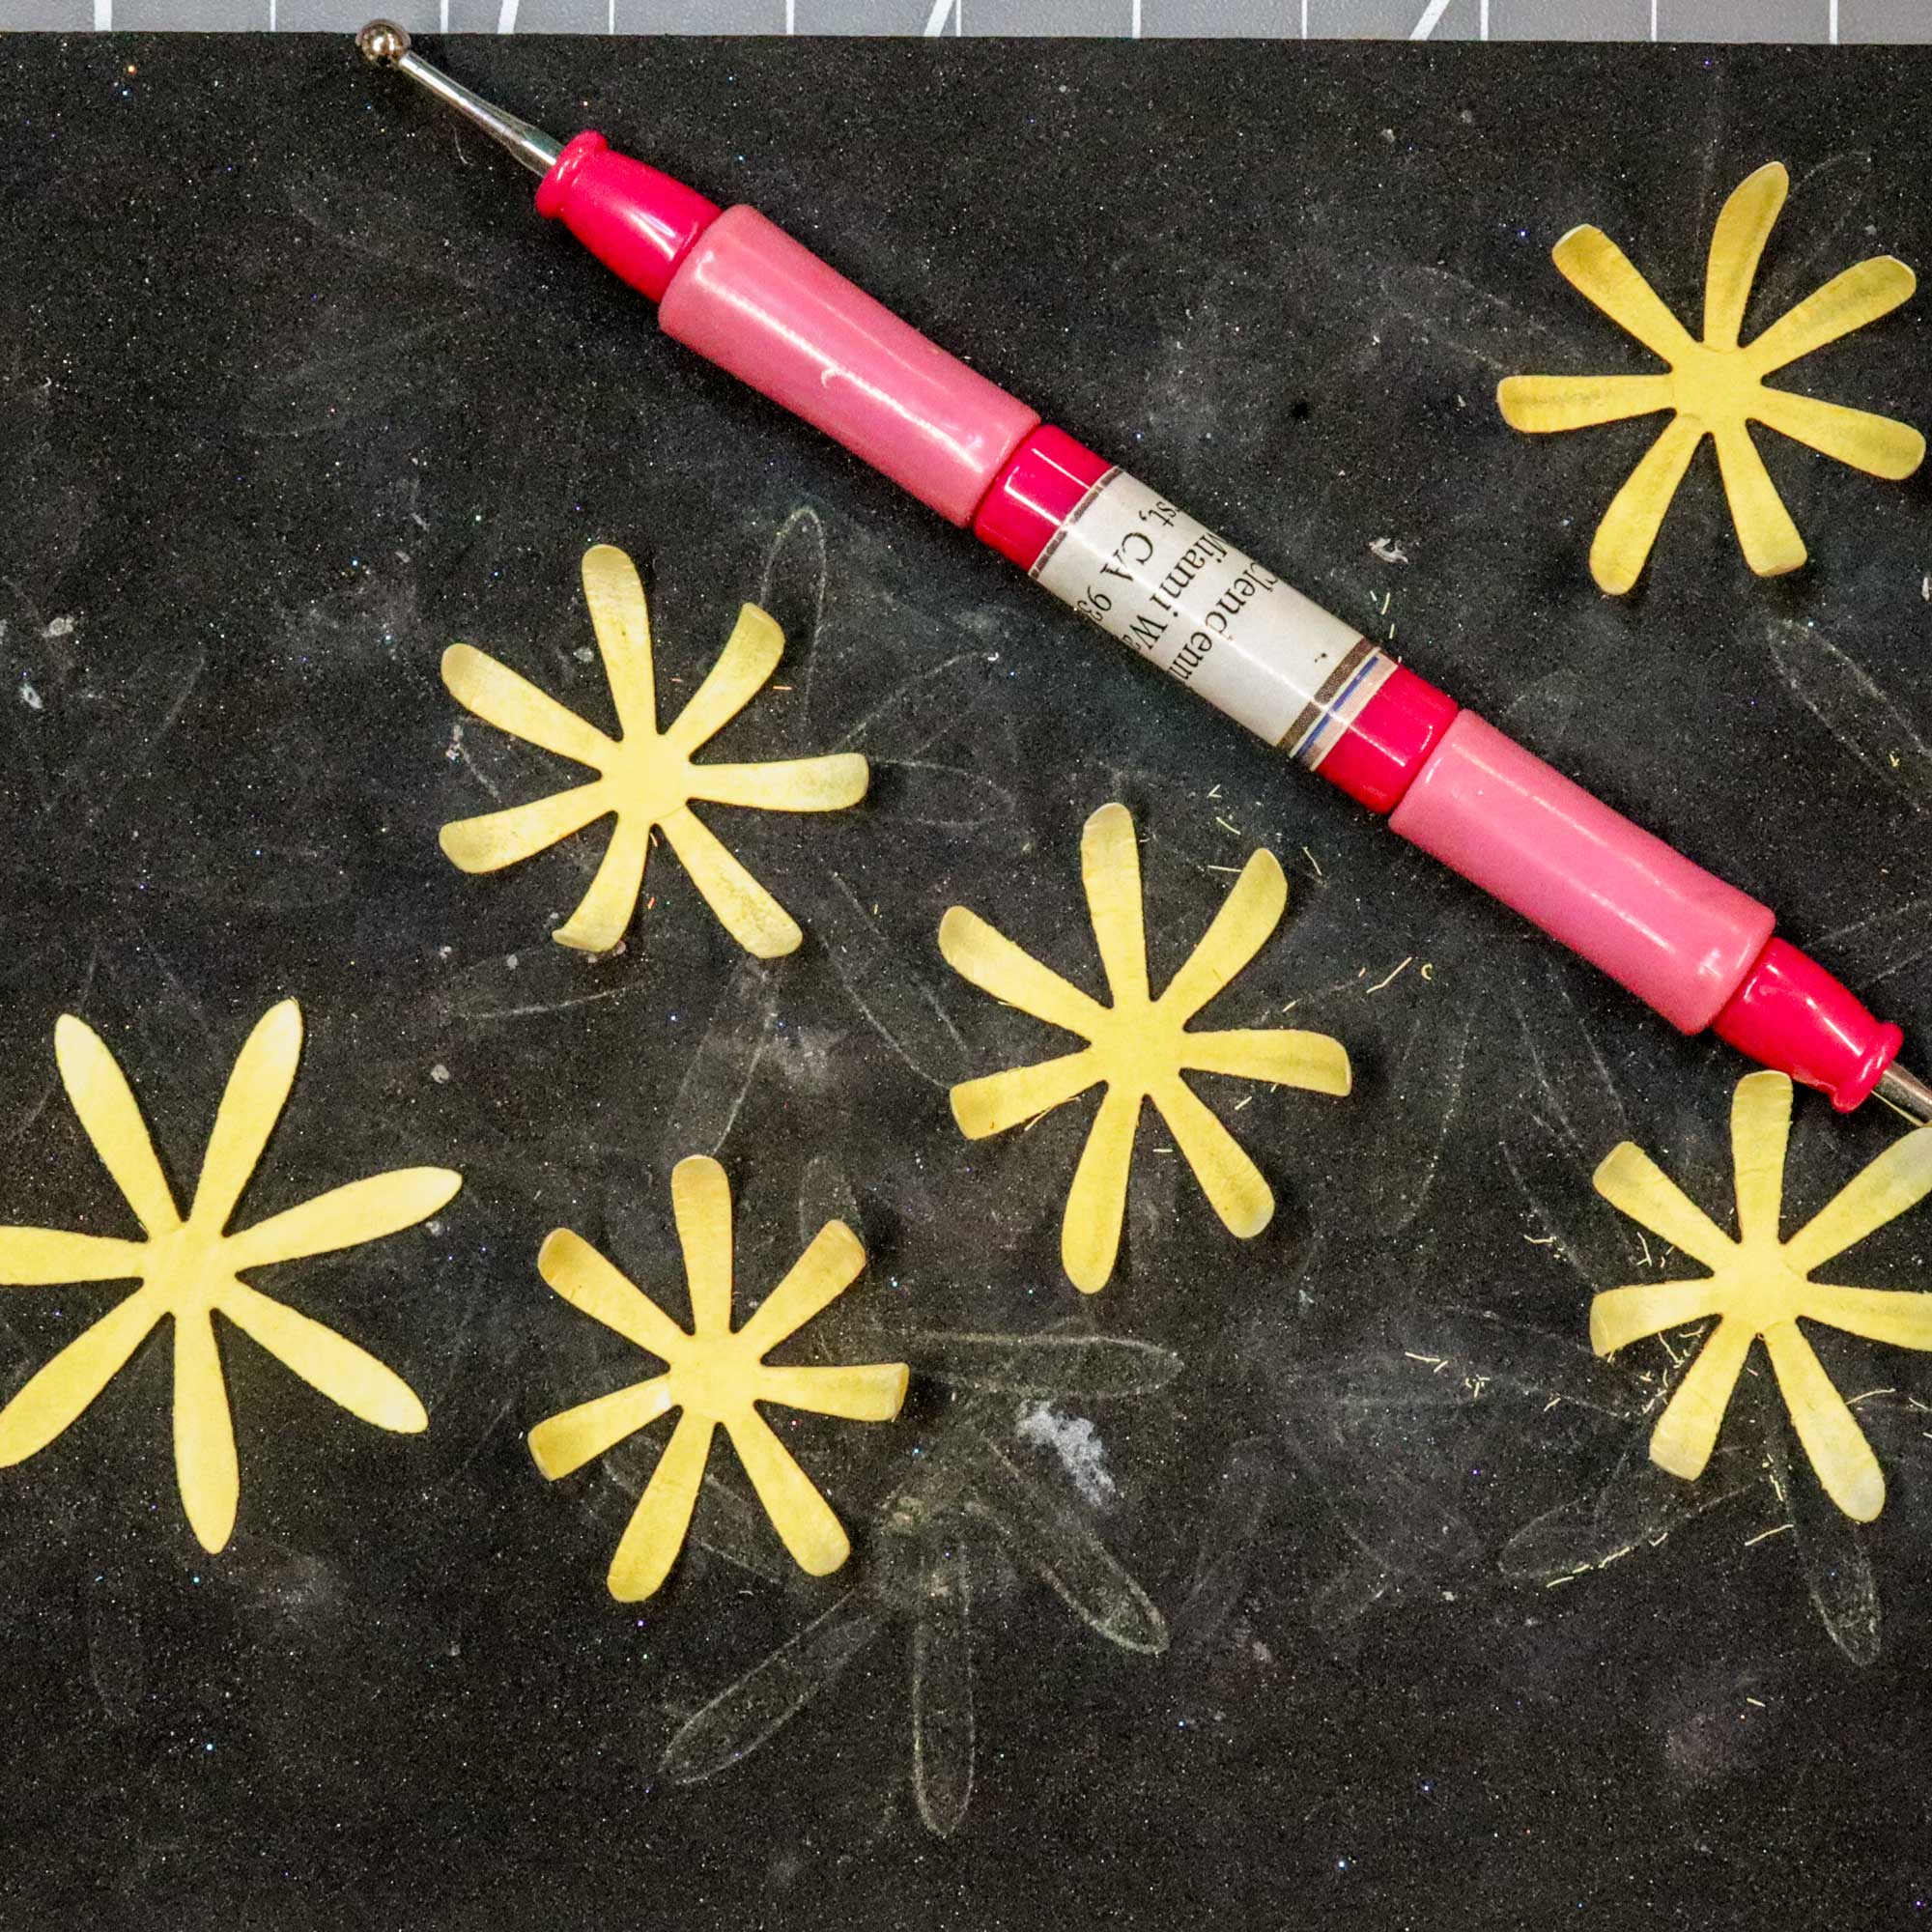
Step 8: Cut then color Florals 32 with Scattered Straw and Carved Pumpkin then using a stylist, shape the flowers from the back on a foam mat.  Glue several layers together (the 2 bottom layers should be the same size on all flowers, both types).  After the first 2 or 3 layers its fun to add smaller layers for depth.
Tip: When adding each layer be sure to stagger the petals.

Step 9: Shape florals 31 (pink flowers) using long nose tweezers or other tool to make tubular petals.  Glue several layers together (just like the other flowers).  Fill all flower centers with Prills or stamen.


Step 10:  After cutting, coloring and shaping foliage and flowers, start arranging leaves and flowers on the card as desired. Don't glue them down yet.

Step 11: before gluing flowers and leaves onto card, decide where you want to put the Thankful, make sure there will be room to see it. Glue it to card where shown so that card can still be folded without creasing the word.

Step 12:  Glue all flowers and foliage as planned previously. the more 3D flowers the harder it will be to mail so keep that in mind.  I usually put cards like this in a gift bag with a gift or hand deliver.


Tip: If you want to mail your card consider using the Autumn Harvest Stamp and Die Set and/or Autumn Pumpkins stamp and die set instead of dimensional flowers.

Another variation of this card using the bird as part of the decor.


Thanks for visiting today!
Robin


Friday, July 15, 2022

Amazing Paper Grace Shaped Card Tutorial

 Good morning!

This tutorial is exclusively at Amazing Paper Grace Creative Encouragement FB page


Wednesday, June 15, 2022

Sunday, May 15, 2022

Tuesday, February 15, 2022

You Are Phenomenal Tutorial at FaceBook

 Hello Amazing friends!  
Head on over to my tutorial for this card at
The Amazing Paper Grace Creative Encouragement Page
on FaceBook HERE

Robin

Saturday, January 15, 2022

Facebook Tutorial Easel Card

 Tutorial this morning at FaceBook, Amazing Paper Grace HERE


Materials and step by step instructions at Amazing Paper Grace  
Just click on the photo saying "Follow Me"

Thanks for visiting!
Robin

Saturday, November 27, 2021

Black Friday Release Frame Card Tutorial

 Good morning!

I have a tutorial for you this morning!  This could be a frame for your favorite photo as well!

Let's get crafting!

Directions: 

Step 1: Create card base.

♥  Using the largest Simply Classic Rectangle Frame Die, cut card shape by leaving die 1/4" off top fold.

♥ Cut 2 pieces of decorative paper to cover full front of card and to cover entire inside of card and adhere them.

Step 2: Die cut opening.

♥ Using the third largest Simply Classic Rectangle Frame Die, cut an opening in only in the card front.

Step 3: Prepare the die cuts.

♥ Cut all but the smallest decorative dies out of Luxe Gold.

♥ Cut 1 of the largest decorative dies out of decorative paper as well as the gold.

♥ Glue the 2 outer gold die cuts to the front of card and save the others for later.

♥ Glue the large decorative paper die over gold.

Step 4: Decorate the inside.

♥ Glue the gold inner decorative die and cut another of the same die out of decorative paper, glue off-set onto gold.

♥ Stamp sentiment on another piece of decorative paper (the inside of what you just cut) then glue to the center of die cuts.

Step 5: Create the flowers.

♥ Use Rose Madder to stamp small Wild Roses. Sponge with Pink Peony.

♥ Die cut the Wild Roses using the coordinating die.

♥ Shape in the 3D Shaping Mold.

Step 6: Create the leaves.

♥ Use Salvaged Patina Distress or other turquoise ink to stamp the Leafy Accents leaves.

♥ Sponge with Speckled Egg Distress Ink and Pink Peony.

♥ Die cut then shape in the 3D Shaping mold.

♥ Mix 3D Lacquer with Shimmer Additive then paint onto leaves.

Step 7: Finish the flowers.

♥ Glue 2 of each size Wild Rose flowers together then pierce centers with Golf Groove Tool.

♥ Insert gold stamens.

Step 8: Decorate the front of the card.

♥ Arrange the flowers and leaves on card front.

♥ When happy with arrangement, glue down.

♥ Stamp and color a small Floral Butterfly using the same colors used for the flowers and leaves, die cut, shape and adhere.

♥ Sponge the flowers and butterfly with dries clear adhesive and sprinkle with glitter.

♥ Sponge and apply glitter randomly to the card front.

♥ Add a gold pearl to the butterfly.

TOP TIP: Learn more techniques with the Classic Frames Dies collection in this video here https://www.heartfeltcreations.us/video/how-to-create-classic-frame-cards-the-ez-way

Have fun creating your own projects! We love to see what you create too, share your projects with us on our Facebook page here https://www.facebook.com/HeartfeltCreations 


Tutorial by designer Robin Clendenning


Heartfelt Creations Products:

  1. Luxe Gold Cardstock
    Luxe Gold CardstockHCGP1-488
    $14.99
  2. Small Wild Rose Die
    Small Wild Rose DieHCD1-7289
    $29.99
  3. Groove Golf Tool Set
    Groove Golf Tool SetDMCT4185
    $35.99
  4. Leafy Accents Die
    Leafy Accents DieHCD1-7193
    $29.99
  5. Hydra Sponges
    Hydra SpongesRLHS100
    $1.00

Other Products: Heavy Weight White Cardstock, Gold Pearl, Shimmer Additive, Salvaged Patina and Speckled Egg Distress Inks