Pages

Comments are welcome and very much appreciated!

Tuesday, September 27, 2022

Have A Sweet Day

 Good morning crafty friends!


Material list HERE 

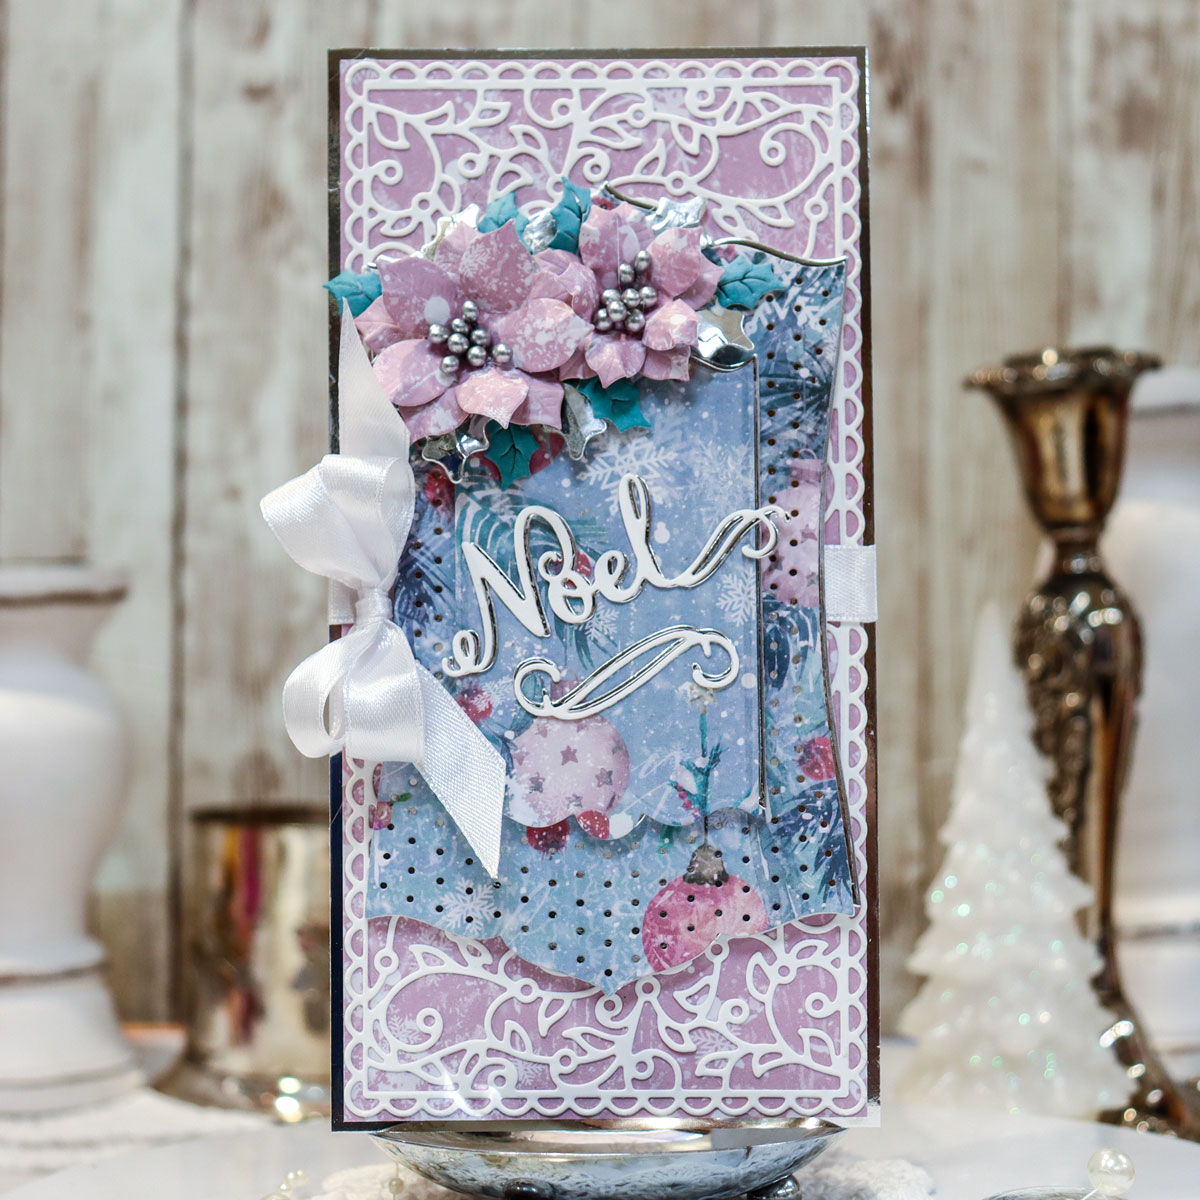
Card size:  5 X 6 7/8”

Make a shaped card (see video) using the outer die of the Fancy Classic Rectangle Frame die set.  Cut a decorative paper piece using the same die.  Glue then decorative paper to card base matching edges.

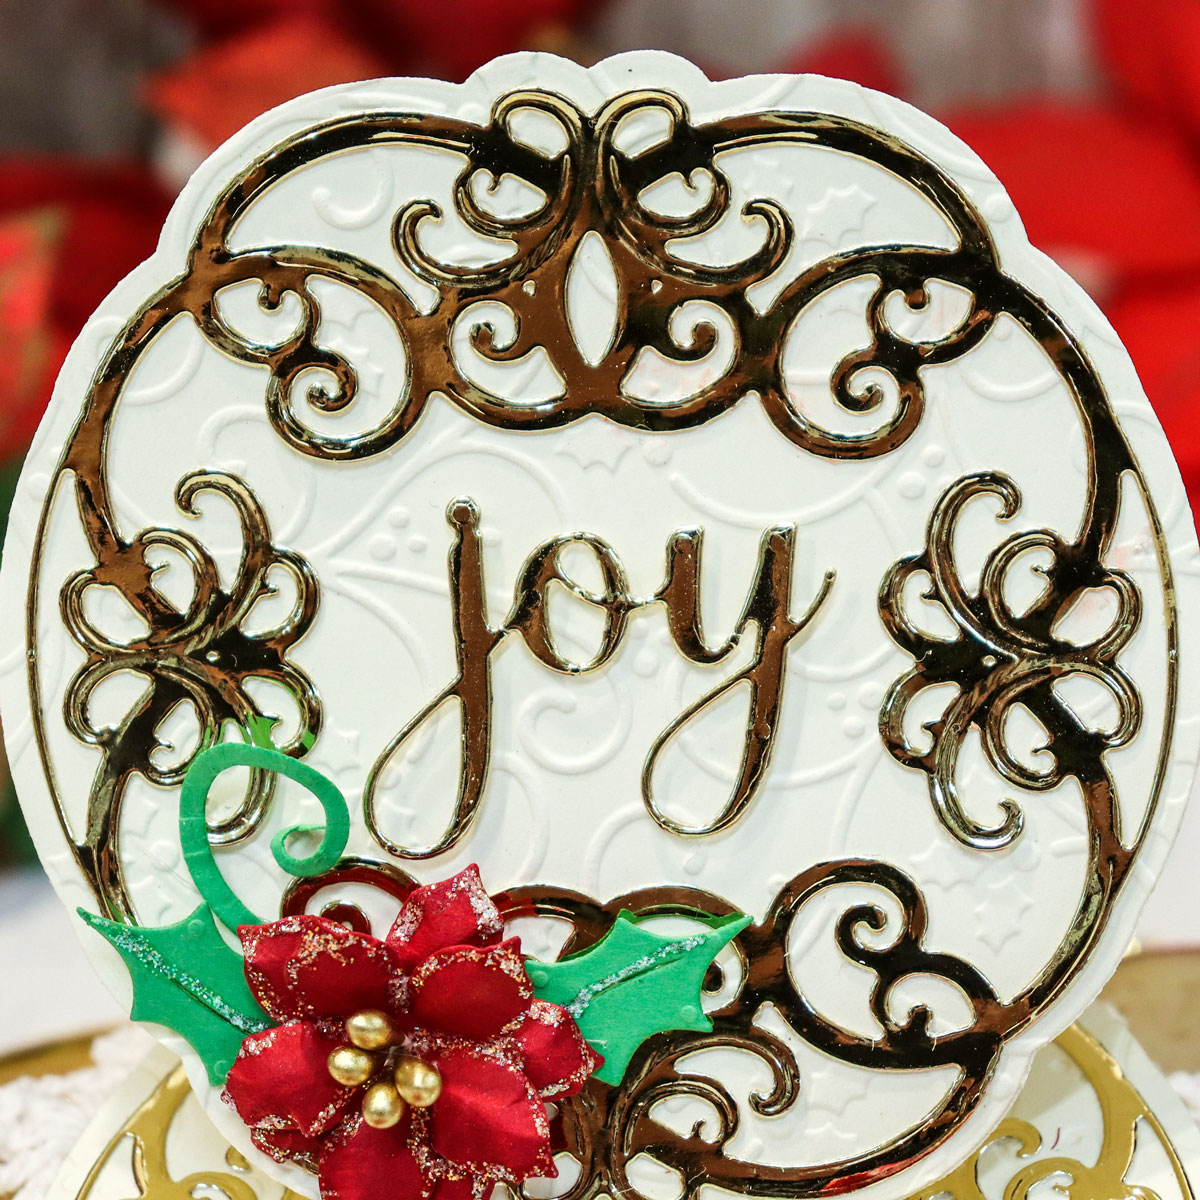
Cut the decorative die from gold then glue it to the card front.

Stamp several small hollyhock stems and blooms, the hollyhock fence X 2, the Clematis Birdhouse and 2 birds using black on white cardstock, die cut all then color.  Slightly shape leaves from the back and place pop dots on the backs of leaves. Shape the bird bodies and place pop dots under their bellies.

Stamp the sentiment using black onto white then use the banner to die cut, shorten to size.  Cut another banner from gold, glue them together off set.

Glue the fence pieces onto card front at the bottom, overlap if needed to shorten also glue the birdhouse down on right side under fence but leave left side of birdhouse free from glue for now.  Adhere the blooms, various sizes and shapes. Adhere the 2 little birds as desired.

Tuck the sentiment in under left side of birdhouse then glue birdhouse all the way down.

Glitter flowers.

Thanks for visiting today!

Robin


Therefore welcome one another as Christ has welcomed you, for the glory of God.

Monday, September 26, 2022

Pumpkin

 Hello there crafty friends!

I've used the beautiful Fall Label Motif for this card today along with others (see list below).  The pumpkin and leaves were die cut from various fall colored cardstock then I sponged some Vintage Photo Distress Ink on some of the edges.  The pumpkin is also sponged with some light orange Oxide Distress Ink to give it some highlights.  The layers and popped up with cut out pieces of foam sheet (like Fun Foam), this makes a nice smooth layer.


S6-184 Eyelet Lace Frame (oval for sentiment)
Other materials used:
Various fall colored cardstock in golds, oranges, browns and light green, 
white cardstock for the card base, gold rhinestones
foam pop up sheet and ribbon.

Thanks for visiting today!

Robin


Tuesday, September 20, 2022

Congratulations!

Good morning!
Material list HERE

 Card size:  5 1/8 X 7”

Fold 7 1/4" X 11” white cardstock in half to make 5 1/2" X 7 1/4".  Use the first decorative die in the Oval Filigree Frame set to cut card base, hang the left side over fold edge by about 1/2" to leave the center portion of fold in tact.

Use the same die to cut another white front and a gold front.  Glue these 2 together, off setting slightly, then glue to card front matching edges.

Cut the large oval from pink decorative paper also cut the same size oval foam sheet piece to pop it up.  Glue these to the center of card.

Stamp and emboss with gold, the sentiment from Sweet Lilac Scroll set, die cut with small oval then gold leaf edges of pink oval.  Die cut another oval from foam sheet to pop up. 

Die cut the smaller decorative oval die from the Oval Filigree set from white and from gold, glue them together off setting.  Pop this oval up in the center of pink oval using foam tape or similar.  Glue the sentiment to the right side of the smaller decorative filigree oval.

Stamp both Hollyhock Stem and Bloom using black on white cardstock, die cut then color.  Shape stems and leaves from the back with a stylist and foam pad.

Use both glue in places and pop dots/foam tape in places to attach them to the left side of the card.  Glitter the card randomly including flowers.

Thanks for visiting today!

 Therefore be imitators of God, as beloved children.

Monday, September 19, 2022

Noel

 Good morning!


I have this beautiful die set provided by Amazing Paper Grace and also have this 
beautiful Christmas paper I bought recently that I wanted to use, it worked out perfectly to make this wonderful slimline card using both.


Also used: White cardstock, silver cardstock, silver stamen, Stickles, and white ribbon.


I used Stickles on the flowers made from the Christmas paper and some silver leaves were added to the small bouquet as well.  Silver die cuts lines the Christmas paper die cuts.
Made a white bow from satin ribbon.

Thanks for visiting today!

Robin

Wednesday, September 14, 2022

Joy


I love making Christmas cards! 
I love the colors, the festive season and the general beauty!
Today I've made an easel card and a treat box.
Treat boxes are always fun to receive or to make and give
for table settings as favors.  Table favors is what I intend to do for my Christmas Tea. 
 
Today's projects created were used with dies provided by Amazing Paper Grace.

My Projects for Today 
uses:


The treat box


Easel Card


One tip I can give is to die cut the card first before embossing because if you emboss first it tends to really flatten out when put back through the machine with the die cutting.  You really defeat the purpose of embossing if you then flatten the card panel.


The Christmas Flourishes Availability:
These dies and plates are available from Spellbinders right now! Click here: The Christmas Flourishes Collection.

Other supplies:
Gold mirror cardstock, Ivory cardstock, red cardstock, green cardstock, Diamond Stickles, Crystal Stickles, gold stamen

For more The Christmas Flourishes Collection Inspiration

Visit each Creative Team blog linked below for their take on creative paper crafting ideas using The Christmas Flourishes Collection.


Follow me on Facebook!
Follow me on Instagram!

Thanks for visiting today!

Robin

Tuesday, September 13, 2022

Thinking of You

 Good morning crafty friends!

Are you ready for a new 3D flower?  I love it when Heartfelt Creation comes out with new flowers and MOLDS to go along with!  It makes crafting dimensional flowers so much faster and easier too!


Material list HERE

Card size: 6 X 6 1/2"


Fold 6 X 12” cardstock to 6 X 6” then place largest Simple Centerpiece die along the top so that cutting edge is off the fold. Cut and cut a smaller simple centerpiece from decorative paper. Cut the Elegant Hearts decorative die from pink decorative paper, cut the center from the pink with a small Simple Centerpiece.


Stamp Hollyhocks using Magenta Hue, Sunflower, and Coastal Coral, sponge with the same colors. Sponge centers of all the flowers with Vibrant Fuchsia. Glue 2 of the same size together for each flower. Glue some yellow Flowersoft to the very center of each.


Stamp 2 large hollyhock vines and 1 large hollyhock vine with flowers using black, color then die cut. Use Fern Green ink to sponge around the outsides of leaves.


Stamp the fence using black then color and die cut. Stamp sentiment using Magenta Hue then die cut with a circle die.


Die cut (using two dies together) 2 white octagon frames, use foam strips under them then secure to the front of the card. Pop fence up to match white Octagon frames. Glue pearls to each corner of frames.


Shape the hollyhock vines from the back. Then pop 2 of them up on the left side, cut the other vine into small leaves. Glue various colors and sizes on the left 2 vines. Glue a few flowers on the right and glue individual leaves on them.


Glitter the flowers and glitter the card base randomly.


Thanks for visiting today!!

Robin

Philippians 4: 4-7

Rejoice in the Lord always; again I will say, rejoice. Let your reasonableness[d] be known to everyone. The Lord is at hand; do not be anxious about anything, but in everything by prayer and supplication with thanksgiving let your requests be made known to God. And the peace of God, which surpasses all understanding, will guard your hearts and your minds in Christ Jesus.


Monday, September 12, 2022

Warm Winter Wishes

 Good morning crafty friends!


I've used the new Seasonal Label Motifs for this card today, namely The Winter Label Motif.


S5-455 Birthday Wishes Vignette
Nesting Circles
Other products include:
white cardstock, aqua cardstock, lavender cardstock, pearls, foam pop ups, glitter 
and various other colors of cardstock for the little scene.

Thanks for visiting today!

Robin

Tuesday, September 6, 2022

Catching Flies!

Good morning crafty friends!


Material list HERE
 Card size:  5 X 5 3/4".

Fold 4 X 11 white cardstock then place large Mushroom die on so that the top of the die overhangs the fold by about 1/4" then cut. Stamp using black and cut another full mushroom front and glue it to the folded card.  Stamp using black and Cut 2 smaller mushroom cottages to go with the large. 

After coloring all the mushrooms, glue right mushroom top to the back of the large mushroom on the right side.  Glue left mushroom to the left side of the large mushroom stem.

Stamp using black: the frog, fence, tiny mushrooms, snail pair, firefly, and flying fairy.  Die cut then color all pieces with Copics or favorite coloring system.

Cut a thin short piece of acetate, glue it to the back of the large mushroom at the top, glue the firefly to the end above where you want the frog.  Use several layers of foam tape to pop up the top of the frog but glue his feet down to the large mushroom.

Glitter the fairy wings then glue her to the left cottage and large cottage.  Pop up the 2 snails to the bottom between the center and left cottage.

Pop up the fence and tiny mushrooms between center and right cottages

Glitter the lantern and the firefly wings.

Thanks for visiting today!

Robin

And Jesus came and said to them, “All authority in heaven and on earth has been given to me. Go therefore and make disciples of all nations, baptizing them in the name of the Father and of the Son and of the Holy Spirit, teaching them to observe all that I have commanded you. And behold, I am with you always, to the end of the age.”

Monday, September 5, 2022

September Die of the Month


I just love the retro look of this gumball machine die set, it makes the cutest card
and I've been dying to try it. 
Today I've made a 3D card and a slimline card.
 
The dies were supplied by Amazing Paper Grace to create today's projects.

There are 26 cutting dies included in the Pop Up 3D Vignette Bubble Gum Machine.


Supplies:
Amazing Paper Grace September 2022 Die of the Month – Pop Up 3D Vignette Bubble Gum Machine.  
Spellbinders nesting Scallop Squares
Silver paper, various cardstock colors, vellum, acetate, pearl, acrylic dots. 

The Amazing Paper Grace Die of the Month is available exclusively at Spellbinders Paper Arts during September 2022, Pop Up 3D Vignette Bubble Gum Machine along with other membership perks.

View this month’s Amazing Paper Grace Die of the Month! https://youtu.be/igVpiES0uzA

Follow me on Facebook!
Follow me on Instagram!

Thanks for visiting today!

Robin