Pages

Comments are welcome and very much appreciated!
Showing posts with label Fairies. Show all posts

Tuesday, September 6, 2022

Catching Flies!

Good morning crafty friends!


Material list HERE
 Card size:  5 X 5 3/4".

Fold 4 X 11 white cardstock then place large Mushroom die on so that the top of the die overhangs the fold by about 1/4" then cut. Stamp using black and cut another full mushroom front and glue it to the folded card.  Stamp using black and Cut 2 smaller mushroom cottages to go with the large. 

After coloring all the mushrooms, glue right mushroom top to the back of the large mushroom on the right side.  Glue left mushroom to the left side of the large mushroom stem.

Stamp using black: the frog, fence, tiny mushrooms, snail pair, firefly, and flying fairy.  Die cut then color all pieces with Copics or favorite coloring system.

Cut a thin short piece of acetate, glue it to the back of the large mushroom at the top, glue the firefly to the end above where you want the frog.  Use several layers of foam tape to pop up the top of the frog but glue his feet down to the large mushroom.

Glitter the fairy wings then glue her to the left cottage and large cottage.  Pop up the 2 snails to the bottom between the center and left cottage.

Pop up the fence and tiny mushrooms between center and right cottages

Glitter the lantern and the firefly wings.

Thanks for visiting today!

Robin

And Jesus came and said to them, “All authority in heaven and on earth has been given to me. Go therefore and make disciples of all nations, baptizing them in the name of the Father and of the Son and of the Holy Spirit, teaching them to observe all that I have commanded you. And behold, I am with you always, to the end of the age.”

Tuesday, July 5, 2022

12X12 Fairy Penny Page

 Good morning friends!

I got this idea from a page I saw on Facebook by a girl named Chrissy, I'm sorry that is all I know about her but I just loved this flying V shaped layout of hers and the colors went perfectly with this photo of my great niece, Penny.  I always liked the colors purple and peach mixed on flowers, I've used it several times on cards in the past.  So Chrissy the fussy cutter, thank you very much for an excellent layout design.

Material list HERE.

Card size:  12x12

Pick a lavender color decorative paper (Sweet Pea Collection).  Spray with Saltwater Taffy (peach/pink-coral) Oxide spray ink.  Sponge with Saltwater Taffy ink pad and Deep Purple ink pad randomly in the flying V shape as shown on sample.  Stamp a few leaves from the Large Urn set at left corner over sponging.  Color with Zig Clean Color markers.

Stamp leaves again using Leaf Green on Deluxe Flower Shaping Paper, stamp Leafy Accent leaves using green, sponge with aqua and green, also a little light coral color (Saltwater Taffy), die cut, shape and set aside.

Stamp Rustic Sunflowers using Deep Purple, sponge with purple and Saltwater Taffy (Penny’s dress is peachy pink, choose color that best suits the photo using for scrapbook page), die cut then glue 2 same size blooms together for each flower.  Glue a pearl in the center of each flower except large flowers, use something larger if possible (large corduroy covered brads used here). 

Die cut 4-5 swirly leaves from the Cut Mat Create 2A from aqua color paper.  Cut 1 or 2 apart to be used around photo and to add to the embellishments going up the left top from photo.  Glue the others center right of photo and photo toward left bottom.  Adhere decorative strip down about 1/3 of the way across the page from left edge. Adhere photo using pop ups on the right side to compensate for the pearl trimmed strip. 

Arrange flowers and leaves going up to left top, going down to left bottom and some just to the center right of photo.  Glue all securely.

Stamp fairy using Memento Black, die cut then color with Copics, glue to flowers at left side of photo.  Stamp Magnolia Buds using London Fog, sponge with Saltwater Taffy and Leaf Green, die cut then insert where desired in arrangement.

Make loops with 16” white ribbon, fold the loops in half, secure fold with hot glue then inset as desired.

Glitter fairy wings, buds and flowers then randomly glitter 12 x 12 page. 


Thanks for visiting today!

Robin

For by the grace given to me I say to everyone among you not to think of himself more highly than he ought to think, but to think with sober judgment, each according to the measure of faith that God has assigned.

Tuesday, June 28, 2022

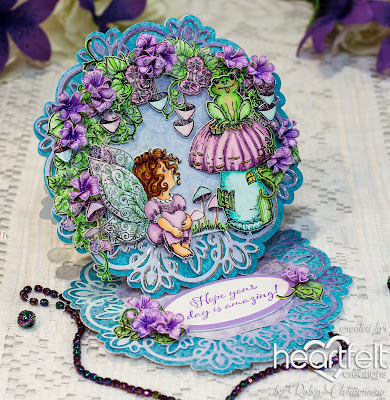
Fairy Wonderment Easel Card

Good morning!
 
Materials List HERE

Card size:  5 1/2 X 5 1/2".

Make a shaped card using the Simply Elegant Centerpiece outer die on a folded 5 1/2 X 5 3/4" card overhanging the folded edge about 1/4" (see video).  Score the left side in the center parallel to the center fold, fold down toward card center. Unfold and lay flat, put glue on the bottom half of front only from score line down, when front is glued on and card is closed flat, sides, top and bottom edges should all match.

Die cut turquoise color decorative paper 2 times using outer die, glue 1 to inside and 1 to front.  Die cut decorative part of centerpiece from silver and from lavender twice. Glue silver and lavender together off-set then glue to card front, glue lavender to inside.  Die cut 2 Simple centerpiece pieces for the centers measuring 3 1/2" X 3 1/2". Glue 1 to the inside and pop up the other 1 on the card front.

Stamp sentiment on white using Majestic Violet then die cut with the large Eyelet Oval & basics to fit sentiment, die cut a lavender mat. Die cut foam sheet to pop up inside (this will be the card front “stop” so that card will display open). Stamp Hyacinth petals using Majestic Violet and using Deep Purple, sponge with Majestic Violet, die cut then shape in the mold.  Add Prills to the centers, curl under tips.

Stamp fairy, frog, mushroom cottage, mushrooms X 2, Ivy X 2, hanging Morning Glories X 3, Morning Glory bunch X 2, fence using Black Memento (if using alcohol inks to color), die cut then color.  Shape back of fairy wings, leaves, mushroom heads, frog head and body, and cottage top with a large stylist on foam.  Put foam tape on backs of formed sections to keep their shape. Add lacquer to frog and leaves.  Glitter fairy wings, card front and inside, flowers with lacquer and ultrafine clear glitter.

Glue and pop-up cottage, frog, mushrooms, fence and fairy. Glue and pop-up vines, 1 Ivy, glory bunches and some upside-down mushrooms around sides and over top.  Use hot glue to glue Hyacinth petal flowers around sides and front.  Glue some flowers on both sides of sentiment inside.  Cut apart the other Ivy then use leaves around flowers inside.


Robin


Psalms 119:1-3

[a] Blessed are those whose way is blameless,
    who walk in the law of the Lord!
2 Blessed are those who keep his testimonies,
    who seek him with their whole heart,
3 who also do no wrong,
    but walk in his ways!


Tuesday, June 21, 2022

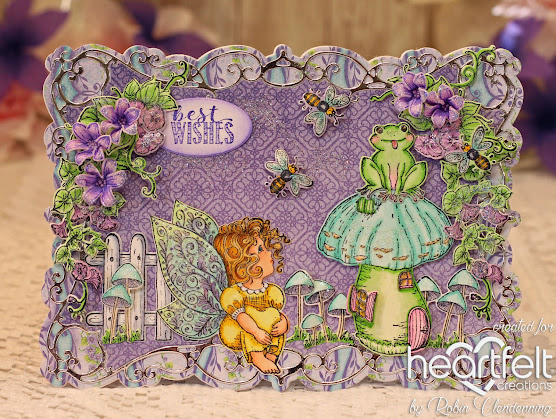
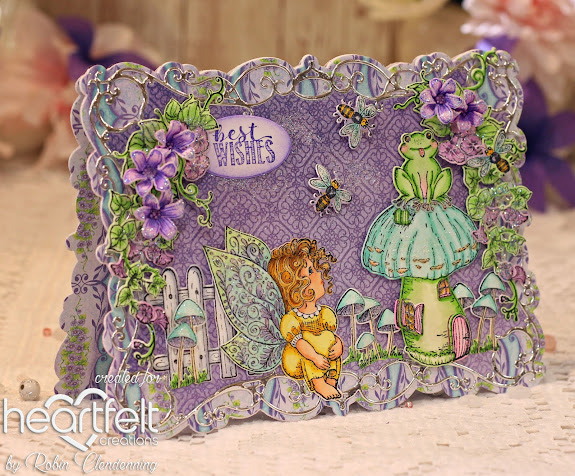
Best Wishes Fairy

Good morning!
 
Material List HERE

Card size:  5 X 6 7/8”.

Make a shaped card (see video) using the outer die of the Flourished Companion Frame die set from white cardstock, Cut another front from heavy cardstock and from decorative paper in aqua and purple colors. Optional, cut another decorative paper piece for the inside.

Using the second and third die in the set, cut a silver decorative frame and a purple inside.  Glue them both to the card front centering.

Stamp the fairy, several morning glories, frog, 3 bees/bugs, small mushrooms X 2, fence, mushroom cottage (choose one of the mini-mushroom cottages), X 2, and frog using black Memento ink.  Die cut then color. Shape leaves, fairy wings, bees, small mushrooms from the back with large stylist on foam. Add foam to the back of shaped parts to keep their shape. Add Wink of Stella to the wings of bugs, fairy wings, windows and frog eyes.

Stamp Hyacinth on Deluxe Flower Shaping paper using Deep Purple on some and Majestic Violet on some, sponge all with Majestic Violet, die cut then shape in the mold, finish shaping with Groove Golf Tools and Deluxe Flower Shaping Kit.  Stamp sentiment on white with Deep Purple, die cut with small tag then sponge the edges. Add Lavender Prills to the centers of flowers and glitter flowers.

Make a little scene with the fairy, cottage, frog, fence, mushrooms and bugs, popping up as desired.  Add the morning glories to the left and right corners going downward. Use hot glue to add flowers to the right and left corners. 

Randomly glitter the card front, insert tag into arrangement on the left side. Finish the inside as desired.

Thanks for visiting today!

Robin


Mark 8:34-38  The words of Jesus
34 And calling the crowd to him with his disciples, he said to them, “If anyone would come after me, let him deny himself and take up his cross and follow me. 35 For whoever would save his life[d] will lose it, but whoever loses his life for my sake and the gospel's will save it. 36 For what does it profit a man to gain the whole world and forfeit his soul? 37 For what can a man give in return for his soul? 38 For whoever is ashamed of me and of my words in this adulterous and sinful generation, of him will the Son of Man also be ashamed when he comes in the glory of his Father with the holy angels.”


Tuesday, June 14, 2022

Fairy Light Cottages

Good morning!

Isn't this the cutest little fairy village?

Material list HERE

Card size:  5 X 6 7/8”.

Make a shaped card (see video) using the Fancy Classic Rectangle outer die placing the die over-hanging the fold at the fop.  Using the same die, cut another piece from white heavy cardstock and 1 from decorative lavender paper. 

Cut the next die in (decorative) and plain die (3rd die) from gold then from aqua decorative paper.  Insert the aqua inside gold frame (save gold inside and aqua frame for another card).  Cut a foam sheet piece to fit under the framed set.  Glue them together then glue the foam to the card front, centering.

Stamp 3 mini–Mushroom Cottages 2 times each (second set is for cutting out windows).  Stamp fairy, small mushrooms X 2, morning glories x4 and large Ivy leaves using black Memento, die cut and color. Use Wink of Stella on windows and lantern.  Pop up the windows and doors on all the cottages. From the back side, slightly shape: lantern, fairy wings, leaves and small mushrooms.  Add foam dots under the shaped areas to help them keep their shapes.

Pop up cottages onto card front adding small mushrooms in between (trim or clip apart as needed to fit, save extra pieces for hanging from the vines). Glue the fairy body to the card front above cottages The wings and lantern are popped. Glue the Ivy and Morning Glories to the left and right sides coming from the top of Fancy Classic die cut. Add in upside down mushrooms as desired.

Stamp Hyacinth petals using Deep Purple from Deluxe Flower Shaping Paper, sponge with Majestic Violet, die cut then shape in the mold.  Use Deluxe Flower Shaping kit to deepen center “wells” use round needle nose type plyers (used for jewelry making mostly) or a Groove Golf tool to curl each petal end downward. Glue some lavender Prills to the centers then use hot glue to add flowers to the card at the top right and left.

Use Stickles, Wink of Stella and Ultrafine Glitter to flowers, wings, and card front.

Thanks for visiting today!

Robin

To the choirmaster. A Psalm of David.

The heavens declare the glory of God, and the sky above proclaims his handiwork. Day to day pours out speech, and night to night reveals knowledge.
 

Tuesday, May 21, 2019

Heartfelt Fairy Purr-fect Birthday

Good morning!
Here is a fun card with pockets and tags galore!
I combined the cute fairy girls with the cute kitties.

Closed


Tags mostly out

top tag

bottom tag

Card open
HC PRODUCTS USED      


Other Products:
White cardstock, 3M Foam Tape, FlowerSoft, Copic Markers: C1,C3,C5,BV20,RV00,RV10,RV02,B00,B01,B02,E50,E53,E33,E35,Y00,Y11,Y15,Y18,YR00,YR02,BV00,BV01,BV02,YG61,YG82,E42,E43,E70,E71,E81,W2

For more tips on creating with the flower shaping molds, watch the tutorial at https://youtu.be/FSdPL7nXvQE

Instructions:
Card size: 8 1/2 X 7 1/2".  Fold Insert so that you have: (Going right to left) far right-6 1/2, then 5”, 5”, 3” and 1 3/4".  Cut far right side with the Fleur Border Basic (you will need 2 cuts because the card is a little too tall). Cut an eyelet border from Fleur Borders X 2.  Cut paper to go onto each panel including both sides of the card inside.  Glue paper and then glue border to right side.  The folded top will be glued, top and bottom only creating a 3” pocket that opens on the left and a 1 3/4" pocket that opens on the left.  Cut 2 Regal Pocket Accents with straight slots then glue both to the top of the 1 3/4" top so that the slot opening meets the edge of the left pocket side opening.  Glue the other side of the accent to the 5” panel so that tags can be slipped in and out easily without interference.

Stamp kitties and fairies with London Gray, log with Cocoa, leaves with Fern green, Sweet Shoppe and treats with black, die cut and color with Copics or favorite coloring method.  Stamp Posies with Buttercup, Magenta Hue, Deep Purple and Forget-Me-Not, sponge, die cut, form (see video) then stamp leaves with Leaf Green and sponge with Chartreuse  and die cut then form.  Cut a tag using Tickets and Tags from decorative paper and stamp using Deep Purple “On Your Special Day” tie with purple ribbon and insert into the right opening 1 3/4" pocket.  Cut 2 more tags using the Album Tags from decorative paper and from white cardstock to reinforce.  Cut slots at the top and tie with purple ribbon.  Create scenes on each large tag using kitties and fairies.  Glitter the wings with Ultrafine.  Insert each tag into pockets created on the left (they will stick out of pocket about 2 3/4").   Open the card and decorate the inside with Sweet Shoppe, treats, extra balloons, balloon kitty and hat kitty.  Stamp birthday sentiment using Deep Purple onto blue sky decorative paper, die cut using Album Tags and Accents then cut the eyelet mat out of white.   Glue the sentiment to left side of open card.  Cut 6 white corners and glue them into the 6 straight edged corners of open card.  And fine glitter to all the flowers on the paper.  Use Rajni’s Crystal Clear glitter on the Posies.  Decorate the corners  left side and front of card with 3D Posies.


HC PRODUCTS USED      

Other Products:
White cardstock, pearls, Copic Markers: RV00, RV10, RV02, RV04, C2, C3, Ribbon, London Fog Memento, foam sheet

For more tips on creating with the flower shaping molds, watch the tutorial at https://youtu.be/FSdPL7nXvQE.
For more tips on creating with the diamond dies, watch the tutorial at https://youtu.be/JwS0Rmysd98.

Instructions:
Card size: 5 1/2 X 6 1/2".  Cut yellow with pink print to 5 1/8 X 6 1/8” and then yellow print 5 X 6” and glue to white base.  Cut 2 Petite Pocket Accents Die, 1 large basic diamond, 1 Lacy Diamond (outside and inside) out of white.  Cut 2 smaller basic Diamonds out of the prints.  Cut a piece of foam sheet with the large Basic Diamond.  Glue the 2 Petite Pocket Accents onto card just far enough away so that points of Diamonds fit inside of the half circles.  Glue the foam to the back of the large Basic Diamond and glue to card then glue the Lacy Diamond on top of the basic Diamond.  Glue the yellow/pink print then the yellow print onto the Lacy Diamond and last of all the (inside part) of the Lacy Diamond.  Glue a pearl to each intersection.

Stamp a vase with London Fog, stamp leaves with Fern Green, stamp tulip blossoms with Magenta Hue and Buttercup, sponge flowers with stamp color and leaves with Leaf Green.  Form blossoms in the Shaping Mold and the leaves with Flower Shaping Kit.  Color the vase with pinks and grays.  Attach Tulips and leaves to the back of the vase.  Cut a round tag from decorative paper and top it with a bow.    Pop up the vase and tag to the left side of card.  Glitter the card randomly.  Glue a large pearl to each corner.

Thanks for visiting today!
Robin
The Bible says that God wants all to come to Him, that is not exclusive at all.  He does not want any to perish but it is up to us because He gave all of us free will.     2 Peter 3:9 


"The Lord isn’t really being slow about His promise, as some people think. No, He is being patient for your sake. He does not want anyone to be destroyed, but wants everyone to repent". 
God's word also says that He so loved EVERYONE that He gave His only son to die in our place because none are righteous.

John 3:16 


16 “For this is how God loved the world: He gave[a] His one and only Son, so that everyone who believes in Him will not perish but have eternal life. 
Jesus the Christ, God's only son said in John 14:6 
 “I am the way, the truth, and the life. No one can come to the Father except through me".  
So the only thing you have to decide is: Was Jesus who He said He was? Many witnesses testify He was, OR was Jesus crazy or a liar? 
 Jesus actually lived that is a fact.  Hundreds of people saw Him crucified, that is a fact, and then later saw Him alive, that is a fact.  Many thousands saw Him do so many miracles they could not all be written down, these are all historical facts.
I know who I believe in and He has changed my life, how about you? 
God's word says ALL have sinned, it does not matter what you have done, He loves you and wants you to come to Him.  Believe in Him, that He died for you and rose again from the dead, turn from your sin asking Jesus to forgive you and ask Him to become your Lord and Savior then follow Him (that is make Him your boss and do like He did while He was on earth...study His word so you know what He did).  But don't worry if you are not perfect, no one is...we all sin but He is faithful and just to forgive us when we belong to Him and ask Him to forgive.


Wednesday, May 9, 2018

Heartfelt Creations Coneflower Foldout

Good morning!

Summer brings with it the excitement of a new gardening season, lounging in the open expanse of the backyard and enjoying the beauty of favorite perennial blossoms dancing gently in the warm summer breeze! Among those returning favorites are the attractive, butterfly loving coneflower! Bright and colorful, these pretty flowers come dressed in a wide variety of hues and quietly display their domed centers and soft delicate petals against the backdrops of ornamental grasses and other decorative backyard plantings! Come along with us as we welcome back the summer season with a walk through the Backyard Blossoms Collection by Heartfelt Creations! Brilliantly hued, and filled with a good dose of summer sunshine, the fabulous paper collection showcases happy shades of bright yellows, pretty pinks, luscious lavenders and glorious greens and showcases lovely lace like patterns, elegant swirls and bountiful coneflower blossoms! Included in this jubilant and cheerful assembling are three exquisitely illustrated cling stamps sets with coordinating dies ideal for all of your summer themed paper craft creations! From large coneflower images, ornamental grasses, to smaller backyard blossom accents, these dynamic illustrations are ideal for creating your very own dimensional flower gardens as focal points on card fronts or as accents on scrapbook layouts! So grab your lounge chair, slather on the sunscreen and join us as we kick back and relax in the backyard enjoying our favorite backyard blossoms!


Heartfelt Creations products used:     
  
Other Products: 
Peach card stock, Lavender card stock, ribbon, Copic Markers:B00,B000, B01, R30,R21,R22,V01,V12,V15,E33,YR65,Y11,Y15,Y38,E53,E33,E35,RV000,G43,G82,YG63,YG03,YG23,C01,C02,C03,C05,R81,R83,E000,E00,E93,E01

For more tips on creating with the border dies & foldout cards, watch the tutorial at https://youtu.be/wxX94X84kUo.

Instructions: 
Card size:  6 X 6 ½”  Cover each panel of foldout card (see video for cutting paper) with the Backyard Blossoms Paper Collection. Die cut borders out of peach card stock and cut narrow borders using the plain edge of the Fleur Borders out of lavender card stock. Cut back border from peach using two of the Delicate Boders and the lavender narrow border using the plain die from the Classic Border set.  Die cut a lavender and a peach using the Festive Holiday Die and one each using the Decorative Medallion Die.  Glue the lavender Decorative Medallion to the back of the card on the right side leaving at least half sticking out from the edge then glue the peach one on (the lavender will appear on top from the front).   On the other side, glue the peach Festive Holiday die to the back of the third panel (third from the front) at an angle and then glue the lavender Festive Holiday die on top of the peach. Cut one pocket from lavender.  Cut a rectangle tag and an oval tag from decorative paper.
Stamp, die cut and color the fairies, blossoms, birds, critters, and coneflowers with Copic Markers.  Glitter all flowers, fairy wings, and butterflies.  On the back panel glue sitting fairy to log on paper, glue one of the birds to top right corner and glue some of the blossoms to the bottom area.  On the inside of third panel glue the lavender pocket to bottom right and insert tags.  Glue some of the blossoms on the left side of the bottom next to the pocket.  On the back side of the same panel, glue the tall coneflower over the Festive Holiday die and then glue a short one next to it (one coral and one purple).    Inside second panel, glue standing fairy to left bottom and the little bird and branch to top left.  Glue small coneflowers to bottom right.  Inside first panel die cut the paper with wheat stocks using the wheat stock die from Backyard Blossoms and then glue them on top of decorative paper.  Glue tiny butterflies and bunny on the bottom.   On the outside of the last panel glue two coneflowers (one purple and one coral) to the left side.  Stamp It’s Your Birthday on decorative paper and die cut with oval die then mat with another oval cut from peach card stock and glue these together then onto the front right bottom.   Glue a bird at the top left on top on one of the coneflowers.
Now make a 3D coneflower using the sunflower stamp and die set.  Sponge deep Purple color onto petals front and back.  Shape by misting flower from the back, place face side down on shaping mat and starting from the outside, use tool to draw petals inward.  Pierce hole in the center and insert a wired stamen (color wire with green ink) from the top (stamen will stick up).  Fold flower in half and even tuck sides in to make it look more like a coneflower then start adding 3D type glue to the stamen and rounded top of the flower to cover with Prills (Mix Go Man Go with Express-O Yourself). Add more glue and more Prills until you have a rounded cone center.  Let dry completely, then glue flower to front panel.   Tie a triple bow with lavender ribbon  (or dyed seam binding) and glue to the front at the bottom of the stems.
Thanks for visiting today, hope you got some ideas for a card!
Robin
Starting with Genesis and on through until the end of the Bible, it all speaks of God's awesome power AND His unfailing love for us, His mercy and His grace.
I'd like to share one of my favorite songs with you, well part of it anyway!
Verse 1
"God of creation there at the start
before the beginning of time
with no point of reference You spoke to the dark
and fleshed out the wonder of light
Chorus 1
And as You speak a hundred billion galaxies are born
In the vapor of Your breathe the planets form
If the stars were made to worship so will I
I can see Your heart in everything You've made
Every burning star a signal fire of grace
If creation sings Your praises so will I
Verse 2
God of Your promise
You don't speak in vain
No syllable empty or void
For once You have spoken all nature and science
follow the sound of Your voice
Chorus 2
And as You speak a hundred billion creatures catch Your breath
Evolving in pursuit of what You said
If it all reveals Your nature so will I
I can see Your heart in everything You say
Every painted sky a canvas of Your grace
If creation still obeys You so will I"
By Hillsong United

It goes on but I will close right here.  I just love the way it speaks of God's almighty creative power and awesomeness! How He speaks and it is done, it is created, it is accomplished. How great Thou art!