Pages

Comments are welcome and very much appreciated!
Showing posts with label baby. Show all posts

Monday, April 22, 2024

Team Favorites


Hello crafting friends! 
This little elephant has to be in my favorites list, OMGosh! So cute!!

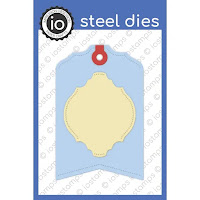
For the tag, I die cut it then split it in half to make it longer.  I wanted it to hang out at the bottom and show at the top too.


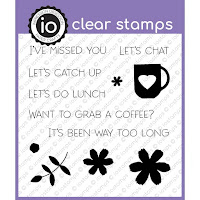
The tag is stamped with the paper colors using the little hearts in this set.
The mat color really decides whether this is a boy card or girl card, don't you think?
Otherwise it could be either.


Find other ideas from the team!


Thanks for visiting today!
Robin


Tuesday, April 16, 2024

April Release Day 2

Welcome to the April Release Hop!
April 15th -16th The Impression Obsession Team will be sharing projects with NEW April Release products! You can find a list of participants on the Impression Obsession Blog each day through the event.
Prizes - Two lucky customers who place an Impression Obsession order during the April Release week (April 15th – 22nd) will be chosen and will have a very special Impression Obsession prize package added to their orders!


Impression Obsession
      Robin Clendenning (Me)


CS1303 Let's Chat, CL1280 Cozy Vibes, STEN035-A1 Circles, DIE017 Border Duo 1, DIE018 Border Duo 2, DIE1302 Petite Scalloped Circles, PP012 Basics 4 Warm Red


Thanks for visiting today!

Robin


Monday, January 22, 2024

Product Focus-Stencils

 Hello crafty friends!

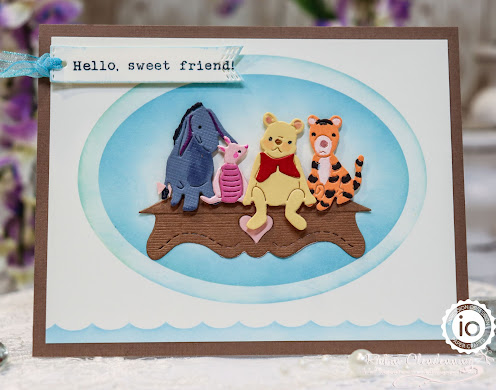
Today the product focus is stencils.  I've used the Ovals to make a double frame for the Childhood Friends and Heart Shelf. 

Aren't these Pooh dies cute?  They bring back so many wonderful memories of watching the Adventures of Winnie The Pooh with my young children.  Pooh quickly became my favorite person.  He is just the type of friend I would like to be and to have as a friend. 


I also used the edge border of the stencils to make a sweet border for the bottom of my card front.
You really get a lot of bang for your buck with these stencils.


Thanks for visiting today, go check out more inspiration on the Design Team Blogs.

Robin


Sunday, August 14, 2022

Seasonal Motif Spring


I used to Tole paint years ago and I remember one of the whimsical patterns I found in a 
book was of a bunny similar to this one, with a wreath of flowers around its neck,
so how could I resist?
The blue card was inspired by the beautiful word dies recently released.  I just knew
the baby boy would be perfect with this gorgeous lattice background and 
that large SWEET!


Projects created today were used with dies provided by Amazing Paper Grace.

My Projects for Today


The Seasonal Label Motifs Availability:
These dies and plates are available from Spellbinders right now! Click here: The Seasonal Label Motifs Collection.

1"white satin ribbon, pearl halves, Stickles, foam sheet (like Fun Foam), decorative white with glitter dot paper, white cardstock, pink cardstock, blue cardstock, beaded flower stamen, blue ink, pink ink, Prills, Light green cardstock

For more The Seasonal Label Motifs Collection Inspiration

Visit each Creative Team blog linked below for their take on creative paper crafting ideas using The Seasonal Label Motifs Collection.

Follow me on Facebook!
Follow me on Instagram!

Thanks for visiting today!
Robin


Tuesday, July 19, 2022

Heartfelt First Christmas


Good morning!
Isn't this baby precious?  He is the new addition to my great nephew's family.
This photo inspired me to make this page using all the blues and whites.

Material list here

 Card size:  12 X 12”

Use light blue decorative paper as a scrapbook page base, splatter with white acrylic paint, sponge some areas with Blueprint Sketch Distress or Distress Oxide Ink.  Tear a piece of darker blue decorative paper from the side all the way across on the top and bottom of paper.  Tear another smaller piece for right side of matted photo.  Curl the torn edges up on both sides of both pieces.

Use a snowflake stencil with white pigment ink on the large piece of dark blue toward the left half of paper.  Glue both pieces of dark blue paper onto 12 X 12 page centering vertically on page with small piece glued to the right side.

5 X 7 photo used in sample, create a plain white frame with the Frame A Card Leafy Border (no insert used) then mate underneath with silver.  Glue photo to white and silver frame then glue it to the page about 2” from right side.

Die cut 2 sets of the Swirly Border Accents (4 pieces altogether) from white.  Cut pieces of white gauze then spread them out to make them thin and not so uniform looking.

Stamp blue cardstock using embossing ink then emboss with white embossing powder the stars and the snowflakes from the Large Holiday Star set then die cut.  Stamp the stars including the large star with Blueprint Sketch Ink, die cut.

Create a large star bouquet at left bottom corner of matted photo including 3 Swirly Borders, stars, large star, snowflakes and gauze.  Create another smaller bouquet of stars at top right corner including stars, snowflakes, gauze and 1 Swirly Border.  Also add a little gauze and 1 snowflake to far left side of page.

Add Crystal Stickles to center dots of each snowflake (including snowflakes on the paper) and snowflakes in the stars.  Add rhinestones to stenciled snowflakes and as desires.

Die cut a “1” and “st” using the ‘Letters and Numbers Die, from dark blue leftover decorative paper and from silver.  Stamp and emboss with clear ink and powder, Christmas onto dark blue decorative paper, die cut then die cut Christmas from silver as well.  Layer silver under letters, number and word slightly offset.  Use pop ups under the 1 st and Christmas then attach to page over the large star bouquet.

Thanks for visiting today!

Robin

Romans 12:2
  Do not be conformed to this world,[c] but be transformed by the renewal of your mind, that by testing you may discern what is the will of God, what is good and acceptable and perfect.[d]

Tuesday, June 30, 2020

HC Congratulations It's A Girl! Easel

Good morning, Sunshine!
This is a type of swing card, the center can swing fairly free.
It looks like a basic easel card bit if you look at the template
at the end of the post you will see that it is different.


HC PRODUCTS USED       

Other Products:
White cardstock, Pink cardstock, London Fog Memento, Embossing Folder, punch for sepals, Copic Markers: RV00, RV10, RV02, C1, YG11, YG41, Y00, Y11, E51, E21, E53, Shimmer additive.

Video
For more tips on creating with the flower shaping molds, watch the tutorial at https://youtu.be/FSdPL7nXvQE
Instructions:
Card Size: 6 X 6”.  See Template for card base after instructions.     Cut 1 white panel 3 7/8 X 5 3/8” then run through your cutting machine with an embossing folder.  Die cut 1 pink inner decorative die from Royal Elegance Frames Dies set from pink cardstock and the inner oval from white cardstock.  Cut decorative paper to match panels of card base except the center easel part.  One the center easel portion of card front glue the embossed panel then the pink decorative die cut and finally the white oval.  Glue the decorative paper to the card base inside piece (5 3/4 X 5 3/4") and the strips on the card front (5 3/4 X 3/4" bottom, 3 1/4 X 3/4" two sides above bottom, 2 1/2 X 3/4" two sides on the top portion [only shows when closed]). Cut a decorative paper border for the bottom of front to go over decorative paper strip (animals with pink background used for this card).  Glue to card front.

Stamp using London Fog (or black), lamb, bunny, deer and the rose images die cut and color.  Stamp the “girl” word and Classic Roses using Magenta Hue, sponge, die cut and form roses (see video), die cut “Girl”. 
Stamp Congratulations using Magenta Hue onto white cardstock and die cut using the Ornamental Tags Die set. 

Glue the 3 little animal characters to the upper portion of the white oval and rose images to the bottom portion of the white oval.  Glue one Classic Rose to the center under the animals and then glue the “Girl” word under the Classic Rose.  Glitter rose and card front.  Glue some of the Classic Rose buds and roses on the side bottom corners of the card front (make sure it doesn’t interfere with opening and closing of card).  Glitter roses.

For the inside of card: Glue the sentiment “Congratulations” to the bottom portion and Glue two Classic Roses and leaves above it (these will hold the easel portion of card open).  Glitter as desired.  For the leaves, mix additive with lacquer to get a shimmery gloss and then paint the lacquer onto leaves to finish.
Thanks for visiting today!
Robin

2 Peter 3:9 New King James Version (NKJV)

The Lord is not slack concerning His promise, as some count slackness, but is longsuffering toward [a]us, not willing that any should perish but that all should come to repentance.


Thursday, June 25, 2020

HC Welcome Baby Boy!


Good morning!
Here is a fun easel card!


HC PRODUCTS USED      
HCD1-7299             Baby’s Air Balloon Die
HCD1-7301             Baby’s Friends Die
HCPC-3914              Baby’s Air Balloon Stamp Set
HCPC-3915              Welcome Baby Stamp Set
HCPC-3916              Baby’s Friends Stamp Set
HCDP1-2116            Tender Moments Paper Collection
HCD1-7154              Eyelet Circle & Basics Small Die
HCD1-7162              Eyelet Hearts Die
HCD2-7306              Decorative Circle Frames Die
HCD1-7201              Tickets and Tags Die
HCD1-7110               Classic Rose Die
HCPC-3752              Classic Rose Stamp Set
HCFB1-462               3D Rose Shaping Mold
HCS1-459-3              Assorted Bead Stamens-Medium
RACP656                  Sky Blue Archival Ink
RACP531                  Vivid Chartreuse Archival Ink

Other Products:
White cardstock, foam sheet, Electric Green Ink, London Fog,  Embossing folder, black pen, white paint, Copic: YG11, YG41, B21, B41, B00, Y11, Y15, RV00, RV10, E43, E79, C2, C3, E50, E51, E21

For more tips on creating with the flower shaping molds, watch the tutorial at https://youtu.be/FSdPL7nXvQE
Instructions:
Card size: 4 3/4 X 5 1/2".   Cut white cardstock 4 3/4  X 11", score and fold at 5 1/2 and 8 3/4.  Cut the 5 1/2" side with the outer die of the Decorative Circle Frames.  Cut another white piece of cardstock 4 3/4 X 5 1/2" and cut one end with the outer Decorative Circle Frames Die.  Glue the 4 3/4 X 5 1/2" card front piece to the card base 2 3/4" end (make sure the decorative end is facing up on the card front).  Cut decorative paper to match card base inside and card front.  Cut 2 Decorative dies from the Decorative Circle Frames out of white and cut 2 eyelet circles from white.   Emboss the 2 circles.  Glue the white decorative dies and the circles to the card front and the inside.  Cut a white heart and an eyelet white heart for the bottom of the card front and pop it up.

Stamp elephant, panda, and racoon using London Fog, die cut and color.  Stamp Baby and Boy using Sky Blue then die cut and color. Die cut another set of Baby Boy from foam sheet. And glue to the bottoms of the Baby Boy images.  Glue these to the card base inside (they will be the “stop” for the front to stand up).  Stamp Welcome on white and die cut with the long die from Tickets and Tags then cut a white frame with the eyelet long die (these dies are long so you have to shorten them).   Pop the Welcome toward the top of the card front. Pop up the little animals under the Welcome sign and above the heart.

Stamp roses with Sky Blue and sponge the edges.  Stamp the leaves using Electric Green and sponge with Chartreuse.  Form the roses and leaves in the rose mold.   Make most of the roses into buds using a white wired stamen in the centers.  Punch green pointed flowers from green to use as sepals for the buds.  Add roses, buds, leaves to the bottom of card front and both sides of the card base sides only even with the top of the word Baby.  Set the card front in it’s stand up position for correct placement of flowers.  Glitter the card and flowers.

Thanks for visiting today!
Robin
Ephesians 5:28-30 New King James Version (NKJV)
28 So husbands ought to love their own wives as their own bodies; he who loves his wife loves himself. 29 For no one ever hated his own flesh, but nourishes and cherishes it, just as the Lord does the church. 30 For we are members of His body, [c]of His flesh and of His bones.