Pages

Comments are welcome and very much appreciated!
Showing posts with label Snowflake. Show all posts

Saturday, September 16, 2023

Day Two- September Release Blog Hop-HoHoHo!

Hello crafty friends!

 2nd day of the September release

From September 15th to 16th, the Impression Obsession Team will showcase their latest projects featuring new clear stamps, dies, and paper packs! Check out the Impression Obsession Blog for a complete list of participants each day of the event. During the September release week (September 15th-22nd), two fortunate customers who place an Impression Obsession order will be selected to receive a unique prize package along with their purchase. Best of luck to all!


I love this sentiment and just cutting the cookie to look like someone ate half a cookie.  So cute!

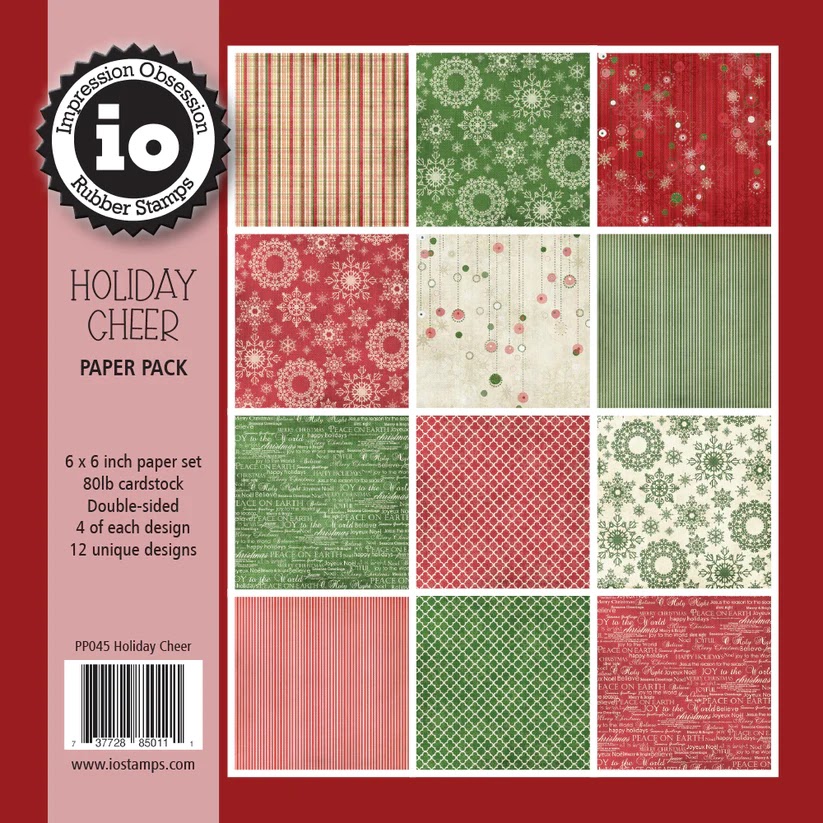
And who wouldn't love this paper, I mean really.


2nd card-Just Believe.
Look at this sleigh filled with goodies!!!
How fun it was to use several different decorative papers to make the packages and those cute candy canes!


And my 3rd card today-HoHoHo


Embossing folder, obviously and I had to make the plate a saucer for that cute Santa cup, right?  Of course, the saucer had to have a couple of Christmas cookies on it too, I mean come on!

Thanks for visiting today my friends and I hope you get loads of inspiration on your 
way along the hop as well!!

Robin


Tuesday, July 12, 2022

Heartfelt

 Good morning Heartfelt friends!


Material list HERE

Card size:  5 7/8” X 8 1/8” (Includes overhanging star).

See video on making a shaped card and follow instructions except do not cut all the way to the bottom for this Holiday Snowflake Frame die as it is a little too delicate for standing on fine edges.  Leave a small amount of straight cardstock at the bottom.  Cut another Holiday Snowflake Frame from Silver and 1 from purple decorative paper.  Glue the siler to the card base then glue the purple but off-set just a little bit.

Cut the inner Holiday Snowflake Frame from silver and from white, glue them off-set then glue them to card front, centering.

Stamp Holiday Star set using embossing ink on white and on silver (Tip: use a “magic” powder pouch on the cardstock before stamping so that embossing powder shakes off easily).  Use white embossing powder, shake off excess then heat emboss.  Also stamp snowflakes from the Large Holiday Star and Merry Christmas from Starry Holiday Greetings using embossing ink, white embossing powder and heat emboss.  Die cut all.  Die cut Merry Christmas and the outer Holiday star from Silver as well. Die cut Merry Christmas from white foam.

Glue the silver Holiday Star under the embossed white Holiday Star-off-setting, do the same with the Merry Christmas. Add foam to the next layer of the stars (silver with white emboss), add foam again then glue smaller white embossed star.  Last glue siler decorative snowflake inside white star then glue white embossed snowflake design on top off-setting a tiny bit.  Glue this stack to the upper right corner of card front (it hangs over the edge side and top). Make sure there will be enough room for the Merry Christmas.

Glue silver Merry Christmas under white embossed Merry Christmas-offset then glue foam Merry Christmas under the stack then glue it to the card front.  Add foam tape or dots to the decorative small, embossed snowflakes and glue them to the card front as desired.

Last step is to add rhinestones as desired.

Thanks for visiting today!

Robin

Galatians 5:22-23 and 19-21
 22 But the fruit of the Spirit is love, joy, peace, patience, kindness, goodness, faithfulness, 23 gentleness, self-control; against such things there is no law. 

I listed the good first but beware of what is not right before God.  This is not from me, this is from God's word, He is your judge, not mankind.

19 Now the works of the flesh are evident: sexual immorality, impurity, sensuality, 20 idolatry, sorcery, enmity, strife, jealousy, fits of anger, rivalries, dissensions, divisions, 21 envy,[d] drunkenness, orgies, and things like these. I warn you, as I warned you before, that those who do[e] such things will not inherit the kingdom of God.

Commit yourself to pleasing God not people.  God will bless you. 

Tuesday, August 11, 2020

HC Festive Winterscapes Debut

Good morning everyone!
This new release has something for everyone.
Cute little village scenes and sweet Nativity scenes too!


HC PRODUCTS  

HCD1-7310 Starry NightWinterscapes Die

HCPC-3920 Starry NightWinterscapes Stamp set

HCDP1-2118 FestiveWinterscapes Paper Collection

HCD2-7261 Booklet FramesDie

HCD1-7260 Booklet BasicsDie

HCD1-7249 Christmas Poinsettia & Holly Die

HCPC-3881 Christmas Poinsettia & Holly Stamp Set

HCFB1-478 3D ChristmasPoinsettia Shaping Mold

PGM15015 Rajni Chawla’sCrystal Clear

85-glitter CrystalUltrafine Transparent Glitter

ANC806 Silver LiningPrills

RACP412 Forget-Me-NotArchival Ink

RACP531 Vivid ChartreuseArchival Ink

352854 Metal Tip forAdhesive

159723 Dries ClearAdhesive

159951 Dries WhiteAdhesive

 Other Products: Versafine Black Ink, Gold Staz-On Ink, clear embossing powder, clear embossing ink, white cardstock, Fun Foam, Silver cardstock.

 For more tips on creating with the booklet frame dies, watch the tutorial at https://youtu.be/kJO5LdNFxgE.

For more tips on creating with the flower shaping molds, watch the tutorial at https://youtu.be/FSdPL7nXvQE.

Instructions: Card size: 4 3/4 X 6 3/4". Cut largest Booklet Frame from Luxe Silver and 1 book marker.  Cut the card base from larges Booklet Basic cut another of the large Booklet Basics from white and cut 2 the next size down from decorative paper.  Cut smaller Fun Foam Pages to glue between pages.  Glue card base to the back of the silver frame then glue the other large white basic to the front of the silver frame.  Glue Fun Foam down then decorative paper page, another foam then the last decorative paper page.  Glue the bookmarker to the center.

 Stamp the wisemen and Nativity using black ink on white cardstock.  Stamp the star using gold ink on white cardstock, die cut all.  Glue the wisemen to the right bottom of book and the Nativity to the center of left page.   Glue the star over Nativity.  Stamp Oh Holy Night using black onto right page above the wisemen then emboss with clear powder.

 Stamp and emboss poinsettias and leaves with clear, heat set then sponge with blue.  Iron off the embossing powder using newsprint to soak up the embossing.  Foam poinsettias and leaves in the 3D shaping mold.  Glue 2 of each size together then fill centers with silver Prills.  Glue 3 flowers and 2 leaf sets to the left bottom corner then glue 2 flowers and 2 leaf sets to the top right corner.  Glitter the flowers and randomly glitter pages.


My next card features the new Snow globe die set.


HC PRODUCTS  

HCD1-7311 Festive NightWinterscapes Die

HCPC-3921 Festive NightWinterscapes Stamp Set

HCD1-7313 FestiveSnowglobe Die

HCDP1-2118 FestiveWinterscapes Paper collection

HCFB1-478 3D ChristmasPoinsettia Shaping Mold

HCD1-7249 Christmas Poinsettia & Holly Die

HCPC-3881 Christmas Poinsettia & Holly Stamp Set

HCD1-7155 Circle BasicsLarge Die

GBKK811B1 Clear Cardstock

RACP412 Forget-Me-NotArchival Ink

RACP531 Vivid ChartreuseArchival Ink

PGM15015 Rajni Chawla’s CrystalClear

85-glitter CrystalUltrafine Transparent Glitter

ANC803 Minnie PearlsPrills

352854 Metal Tip forAdhesive

159723 Dries ClearAdhesive

159951 Dries WhiteAdhesive

 Other Products: White cardstock, blue cardstock, Fun Foam, embossing ink, clear embossing powder, Copic Markers: E21, E31, E33, E35, YG11, YG05, YG14, RV24, RV29, B12, B24, Y11, YR31, C3, C5, C1, E71, E74, red color pencil, clear acrylic shaker pieces.

 For more tips on creating with the flower shaping molds, watch the tutorial at https://youtu.be/FSdPL7nXvQE.

Instructions:

Card size: 4 1/4 X 5”.  Cut Snow globe from blue cardstock folded, making sure to overhang the top by about 1/4" so that the fold stays in tact.  Cut another Snow globe front from blue, cutting the decorative part from the Snow globe base as well.  Cut that decorative piece again from white.  Glue the card front to the base then glue the white decorative piece into the base as an inlay. Cut the circle inside die from the Snow globe set from white then use a circle die to cut a smaller circle making a white frame.  Cut a ring of Fun Foam to fit the white frame then cut a piece of clear cardstock to fit circle frame.  Glue the acetate to the back of the white frame then glue the foam ring to the back of the acetate and set aside.  Cut another circle from decorative paper as a background for the Festive Winterscape, glue it to the center of the blue snow globe base.

 Stamp, die cut and color the Bakery, large and small Christmas trees, carolers and street lamp.  Glue the pieces to the background decorative circle.  Add shaker bits to the scene in the center then carefully glue the foam ring with white frame over the top of scene and shaker bits.  Set something on top for weight and let dry.

 Stamp and emboss poinsettias and holly with clear, sponge with Forget Me Not and Vivid Chartreuse.  Iron the embossing powder off using newsprint to soak up embossing.  Die cut then shape in the mold.  Glue 2 flowers together then fill center with Prills.  Glue the flower and leaves to the base of Snow  globe.  Glitter the flower and Snow globe.

Thanks for visiting today!

Robin

Psalm 46:1

God is our refuge and strength,
    always ready to help in times of trouble.


Tuesday, November 8, 2016

ODBDSLC280-Sketch

Good morning!
Time for a new challenge at Our Daily Bread Designs.
A new sketch to inspire you!
ODBD stamps: Merry & Bright
ODBD dies: Christmas Lights, Snowflake Sky, Doily, Pierced Circles
I used the outer doily die to cut the scallop frame and the vellum. The background was sprayed with Dylusions spray inks on aluminum foil (or any non porous surface) and then sprayed with lots of water and my paper dunked into the inky puddles sort of speak.  When dry,  I cut the "Snowflake Sky" in white and glued it (and the frame that comes with it) to the top of the background that I made. I cut 2 strands of "Christmas Lights", colored them with a purplish color and glued them to my hand cut banner which is popped up with foam tape.  The sentiment is cut with a pierced circle then popped up and  matted with another pierced circle.
I added some rhinestones to the background for some extra bling.
In real life my bow and sentiment matches perfectly so I think the embossing powder and the shimmer of the ribbon must bounce light differently.

Please visit my design team sisters for more inspiration

Here is the sketch, have fun!

ODBD new products used:


There will be a $15 gift certificate  toward stamps for one random winner as well as one winner for the Shining the Light Award.
The participants have until November 27 to join us.
Please submit your entry to the ODBD Blog HERE.

Thanks for visiting today!
Robin

Ephesians 2: 8-10
 8 For by grace you have been saved through faith, and that not of yourselves; it is the gift of God, 9 not of works, lest anyone should boast. 10 For we are His workmanship, created in Christ Jesus for good works, which God prepared beforehand that we should walk in them.

Tuesday, November 17, 2015

ODBDSLC263-Christmas Inspiration

Good morning!
Welcome to my blog!  Today we start a new challenge at Our Daily Bread Designs.  It is always fun to look at a picture a find inspiration for a card creation and that is what this week's challenge is all about (Scroll down for the Inspiration Photo).  There are so many elements in the photo to make it possible for a wide variety of cards to come from it.  I can't wait to see what you create.
I white embossed the snowflake border and then masked the bottom sides and stamped the Christmas tree and embossed in white.  I then sponged dye inks on the entire panel and wiped away the excess.  I colored in the ornaments with purple ink.  I then made a white frame with Spellbinders A2 Rectangles and popped it up.  I die cut the tiny star and placed it over the stamped star just for added interest.  The little spray at the bottom is done with the new Lovely Leaves and the Peaceful Poinsettia dies.  I inked the edges slightly with purple and formed the flowers with my large stylist and a foam pad.  I added white sheer ribbon underneath and red violet Prills to the center of my poinsettia.
My second card is in more traditional colors for Christmas.
I decided to do this card in both color combinations because I love it both ways!  Plus the Inspiration Photo is mostly in traditional colors. See below.
I used the same stamps and dies from ODBD for the second card.  The difference is mostly in the framing.  I used an oval frame embossing folder on the green tree panel and then oval Spellbinders nesting dies for the cut out window and gold frame.  The stamped snowflake frame is on the red framing.  I added gold Liquid Pearls to the ornaments.  For my poinsettias, I rubbed gold Delicata pigment ink on the leaves and then formed.  I then added gold micro beads to the centers.  I also added gold metallic ribbon in a bow  The gold paper I used for the framing is a mirror finish paper which is very metallic looking.
To see more inspiration please visit my design team sisters
To see all the projects created for ODBDSLC263 or to join the challenge click here.  You have until Nov. 22, 2015, at 8:00 pm EDT to join us. By participating in the challenge, you have a chance to win a  $15 ODBD Gift Certificate good towards the purchase of stamps in the “stamps column” on the ODBD website, or to be spotlighted on the ODBD Blog at our next challenge. The random prize winner will be posted on our next challenge post. Please do not post on Flicker as many of us do not have the ability to comment on your cards nor can we spotlight your cards on the blog.

As we get closer to the Christmas season I start remembering more often, the real reason we even HAVE a Christmas season.  It is a real historical event, found not only in the Bible but in a lot of other historical documents.  This Jesus of the Bible really did live, He really did walk among us, teaching us God's ways, true love and giving of ourselves.  He really did die on the cross and He really did rise again from the dead by the power of God our heavenly Father.  There was a purpose for His coming to earth as a baby in a humble stable.  There was a purpose for EVERYTHING He did while on earth.  God had a plan and He set it in motion when He sent His ONLY Son, Jesus Christ, to earth.  He already knew that He would die...that was the purpose.  He sent His perfect lamb to die for all of us so that we could live forever with Him in heaven IF we accept His gift, IF we believe in our hearts and turn away from our sinful life, IF we give our hearts to Him.  
Jesus IS real, now, what are you going to decide?  Believe and be with Him forever or not believe and perish?  He has given everyone the choice.
"for all have sinned and fall short of the glory of God"
Romans 6:23 "For the wages of sin is death, but the gift of God is eternal life in Christ Jesus our Lord".
Romans 10:9 "that if you confess with your mouth the Lord Jesus and believe in your heart that God has raised Him from the dead, you will be saved".
If we confess our sins, He is faithful and just to forgive us our sins and to cleanse us from all unrighteousness.
The most well known verse in the Bible world wide is probably this:
"For God so loved the world that He gave His only begotten Son, that whoever believes in Him should not perish but have everlasting life".

Thank you for visiting today!
Robin


Thursday, December 18, 2014

DRS Challenge #153-Color Challenge

Good morning to you all and happy Thursday!
These are the colors for our color challenge this week.

Christmas Village 4 in 1 accessories 119D, Snowflake Background 187H

My background is done on glossy white paper by stamping with VersaMark and heat embossing with white.  I then used a combination of China Blue, Stormy Blue, Chipped Sapphire distress inks and sponged the color over the embossing then wiped off any excess. My foreground was done on white matte paper and cut out on the border line.  I stamped the tree border onto the glossy as well and then lined them up.  I stamped the tree border once more on shimmer blue and punched out a circle for the moon.  I cut it off at the border line.  I added lots of Diamond Dust to make everything sparkle.  When dry, I cut the panels into one decorative panel (Spellbinders) and then lined it with Silver Leaf Pen.  The card base is also Spellbinders.  I used a word die by Elizabeth Craft Designs on the sheer white ribbon.
I hope you like this and I hope you will join in the fun of the challenge.  There is always a prize given to some lucky winner.  Find the challenge, the other samples from all the designers and how to upload your sample HERE.

Tuesday, December 9, 2014

ODBDSLC219 Christmas with ODBD week 2

Good morning everyone!
Hope it is winter in your neck of the woods...It is still NOT winter here.  Hard to feel like Christmastime when it is so warm. Starting to feel like my Aussie friends!
But I can still imagine...Here is my winter center step card. 
ODBD stamps used:Warm Wishes, Mini Tag Sentiments
ODBD dies used:Gilded Gate, Mini Tags
ODBD paper used: Christmas Collection 2014
My center has three steps.  The trees and snowman are cut out and glittered and stuck on the very back.  The next layer has the ground and snowman so in real life, he looks VERY 3-D. I punched snowflakes and also used an old Spellbinder snowflake die set.  I die cut the garden gate (Gilded Gate) with silver and subbed some gunmetal Rub-Ons through the openings of the die.  I die cut a heart charm to go with the sentiment and also die cut two of the mini tags for the sentiment and Merry Christmas sentiment, then tied them all together with silver thread.

Please visit my other design team sisters for more inspiration:

To see all the projects created for ODBDSLC219 or to join the challenge click here. You have until December 14, 2014 at 8:00pm EDT to join us. By participating in the challenge, you have a chance to win a  $15 ODBD Gift Certificate good towards the purchase of stamps in the “stamps column” on the ODBD website, or to be spotlighted on the ODBD Blog at our next challenge. The random prize winner will be posted on our next challenge post. Please do not post on Flicker as many of us do not have the ability to comment on your cards nor can we spotlight your cards on the blog.


Joy To The World
Be glad and rejoice with all your heart for the Lord is come! He is come as a baby in the manger, as the Savior of the world, as the King of kings and Lord of lords, as the One who would die on the Roman cross for us because He loves us so much!
If we are down cast for any reason, all we need to do is remember the One who holds our lives in His hands, the One who gives us breath to breathe, the One who created all things and holds them together by His might.  He is our everlasting joy.  If we are His, we can have joy even in our trials, even in our darkest hour! Not "yippee, I'm so happy I'm having difficulty!" No, it's just that inner joy, the peace that passes understanding, the joy of knowing we have eternal life through Jesus Christ our Lord!  
Do YOU have Him as your Lord? You can, just tell Him you are sorry for all the times you've failed,  ask Him to forgive you of your sin and tell Him you want Him to come into your heart.  Do it right now.  Then go tell someone.  Tell a local pastor or a friend you KNOW is a Christian and can help you on your way to knowing Him.  Turn 180 degrees from dark to His light.  HE will give you a new heart, a clean spirit! You can email me if you have questions.

Wednesday, October 8, 2014

Repeat Impressions-Winter Magic

Hi, good morning!! I'm the guest artist today for Repeat Impressions, The House that Stamps Built. The theme for this week is Winter!


Repeat Impression stamps used: Chickadee at Rest- 211P
                                                            Wishing You a Season- 424G
Shop here
Other: Spellbinders dies, Stickles-Star Dust, Ribbon, Sky Blue Brilliance Ink for edging.
Click HERE to find Repeat Impression's blog site.

I love winter!! I love snow and cold weather, frost and snowmen! I love the warm woodstove, the hot chocolate and fleece scarves!! There is nothing better than crisp, clean, cold air in the morning with  sparkling frost all around twinkling in the morning sunlight!  Birds fluffy on their perches just starting to sing.  That is what this image brings to mind! I adore Chickadees so I HAD to pick this image for my winter card!  The sentiment is fun too because you could use it for any winter event, it is not specific to Christmas BUT it could also be used for Christmas.. Yes mom, I'd like this stamp set in my stocking please!
I can't wait to see all the winter cards you come up with...Happy stamping!
Thank you Repeat Impressions (Wendy Wyman) for this opportunity to be your guest artist!  It has been so fun!
Blessings,
Robin