Pages

Comments are welcome and very much appreciated!

Tuesday, April 26, 2022

Happy Birthday SouthWest Style

 Good morning! I was inspired to make this card from two things, a pair of cowgirl boots I have and from a lot of different southwest furniture I've seen.  Lots of old wood with turquoise old, cracked paint or turquoise details of another kind plus the always popular silver details on boots and furniture.


I cut the decorative die twice, once in turquoise and once in silver.  I used the silver die cut to "inlay" silver decor in my turquoise die cut.


Material list HERE

Card size:  6 X 6”

Make a card base from kraft 12 X 6” cardstock, fold in half to make 6 X 6” card.

Die cut French Courtyard from turquoise and from silver (be careful when cutting silver so that you do not lose any pieces, you will use some parts normally thrown away).  Also cut the circle sentiment from turquoise, background from kraft and also cut some companion circles using the 2 circle die sets to fit out of silver, turquoise, kraft and white. (cut foam to fit 2 different circle layers to pop-up).

Glue the turquoise French Courtyard to kraft card then fill in some of the design (the rays at each corner and the small circles) with silver.

Stamp sentiment on white circle using embossing ink, heat emboss using Tuscan embossing powder (it is a combination of turquoise, copper and multi color).  Layer all the circles together larges to smallest including pop-up foam layers.  Glue them to the center of card.

Stamp leaves with Garden Patina, sponge, die cut then shape in the mold (see video).  Stamp wild roses using Paradise Teal, sponge with Garden Patina, die cut then shape in the mold.  Glue 2 blossoms per flower, fill centers with silver Prills after making a well in the center of each flower with a foam mat and stylist.  Glitter flowers.  Cut leaves apart in sets of 2 or 3, paint with shimmer and lacquer mix.

Add leaves and flowers to the left side of the center circle sentiment, going around it.

Randomly glitter card.

Thanks for visiting today!

Robin


28 I give them eternal life, and they will never perish. No one can snatch them away from me, 29 for my Father has given them to me, and he is more powerful than anyone else.[a] No one can snatch them from the Father’s hand. 30 The Father and I are one.”


Monday, April 25, 2022

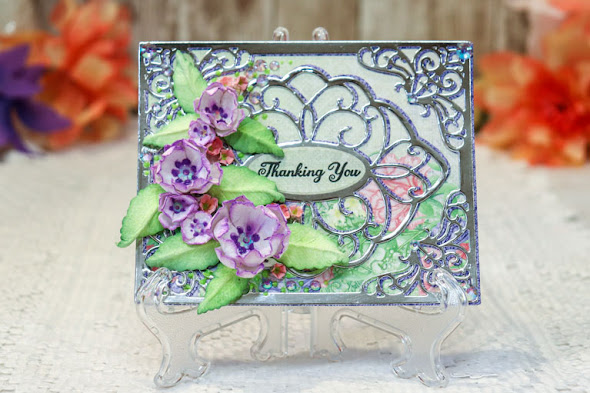
APG Thanking You!

 Good morning, dear Amazing friends!


Today I'm using the Filigree Marquis from Classically Becca along with S4-982 Flowers and 


For papers I used Silver Mirror, and Heartfelt Creations decorative paper.
Nuvo Drops used for embellishments in Apple Green and Crushed Grape
I also used Rhinestones from Buttons Galore (CR2106) in Grape (they have an iridescent look).
The silver decorative die cuts are each shadowed by purple decorative paper.
I hope you like this card and it inspires you to create it or something like it!
Thanks for visiting today!

Robin

Friday, April 22, 2022

Amazing Paper Grace New Release


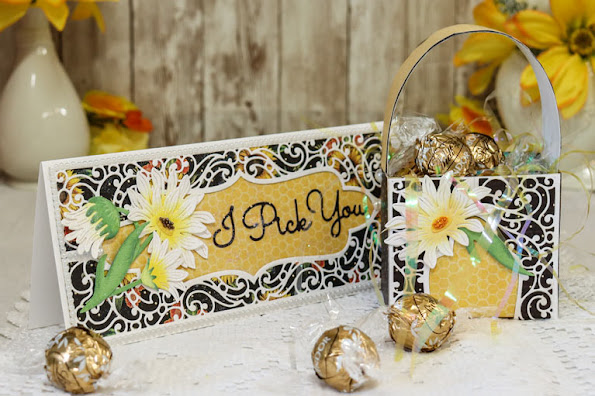
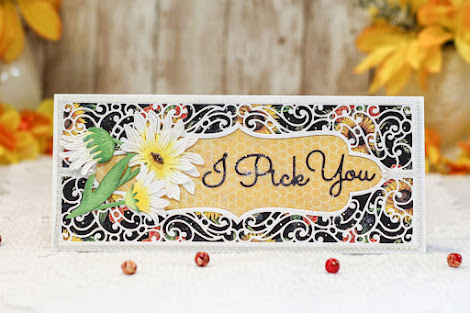
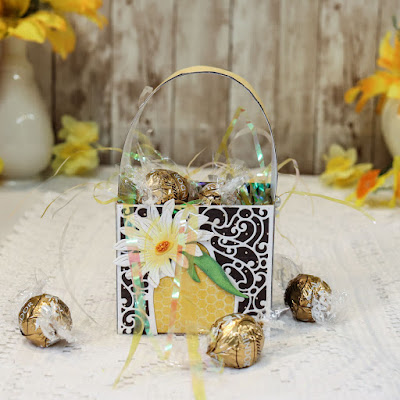
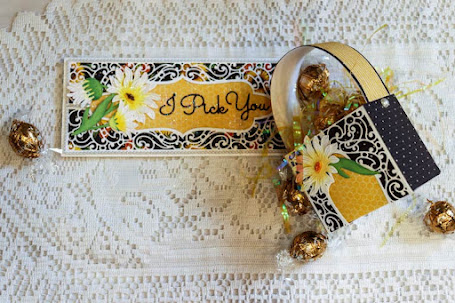
It is spring and that always makes me think of flowers and baskets, bees and daisies.  I wanted to make a card that reflected those ideas and what would be better than a pretty basket to go with a beautiful card.  I'm using new slimline dies from Amazing Paper Grace for these projects.

 
Projects for today's post were used with dies provided by Amazing Paper Grace.

My Projects for Today


Layered Fleur Bouquet Slimlines Availability:
These dies and plates are available from Spellbinders right now! Click here: Layered Fleur Bouquet Slimlines Collection 


Other Supplies: 
White cardstock, graphic 45 decorative paper, pearls, brown Prills, orange Prills, green cardstock

For more Layered Fleur Bouquet Slimlines Collection Inspiration

Visit each Creative Team blog linked below for their take on creative paper crafting ideas using the Layered Fleur Bouquet Slimlines Collection 

Follow me on Facebook!
Follow me on Instagram!

Thank you for visiting today!

Robin


Tuesday, April 19, 2022

It's Your Special Day


Good morning!

Material list HERE

Card size:  5 X 6 7/8”

Start with a white card base the measures 5 X 7” with fold at the top.  Plat outer die of the Filigree Companion Frame Die hanging over fold by about 1/4" (this is so that fold will not be cut away, see video).  Cut another front from white with the same die and then cut one from decorative paper.  Glue together matching edges at bottom and sides.

Cut the decorative frame using the Filigree Companion Frame set from white and from silver, off-set slightly when gluing together then glue to card front. (The inner decorative dies and corners were not used on this card).

Stamp round sentiment using Cactus Flower then stamp the Let’s Celebrate You inside the circle, die cut using the circle that best fits, sponge the edges with Cactus Flower, pop up with foam.

Stamp dragonfly 3 times on vellum using embossing ink then heat emboss with silver embossing powder.  Die cut then color the backs with inks and sponges.  Glitter the top layer after gluing all 3 together at the body.  Add a little white gel pen to bring a little definition to the eyes and black marker as well if desired.

Stamp several wildflower groups from the 2 stamp sets, Daydream Florals and Dragonfly Florals, die cut and color with Copic Markers (or favorite coloring system).

Glue and pop-up florals in left bottom corner inside silver and white frame then glue body of dragonfly and pop-up head to be on top of flowers.  Leave wings free.  Add popped up circle sentiment to card front at right bottom corner (if you haven’t already done that).

Glitter card and flowers, avoid silver mirror paper if possible.


Thanks for visiting today!

Robin

because, if you confess with your mouth that Jesus is Lord and believe in your heart that God raised him from the dead, you will be saved. 10 For with the heart one believes and is justified, and with the mouth one confesses and is saved.


Friday, April 15, 2022

Facebook Talent Tutorial at Amazing Paper Grace Creative Encouragement

 Good morning!

Dies used: S6-174 Romantic Chargeour and S4-982 Cinch and Go IV

Please go to the Facebook page HERE for the step by step (with photos) exclusive tutorial.

Tuesday, April 12, 2022

For My Friend Purple Dragonfly

Good morning!
Debut of the lovely Dragonflies.

Material list HERE

Card size:  5 X 7”

Cut white cardstock 7 1/4" X 10” then fold in half to make 5 X 7 1/4".  Place outer die of the Fancy Classic Oval onto cardstock so that top of die overhangs folded top of card by about 1/4" (see video).  Cut another front using the same die, glue it to the front of card base matching edges at sides and bottom.

Using the outer die and decorative die together, cut a silver frame, glue it to the outside edge of card.  Also cut from silver the inner decorative die. Die cut darker blue paper using the plain die just 1 down from the outer frame die then glue it inside silver frame on card.

Cut the inner decorative die again from light blue cutting the oval center out so that silver shows.  Off-set and glue the blue to the silver.  You should still have a large silver oval in the center.

Die cut the smallest decorative oval from purple and blue combination paper then glue it to the silver center.

Stamp the dragonfly 3 times on vellum using embossing ink.  Use silver embossing powder to heat emboss dragonflies.  Fie cut then paint the backs with Clean Color Markers.  Glue bodies together leaving wings free.  Add 2 tiny blue rhinestones for the eyes.  Cut foam tape or pop ups under the dragonfly body then attach to card on right side.

Stamp For My Friend using Deep Purple then die cut. Set aside.

Stamp flowers using Garden Patina then sponge with a combination of Cactus Flower, Garden Patina and Deep Purple.  Die cut then shape in the mold.  Finish shaping with the Groove Golf Tools.  Glue 2 parts together to form each flower.  Fill centers with silver Prills and glitter flowers.

Stamp leaves using Leaf Green, sponge with Chartreuse, die cut and shape in mold.  Paint leaves with a mix of 3-D Lacquer and shimmer additive.

Create a bouquet with the flowers and leaves on the left side then glue the sentiment between the dragonfly and the flowers.
 

Thanks for visiting today!
Robin
for all have sinned and fall short of the glory of God, and are justified by his grace as a gift, through the redemption that is in Christ Jesus,

Monday, April 11, 2022

Blessings


Just in time for Easter, what a beautiful card to send.  Easter greetings inside and Blessings on the outside.  Lot of spring flowers too.
I've used Graphic 45 patterned paper and some alcohol ink colored pearls to dress up this card.
My flowers were sponged with Rose Madder and Sunflower inks then shaped from behind, after misting with water, with the Groove Golf Tools.
The cardstock color for the base is ivory and I used a darker shade (light tan) for the decorative deicuts.
White was used for the diecut flowers.

Thanks for visiting today.  Hope you are inspired to go create a card today.

Robin

Tuesday, April 5, 2022

For My Friend

Good morning my friends!

Ok, you've guessed it, this is one of my very favorite diecut shapes and I use it a lot
It works so well with those new floral frames too, I just can't resist!
Material list HERE

Card size:  6 X 6”

Make a card base using ivory cardstock folded size 6 X 6.  Place the die at the top barely over the fold so that it will not cut the fold (see video).  Cut the Elegant Hearts Centerpiece from light gold cardstock then glue it to the ivory card base.

Stamp Oval Floral Frame using black ink then die cut and color.  Cut the cottage scene from decorative paper with the Oval Floral Frame to fit inside of frame.  Cut an oval piece of foam sheet or use pop ups to pop up the cottage and frame then attach to the center of the card.

Stamp Magnolia flowers using Magenta Hue (at least 8 of the same size), to make 3 flowers and 2 buds. Stamp leaves using Fern Green, sponge with Leaf Green, die cut then shape in the mold.  Shape flowers in the Magnolia mold.

Glue 2 blossoms together for each flower and use 1 blossom each to make buds.  Glue the flowers and leaves to the oval frame.  Paint the leaves with a mixture of 3D Lacquer and shimmer additive.  Glitter the flowers then add gold Prills to the centers.

Stamp For My Friend using Magenta Hue, die cut the stamped sentiment and also die cut from foam to pop up the sentiment.  Glue the 2 layers together then glue it to the card.

Glitter the card randomly then add some pink Prills to the tree and grass/flower area of cottage image.

Thanks for visiting today!
Please let me know how you like this card by leaving me a comment!!

Robin

Jesus always spent time in prayer seeking to do the will of His Father, how much time do we spend with our heavenly Father to discover His will for us.
He is the vine we are the branches, we get our strength and nourishment from our time with Him.
One thing we have is the written Word of God to know His will especially when you feel like you just don't "hear" God's voice.  Look to Jesus, what He did on this earth, what He said, and ask yourself "what would Jesus do?".  You know He went about doing good to all those who sought Him or even those He just happened to come in contact with.  Let's do the same.
We don't have to agree with someone to love them, do unto others as you would have them do unto you.
That is called the golden rule for a very good reason, Jesus said the first commandment is to love God with everything that is in you and the rest of the commandments are summed up in the next, love your neighbor as yourself.  (your neighbor is ANYONE you come in contact with or know).
Start today, follow Jesus.


Monday, April 4, 2022

Amazing Die of The Month for April


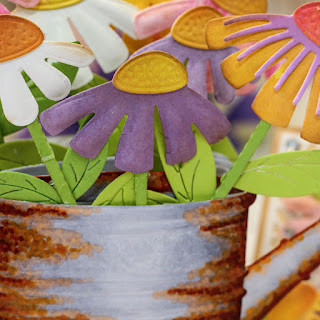
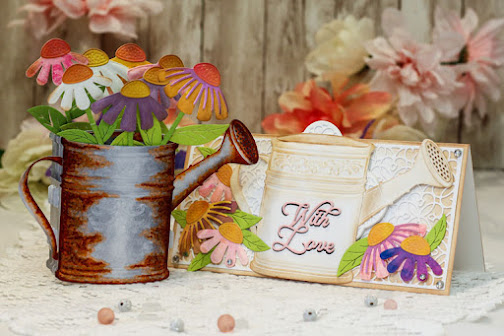
Pop Up 3D Vignette Watering Can Bouquet, the Amazing Paper Grace Die of the Month for April

I have always loved the look of rusty old stuff, in my yard and yes, even in the house.  A rusty water pail is amazing to me, so I wanted to try and re-create what I see so often.  
I've noticed over the years old rusty watering pails and/or wheel barrels, etc. are often used for planters, perfect!  This month we have this 3D watering pail and flowers to go with, what could be better than that!!
 
My creations were created today with dies provided by Amazing Paper Grace.

There are 15 dies included in the Pop Up 3D Vignette Watering Can Bouquet.


I also made this card to go with the 3D Watering Can.  I grunged it up a bit to better photograph with the rusty 3D can with Spring flowers.  
I used Tea Stain Distress Ink to age it.
I did not actually make them to go together as both are essentially cards otherwise I would have used silver or gray paper to make the can on the slimline card.  I just really wanted to show a whole different way to use this cute can and the flowers!


Supplies:
Amazing Paper Grace April 2022 Die of the Month – Pop Up 3D Vignette Watering Can Bouquet,  S5-492 With Love Regalia Card Builder and 
White cardstock, Black cardstock, Pink cardstock, green cardstock, Foam sheets, form tape, iridescent baubles, Tea Stain Distress Ink, sponges, Dries Clear Adhesive. Copic Markers for coloring the can on the 3D card, and spray inks (various) to make backgrounds for cutting out flowers.

For more Pop Up 3D Vignette Watering Can Bouquet Inspiration
Visit each Creative Team blog linked below for their take on creative paper crafting ideas with  Pop Up 3D Vignette Watering Can Bouquet, the Amazing Paper Grace April 2022 Die of the Month!

View this month’s Amazing Paper Grace: Die of the Month video!

Follow me on Facebook!
Follow me on Instagram!