Pages

Comments are welcome and very much appreciated!

Tuesday, February 28, 2023

One In A Million

 Good morning friends!


Card size:  4” X 9 1/8”

Make a shaped card base with the outer die of the Slim Elegant Rectangle (see video). Cut another front from aqua decorative paper using the same die, then glue it to card. Cut the decorative outer part of the Slim Elegant Rectangle from white and from gold.  Using the Curvy Accent Borders die set cut from white and from gold the lattice die plus a decorative border for one side. Glue the gold and the white pieces together off-setting slightly.  Angle the border pieces and glue to inside of frame pieces, cutting off excess. Now, glue these to the card front.

Stamp sentiment using a teal color ink on white, die cut with oval, mat with gold oval a little larger. Adhere pop-ups and adhere to card top right corner.

Stamp pea hen using black, die cut then color.  Die cut the peacock again from gold to use as a mat under colored peacock, glue them together off-set.  Add pop-ups under peacock then adhere to card left bottom corning.

Stamp Wild Asters using Fuchsia, sponge with Magenta Hue, die cut, sponge the backs and sponge the edges. Place upside down on foam mat from the Deluxe Flower Shaping Kit, use a small/medium stylist to shape flowers starting at tips and working toward center. Glue 2 together. Pierce center of each flower. Glitter flowers.

Take out enough stamen to make 3 flowers, set them on waxed paper or paper palette then dye them with Mustard Seed Stain.  Insert into flowers when dry.

Stamp Leafy Accents using Bamboo Leaves, sponge with New Sprout, die cut then sponge the backs, form in the shaping mold. Brush on lacquer.

Glue flowers and leaves to top left and bottom right. Glitter card base randomly.

Thanks for visiting today!

Robin

Jeremiah 29:11-13
11 For I know the plans I have for you, declares the Lord, plans for welfare[b] and not for evil, to give you a future and a hope. 12 Then you will call upon me and come and pray to me, and I will hear you. 13 You will seek me and find me, when you seek me with all your heart. 

Tuesday, February 21, 2023

Peacock Love

 Hello my crafty friends!


Card size:  5” X 6 7/8”

Make a shaped card using the outer die of the Rectangle Filigree Frame (see video). Cut another front using the same die from the teal decorative paper then glue it to the top of card base.

Cut a Decorative Heart including the inside decorative heart and word from silver cardstock. Cut another plain (scalloped heart) from white to lay under the silver for more contrast.  Glue the silver to the white then glue the word LOVE to the center. Set aside until after the next step.

Pop up the outer part of the silver Decorative Heart and adhere to the center of the card front. Now, glue the center white and silver heart flat inside. Add white pearls to the silver where desired.

Stamp Rustic Sunflowers (smallest size) using Majestic Violet then sponge with Cactus Flower, die cut, sponge the backs and edge the petals with Majestic Violet, Form in the mold. Glue 2 together for each flower, fill with Prills then glitter.

Stamp the Leafy Accents using Bamboo Leaves, sponge both sides with New Sprout, die cut, add a bit of violet to some leaves.  Brush with lacquer.

Stamp both peacocks using black, die cut then color with chosen method (Copics used here). Pop both peacocks up over silver Decorative Heart, top and bottom.  Arrange flowers and leaves top left and bottom right.

Optional: cut decorative paper for the inside to finish.

Robin

For this is the message that you have heard from the beginning, that we should love one another.

Tuesday, February 14, 2023

Peacock Cottage

Good morning crafty friends!
A country cottage with Peacocks in the yard...wow!


Material list

 Card size:  5” X 7”.

Make a shaped card (see video) using the outer die of the Elegant Swirl Gateway on folded white cardstock.  Cut another white front then glue it to card base matching all cut edges (note: it will not match fold but extend over). Cut a card front from blue color decorative paper, glue it to the card front matching all edges.

Use the next die in on the Elegant Swirl Gateway to cut the decorative part of this set from white cardstock. Glue it to the card front.

Stamp Ornate Window, Pea hen, and curved posey piece using black onto white, die cut, color.  This sample uses white Painty Pen on the baby’s breath flowers and white on the peacock.  Cut one of the cottages from the Countryside Cottages Paper Collection using the open window die from the Ornate Window. Pop window frame with 6 panes cut out over the cottage images, glue to card.

Pop up curved posy swag onto top of window and pop up the Pea hen to bottom of window.

Stamp leaves using Bamboo Leaves, sponge with New Sprout and Magenta Hue, die cut then form in the Leafy Accents Mold. Brush lacquer onto leaves.

Stamp Sunflowers using Vibrant Fuchsia, sponge with Magenta Hue, die cut then form in the 3D Rustic Sunflower mold.  Glue 2 flowers together then add yellow Prills to the centers. Glitter flowers.

Arrange leaves and flowers around pea hen and also glue 1 to the top of the window over flower image in the center.

Glitter flower images and card base if desired.

Thanks for visiting today!

Robin


Tuesday, February 7, 2023

Debut of the Ornate Peacock

 Hello my friends!

Another new collection and isn't it beautiful!


Material list

Card size:  3 7/8” X 9 3/8”

Create a card base 3 3/4" X 9 1/4" with the Slim Basic Die, cut a Slim Eyelet panel 3 7/8 X 9 3/8”, glue it to the front of card base.  Take the window die (just the open window die) and cut through both layers of the front of card.  Cut a piece of Clear cardstock (window acetate) to fit over opening on the inside of card. Glue it in place all the way to window opening edges.

Cut another card front (Magenta Pink decorative paper) same size as card base with the Slim Basic, also cut a piece of foam sheet the same size.  Cut the window opening on both pieces and then glue them together. Lay some sprinkles onto acetate then carefully glue card front onto card base (make sure to put glue right to the edge of window opening trapping all sprinkle bits inside of window).  Lay aside until later.

Stamp Ornate Window, top of Ornate Window again, Ornate Peacock, accessory piece from Ornate peacock then die cut all pieces and color with Copic Markers or preferred coloring method.

Pop up extra Ornate Window top onto of Ornate Window matching lines.  Glue window from on top of cut-out window on card. Pop up Ornate Peacock onto card at the bottom of window frame as if he is sitting on the window ledge.

Stamp smallest Wild Asters using Deluxe Flower Shaping Cardstock and Fuchsia ink.  Sponge with Magenta Hue, die cut, sponge backs.  Stamp leaves onto Deluxe Flower Shaping Cardstock using Bamboo Leaves, sponge with New Sprout, die cut then sponge the backs. 

Using the Deluxe Flower Shaping Kit, turn all flower and leaf pieces stamp side down onto foam, use a medium stylist from the kit to shape flowers and leaves, starting at outside points working toward centers (see video).

Glue Yellow Flower Soft (or any yellow flower centers such as Prills) to the center of each double flower. Glitter the flowers then glue them along with the leaves onto card (2 at bottom left and 1 at top left for this sample).

Cut another piece of Magenta color decorative paper for the inside of card then glue it in place.  Stamp sentiment using Vibrant Fuchsia onto lower part of a piece of white cardstock then die cut it using the open window opening die.  Glue it to the inside of card to match the front window opening.  Glue the Peacock accessory piece previously stamped, die cut and colored, onto the white “window” with sentiment, toward the top, showing through the front window.

Randomly glitter the card base and the flowers on peacock image.

Thanks for visiting today!
Robin


Whoever pursues righteousness and kindness
    will find life, righteousness, and honor.


Tuesday, January 31, 2023

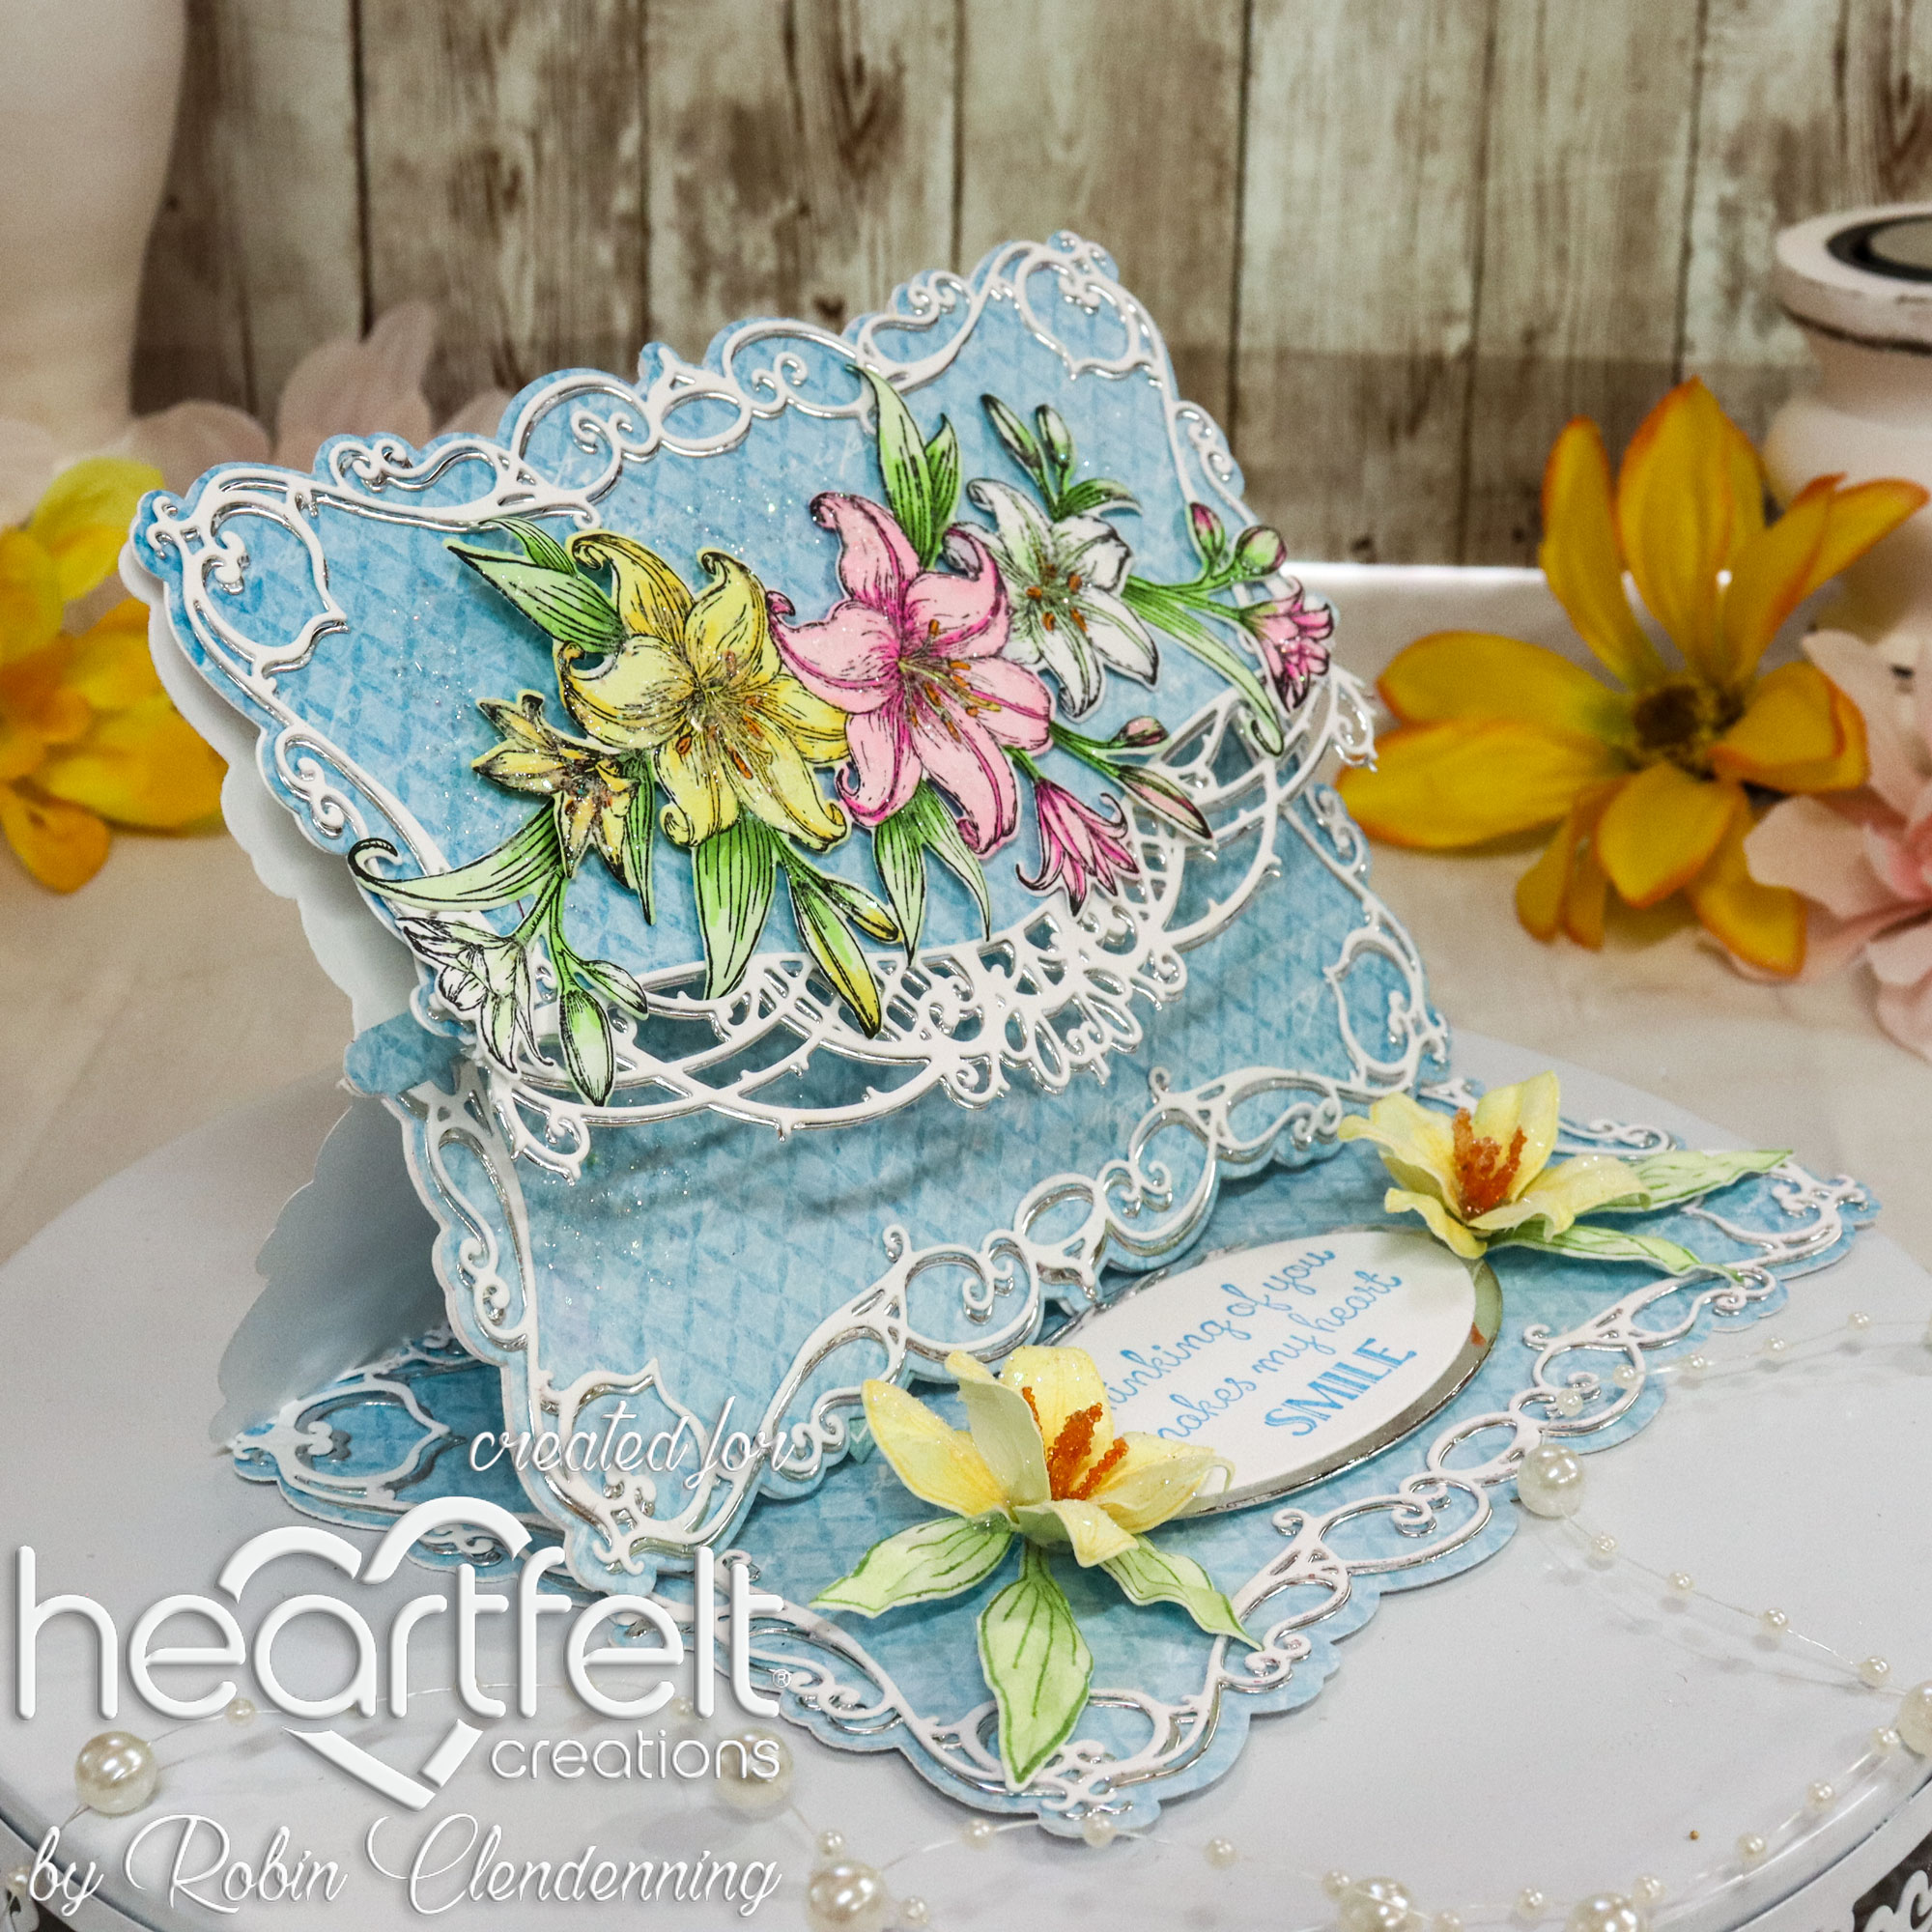
Lily Easel Pocket Card With Tags

 Good morning crafty friends!


 Card size:  5 1/8” X 6 7/8”

Cut a shaped card base (see video), score right side again at the halfway point between center fold and outside edge of base to form easel. Cut blue decorative paper for inside easel base.  Cut another card Front from white and from blue decorative paper then glue front to bottom half of easel front only. Cut another front with an extended folded 1” flap at top (same as if it were a shaped card base), glue the 1” flap to the back of card front (this will make a shaped flap for the pocket you will create), cut the panel (after gluing blue paper on) with the plain edge of the Curvy Decorative Border a little lower than halfway down.

Cut another card front with matching blue paper then cut this panel with a straight edge a little higher than the center (this will be the pocket bottom), glue it to the easel front om the bottom and 2 sides only (leave top open as pocket).  Now cut 2 tags for the pocket and close top flap. 

Cut the Decorative border from white and from silver, glue together off-set then glue to the top curved edge of flap.

Cut the Flourish Companion decorative die from white and from silver 2 times.  Glue sets together. Glue one set to the inside of easel card.  Cut the other set just slightly below center then glue the larger half to the flap (ends will go over the Decorative Border a bit) then glue the bottom half to the pocket front. This will finish card base.

Stamp sentiment with Sky Blue, die cut with oval to fit then die cut a silver oval mat. Pop up on bottom portion of inside easel base (this will make the easel stand).

Stamp the Garden Lily Bouquet and 2 extra lily images using black for the front flap decoration, (these images will cover points where dies cross at the bottom corners).  Color images with Copic Markers (or chose coloring method). Die cut then pop up on card front flap.

Stamp Lilies with Sunflower, sponge with Buttercup. Stamp leaves with Bamboo Leaves, sponge with New Sprout, die cut all then shape in the mold. Glue 2 lilies together for each flower, pierce centers then insert stamen. Arrange 2 lilies with leaves on inside easel next to each side of the sentiment.

Glitter flowers and card base and front. Add ribbon to tags inside of pocket.

Thanks for visiting today!

Robin
Matthew 25:31-40

31 “When the Son of Man comes in his glory, and all the angels with him, then he will sit on his glorious throne. 32 Before him will be gathered all the nations, and he will separate people one from another as a shepherd separates the sheep from the goats. 33 And he will place the sheep on his right, but the goats on the left. 34 Then the King will say to those on his right, ‘Come, you who are blessed by my Father, inherit the kingdom prepared for you from the foundation of the world. 35 For I was hungry and you gave me food, I was thirsty and you gave me drink, I was a stranger and you welcomed me, 36 I was naked and you clothed me, I was sick and you visited me, I was in prison and you came to me.’ 37 Then the righteous will answer him, saying, ‘Lord, when did we see you hungry and feed you, or thirsty and give you drink? 38 And when did we see you a stranger and welcome you, or naked and clothe you? 39 And when did we see you sick or in prison and visit you?’ 40 And the King will answer them, ‘Truly, I say to you, as you did it to one of the least of these my brothers,[f] you did it to me.’

Tuesday, January 24, 2023

Debut of The Slimline Decorative Rectangles for January

 Good morning Heartfelt friends!

Wow, Heartfelt Creations has some new slim line fancy decorative dies, I love it!


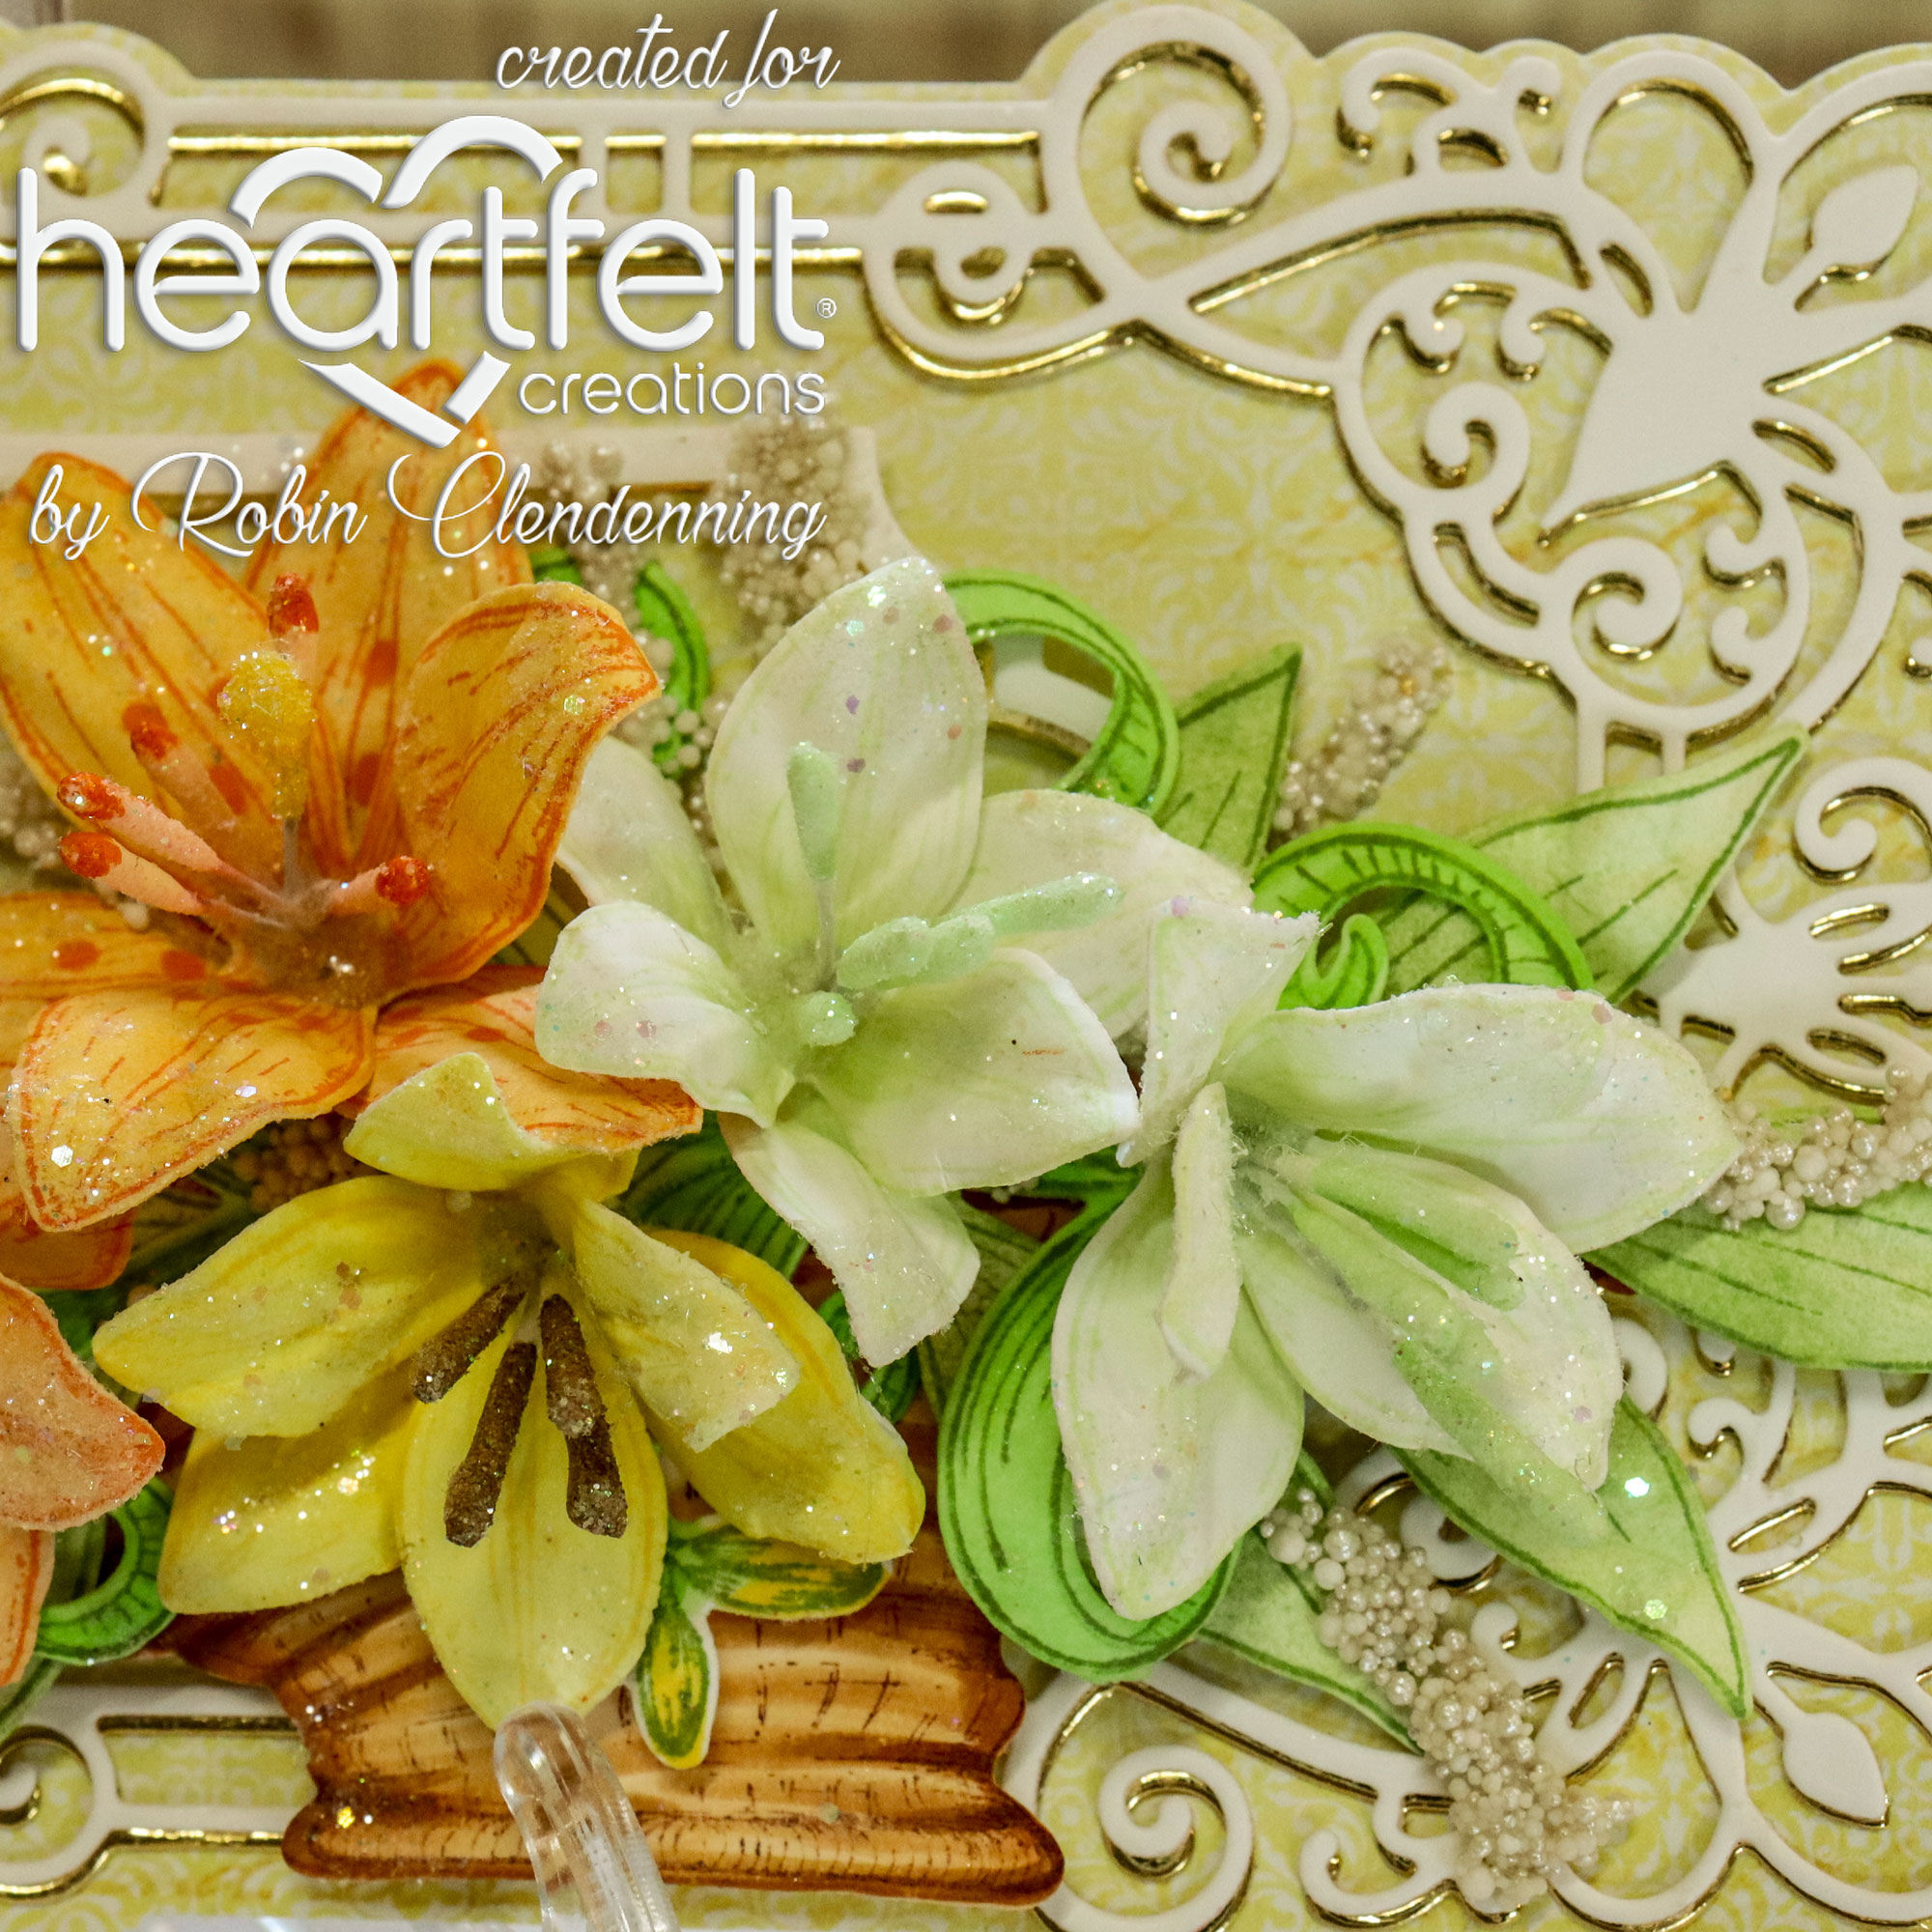
Card size:  4 X 9”

Make a shaped card base using the outer die of the Slim Elegant Rectangle Die Set, (see video).  Cut another front from yellow decorative paper then glue it to the card base.

Cut a white and a gold decorative Slim Elegant Rectangle including inside portion.  Offset the white from the gold and glue pieces together.  Glue the large die cut side to the card front, pop up the inside rectangle set to card front.

Stamp a piece of white with sentiment using embossing ink then sprinkle with gold and heat emboss.  Cut it out with circle then mat with gold and pop up on left side of inside rectangle.

Stamp lilies using Tiger Lily, sponge with same, New Sprout, and Sunflower, sponge with Buttercup. Die cut then shape in the mold.  Glue 2 together for each flower, pierce centers and insert Petite Pollen stamen, (for the orange flowers I colored the ends of the orange pollen with a dark orange). 2 largest flowers have a yellow beaded stamen as well.  Glitter flowers.

Stamp the leaves and spray with Bamboo Leaves, sponge with New Sprout, on the unopen flowers (the Spray) use a little color on the ends, orange and yellow used for this sample. Die cut then shape in mold.

Stamp low basket using Rich Cocoa, color with Copic Markers in brown tones, die cut then pop up on card right side bottom.

Arrange leaves and flowers coming out of basket, secure with hot glue.  Make long drops with hot glue on a nonstick surface then cover with white Prills, after cooling fill in any spots with Dries Clear and more Prills.  Lift from nonstick surface and insert into arrangement.

Thanks for visiting today!

Robin

Do not be deceived: God is not mocked, for whatever one sows, that will he also reap. For the one who sows to his own flesh will from the flesh reap corruption, but the one who sows to the Spirit will from the Spirit reap eternal life.


Tuesday, January 17, 2023

Sending Hugs!

 Good morning!

Using the lovely Lilies again today along with this beautiful slim line decorative die.


Card size:  3 1/2" X 8 1/2"

Cut white cardstock 8 1/2" X 7” then score and fold in half lengthwise to make a 3 1/2" X 8 1/2" card base. Cut decorative paper from Garden Lily Collection with the Slim Eyelet Rectangle to fit.  Cut the Slim Lattice Rectangle from white. Glue layers together on card base except small white oval. On the small white oval stamp the sentiment using Bamboo Leaves.  Also cut the small oval from foam sheet or use pop ups and adhere to center of card.

Stamp the Lilies using Fuchsia and New Sprout, sponge fuchsia flowers with Magenta Hue. Stamp leaves with Bamboo Leaves, sponge with New Sprout, (including Garden Lily Spray), die cut then shape in the mold. Glue 2 of each size together and pierce the centers to add stamen, (Rock Candy stamen were dye dark orange with alcohol ink refill). Glitter flowers.

Stamp Lilac with Sunflower, sponge with Buttercup, die cut then shape (each flower has 3 layers).  Fill centers with Prills.  Glitter flowers.

Brush 3D Lacquer onto leaves, let dry then arrange leaves and flowers around sentiment on left side.

Randomly glitter card front.

Thanks for visiting!

Robin

So Jesus said to the Jews who had believed him, “If you abide in my word, you are truly my disciples, and you will know the truth, and the truth will set you free.”

Tuesday, January 10, 2023

Debut of The Garden Lily

 Good morning crafty friends!


Card size:  4 3/4"X 6 3/4"

Cut shaped card with outer die of the Decorative Circles Frame, cut another front from pink decorative paper (cut another one for the inside-optional), see Video about shaped cards.

Cut the first decorative die from white and from gold.  Cut out center of both then glue them together slightly off-set. Pop it up onto front Cut eyelet circles from gold and white getting progressively smaller, pop them up.

Stamp sentiment using Vibrant Fuchsia then cut with smaller scallop circle, cut the circle from gold as well.  Glue the gold under the white sentiment panel offset, pop it up.

Stamp Lilies in all sizes using Sunflower, sponge with Buttercup, New Sprout, Tiger Lily, and Vibrant Fuchsia, sponge with Magenta Hue. Stamp Leaves using Bamboo, sponge with New Sprout. Use Shaping Mold to shape, glue 2 of the same size together for each flower then pierce centers and insert Petite Pollen.

Stamp image of unopened lilies using New Sprout then color with Copic Markers.

Arrange flowers and leave around left side of sentiment.  Loop pearls on a line, stick ends into hot glue then insert into arrangement.

Glitter flowers with Rajni’s Crystal glitter  

Thanks for visiting today!

Robin

Seek good, and not evil, that you may live; and so the Lord, the God of hosts, will be with you, as you have said. Hate evil, and love good, and establish justice in the gate; it may be that the Lord, the God of hosts, will be gracious to the remnant of Joseph.

Tuesday, January 3, 2023

You Make Me Smile

 Good morning friends!


Card size:  5 X 6 7/8”

Make a shaped card using the outside die of the Simply Classic Rectangle Die set (see video).  Next, cut the outside die again from decorative paper.  Cut the large decorative die from white cardstock. Then cut it again from another coordinating decorative paper (you will only use the inside part of this cut.  Glue the white and the decorative inside parts together on the Decorative paper card front. (Optional, repeat this last part for the inside of card).

Cut the plain edge rectangle from decorative paper and from a piece of foam sheet, glue them together.  Cut the small decorative die from white cardstock and foam sheet.  Glue the decorative part down onto rectangle, stamp the inside cut out portion with sentiment using Jade Brilliance then glue the panel onto foam, glue to center of card front.

Stamp several Pink Peony and New Sprout Hollyhock flowers of different sizes from white Deluxe Flower Shaping Paper.  Stamp several sets of small leaves with Bamboo Leaves, sponged with New Sprout.

Shape all in the flower shaping mold, dampening slightly.  Squeeze the petals together in a pleating style (except smallest Hollyhock, leave those as they are after shaping mold).  Glue 2 of each size together to form flowers. Pierce centers of squished together flowers then insert stamen, white and yellow.  For smallest flowers, glue Prills to the centers making them look like a different type of flower.

Arrange leaves and flowers onto left side of sentiment, glue with hot glue.  Curl the wires cut off of larger flowers and then insert them into arrangement, add pearls to arrangement.

Glitter flowers using Rajni’s Crystal Clear glitter, randomly glitter card front using Crystal Ultrafine.  Brush 3D Lacquer onto leaves.

Thanks for visiting!

Robin


Tuesday, December 27, 2022

Hugs

 Good morning crafty friends!


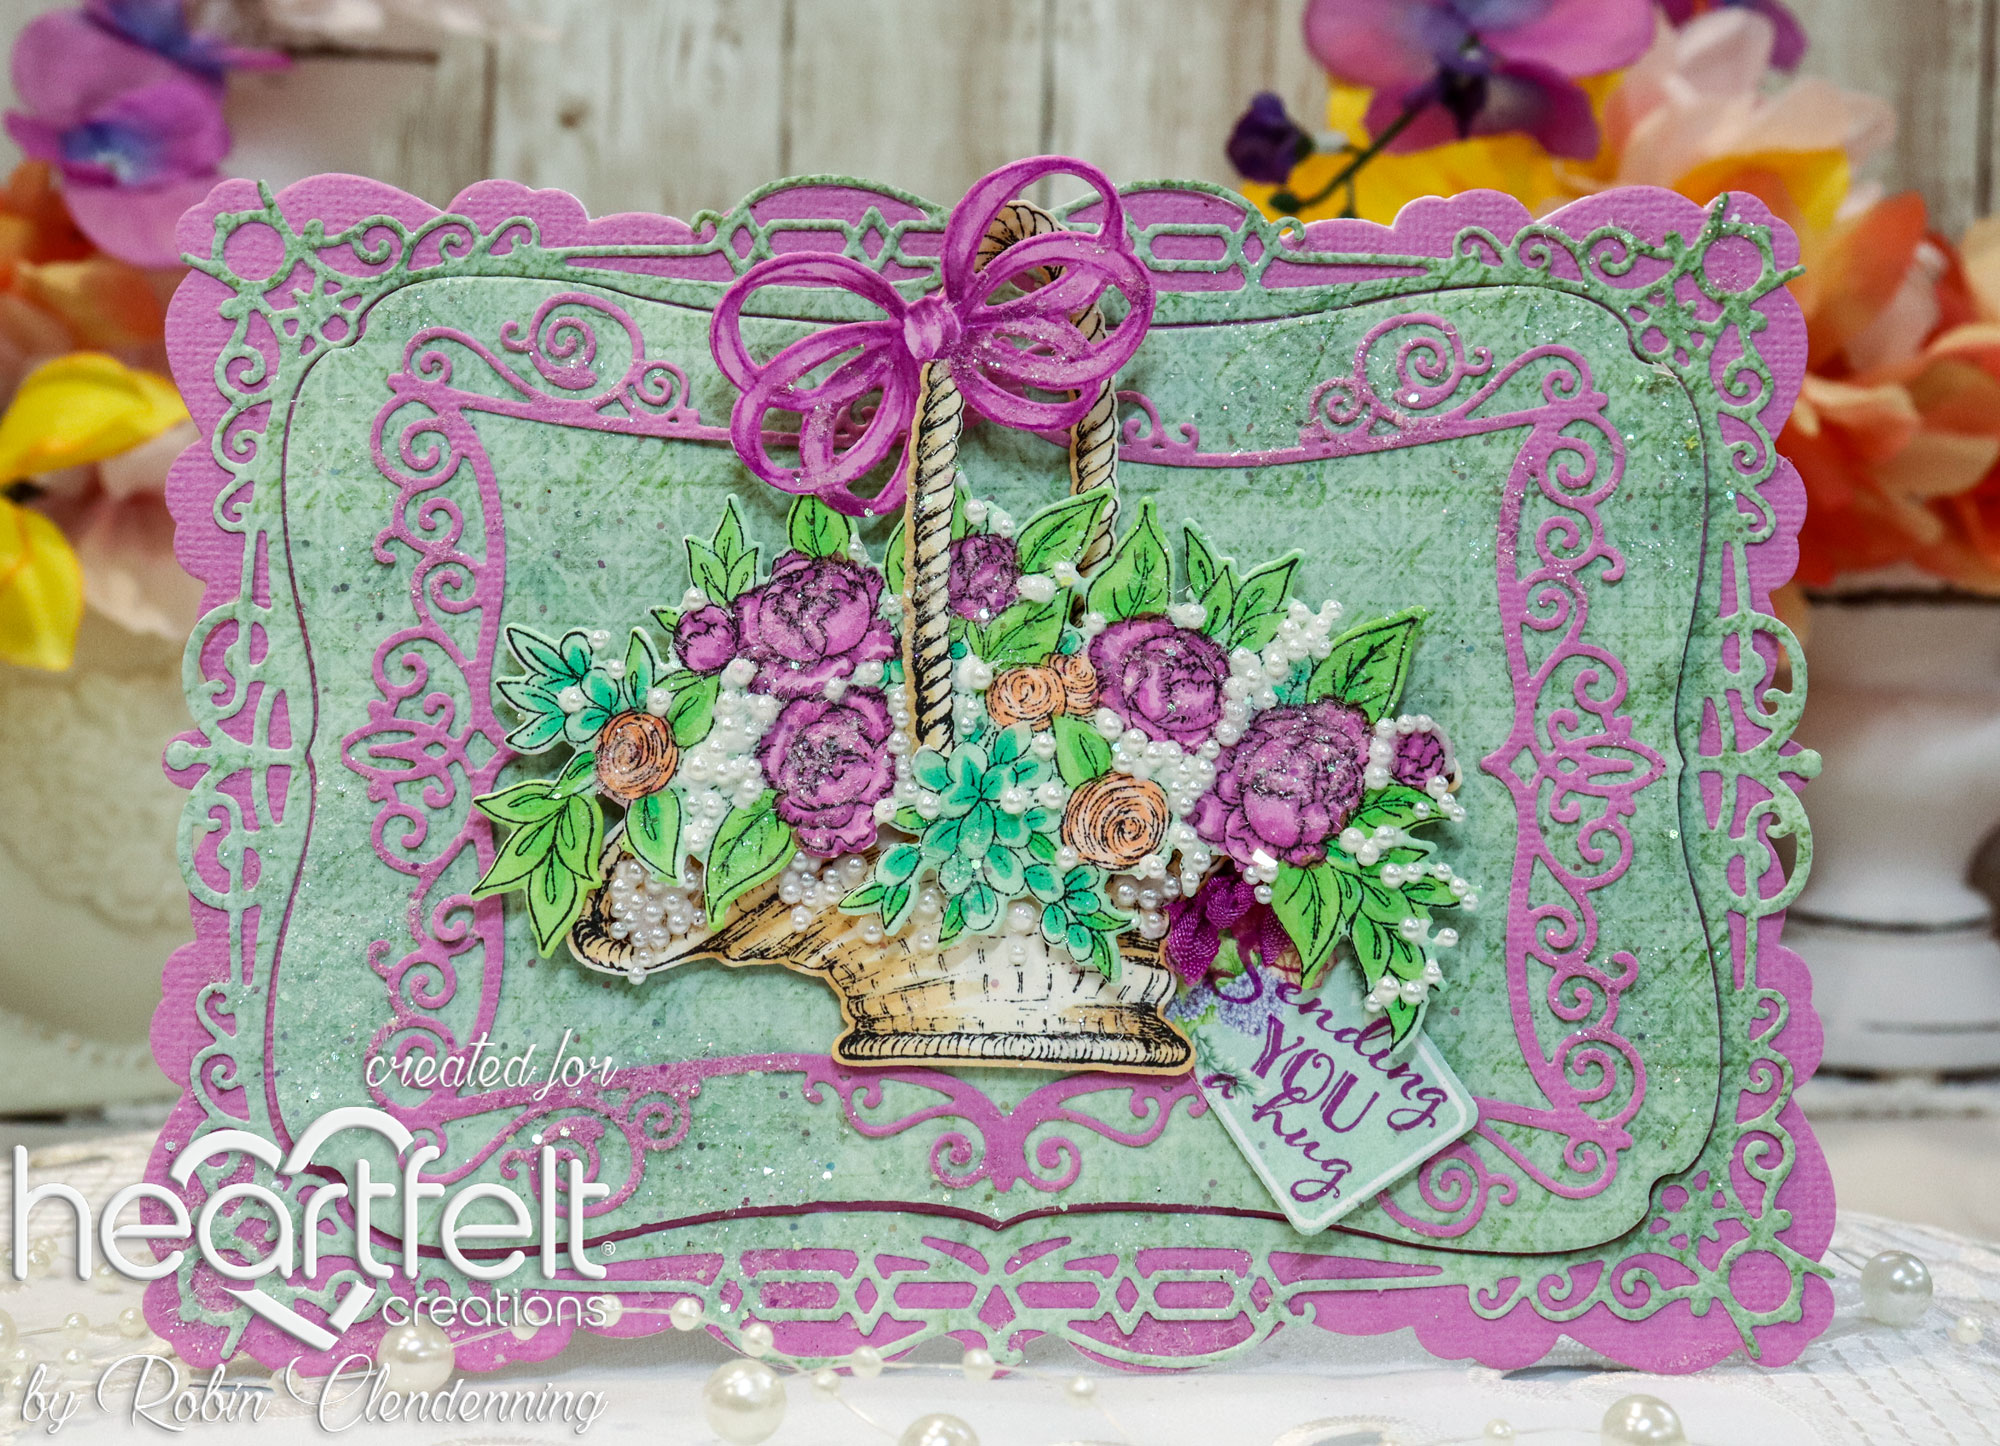
Card size:  5 X 6 7/8”

Make a shaped card using the outer die of the Flourish Companion Frame on a white folded card measuring 5 1/4" X 7 1/4" (see video).  Cut a panel from lavender using the same die.  Glue the lavender panel to the card.

Use the outer die of the Rectangle Filigree Frame to cut the green decorative paper panels.  Glue the outer cut to the lavender front.  Pop up the center green panel. 

Die cut the inner decorative part of the Rectangle Filigree from lavender.  Glue this die cut to the center of card.

Stamp the short basket, handle, and Basket Blooms using black, die cut and color.  Stamp the bow with Cactus Flower then die cut and color.

Pop up the basket, pop up the flowers, make a small slit where the handle should meet basket then insert handle and tuck the back of handle behind the blooms.  Glue the bow to the top of handle.

Glitter the flowers and the card.  Add Nuvo white drops to the baby’s breath then add tiny half pearls on top.

Stamp the sentiment using Cactus Flower on a decorative tag from paper collection, die cut, add a ribbon at the top then tuck it into blooms and basket.

Thanks for visiting!

Robin

Luke 2:26-32

26 And it had been revealed to him by the Holy Spirit that he would not see death before he had seen the Lord's Christ. 27 And he came in the Spirit into the temple, and when the parents brought in the child Jesus, to do for him according to the custom of the Law, 28 he took him up in his arms and blessed God and said,

29 “Lord, now you are letting your servant[e] depart in peace,
    according to your word;
30 for my eyes have seen your salvation
31     that you have prepared in the presence of all peoples,
32 a light for revelation to the Gentiles,
    and for glory to your people Israel.”


Tuesday, December 20, 2022

Thoughtful

Good morning!
Another gorgeous basket to share this morning!
Also, don't you just love these new dies that came out on Black Friday?


Material list HERE

Card size:  5” X 7 7/8”

Make a shaped card using the outer die of the Flourish Companion Frame on a folded 5 1/4” X 7 1/4" card, letting edge of die hang over the fold at the top by about 1/4" (see video).

Die cut a blue decorative paper panel using the same outer die.  Glue panel to the folded card.  Die cut the large decorative frame of the same set from white cardstock then glue it to the blue panel.

Die cut 2 Delicate Daisy Borders from white and from silver, glue each set together slightly off-set. Pop these up onto card both bottoms facing each other in the center (ends will hang over card).

Stamp the Basket blooms and extra lily (2 lilies) using black ink.  Stamp the shorter basket using black ink, die cut all then color.

Pop the basket and then pop the flowers on top in the center of card.  Tuck the 2 sets of lilies under the basket on both sides.

Stamp the sentiment using VersaMark then emboss with silver powder and a heat gun.  Die cut with the Ticket and Tags set.  Cut a silver mat for the sentiment. Pop sentiment up under the basket.

Randomly glitter card, glitter the flowers, use white Nuvo on the baby’s breath, glue silver half pearls on each corner.
Thanks for visiting today!


Robin

Luke 2:7-11

 And she gave birth to her firstborn son and wrapped him in swaddling cloths and laid him in a manger, because there was no place for them in the inn.[c]

And in the same region there were shepherds out in the field, keeping watch over their flock by night. And an angel of the Lord appeared to them, and the glory of the Lord shone around them, and they were filled with great fear. 10 And the angel said to them, “Fear not, for behold, I bring you good news of great joy that will be for all the people. 11 For unto you is born this day in the city of David a Savior, who is Christ the Lord. 

Tuesday, December 13, 2022

My Friend


Good morning crafty friends!
Time for the debut of these gorgeous baskets and bouquets...don't you just LOVE them!


Material list HERE

Card size:  4 1/2" X 7 3/4"

Cut 1 white eyelet slimline sized 3 1/4" X 7 3/4", Cut 1 blue decorative paper slimline straight edge 2 7/8” X 7 3/8” then cut a gold mat about 1/32”.  Glue these onto a white folded card size 3 X 7 1/2.

Cut 1 each of the Daisy Corners (left and right) from white and from gold then glue these sets together slightly off-set.  Pop these corners onto the slimline card at bottom corners. 

Stamp the tall basket, the Basket Florals and the 2 butterflies using black ink, die cut then color.  Pop the basket up in the center of card then glue the Basket Floral onto the basket. Pop butterflies up onto card, glue a rhinestone onto each head and Stickle the wings.

Stamp the sentiment using Oxide Ink (partly pigment so it stays wet long enough to emboss) onto vellum.  Add clear powder then heat emboss.  Trim vellum closely then glue gold trim onto top and bottom and fishtail ends.  Curl sentiment slightly around a fat round pen.  Glue sentiment to card putting glue on bottom of gold only so that it won’t show.

Use white Nuvo to enhance the baby’s breath also use glitter to glitter flowers.

Thanks for visiting today!

Robin


Therefore the Lord himself will give you a sign. Behold, the virgin shall conceive and bear a son, and shall call his name Immanuel.