Good morning and Merry Christmas!
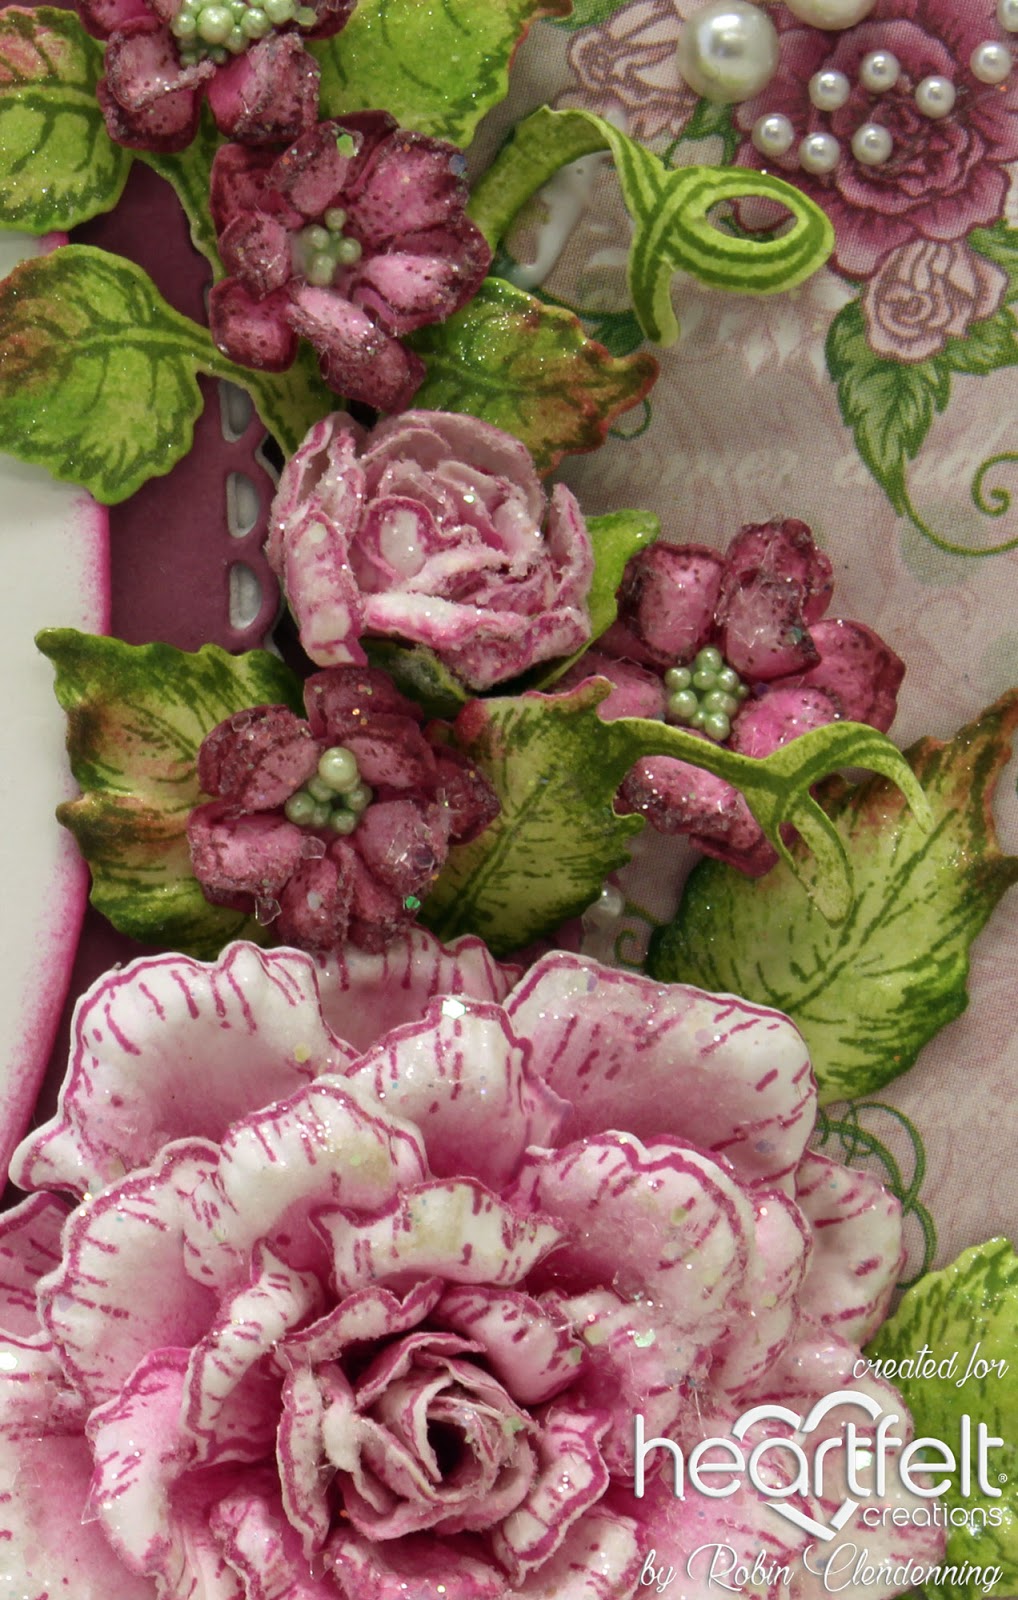
Floral Fashionista flowers and pearls
what could be more feminine and don't
you just LOVE this verse??!!
((Hey, don't forget to scroll down to see my second card))

Other Products:
Pearls, Ivory card stock, foam sheet, dark pink card
stock, Nuvo Shimmer Brush
For more
tips on creating with the flower shaping molds, watch the tutorial at https://youtu.be/FSdPL7nXvQE.
To see how
to shape the roses, watch the video at https://youtu.be/Z8P070kC3oo.
Instructions:
Card size: 5 1/4 X 6”.
Cut Ivory card base then cover with dark pink card stock. Cut another ivory piece 5 1/8 X 5 7/8” and
glue it to the pink. Cut a piece of
decorative paper (rose pattern shown here) about 2 1/2" X 5 3/4" for right side of
card. Cut a piece of dark pink 4 X 6” cut
the right side with the plain edge Fleur border and cut the scalloped edge from
another piece of dark pink. Run the dark
pink panel (not the border) through the die cutting machine with an embossing
folder. Trim the height to match rose
paper and then glue border onto the right side.
The embossing folder used here has lines that cross so there is a pearl
at each cross section. Add a pearl
flourish to the right side on the rose panel.
To decorate: Stamp Unfailing Love scripture on a piece of
ivory and die cut with the oval die set.
Die cut the smaller eyelet oval from dark pink for a mat. Cut an oval 1 size down from the sentiment oval
out of foam sheet. Cut the eyelet oval
out of foam sheet (keep little scalloped hole piece in). Layer the dark pink eyelet to the foam eyelet
and the small oval with the sentiment oval then glue them all together,
stacking. Glue the stack to the left
side of card, centering vertically.
Stamp, sponge and die cut roses and tiny blossoms. Place both flower types in their own shaping
mold and run through die cutting machine. Stamp, sponge and die cut leaves
using Fern Green. Run Leafy Accent
leaves through the machine in the mold.
Form rose buds for centers of roses (see video) and just poke the belly
of all the larger petals, glue them together staggering petals. 2 large, 2 medium, 1 each of the next 2 sizes
down and then your buds in the centers.
(The smaller rose is still 2, 2 and 1 then the bud, just smaller sizes). The
tiny blossoms are 2 layers each and have Prills in the centers. All flowers are
glittered leaves are brushed with shimmer.
Glue leaves and flowers to the
card right and bottom of oval.
Second card, Classic Sunflower in lavender...These definitely look like a different kind of flower, amazing. Might want to get your Classic Sunflowers out, eh?


Second card, Classic Sunflower in lavender...These definitely look like a different kind of flower, amazing. Might want to get your Classic Sunflowers out, eh?


HC PRODUCTS USED
Other Products:
Pink card stock, dark pink card stock, silver card stock,
white card stock, Liquid Pearls-white
For more
tips on creating with the flower shaping molds, watch the tutorial at https://youtu.be/FSdPL7nXvQE.
Instructions:
Card Size: 6 X 6”.
Cut dark pink panel to 5 1/2 X 5 1/2" then cut a silver mat about
1/32” larger on all sides. Glue these to
the white folded card. Cut a panel from
decorative pink paper measuring 5 1/2 X 6” and die cut frame of Ornate Pocket
Accent on top and on the bottom (cut only 1/2 way down the die frame). Cut 2 Ornate Pocket Accents dies out of
white. Cut 1 large circle out of white
and 1 out of silver and then 1 size down out of pink. Glue pink and white together and offset
silver to the right so that it shows like another circle mat then glue to the
center of die cut pink decorative paper.
Now glue white Ornate Pocket Accents die cuts to top and bottom to match
edges. Glue the die cut panel to card
and randomly add glitter to card before decorating with flowers. Stamp sentiment on white card stock and die
cut with the eyelet heart. Pop up heart
on the right side of circle.
Stamp several sets of Classic Sunflowers using Magenta
Hue and then die cut. Sponge a bit of
Magenta Hue just in the centers of each blossom. Form flowers with the pad and stylist found
in the Deluxe Flower Shaping Kit. Glue
together 5-6 blossoms per flower and pierce centers (make a large hole for
several stamens to go into).
Take about 5-6 stamens and fold them in half around a
small wire that can be used like a needle and thread stamen through the
hole. Dab glue around bade of stamen and
let dry before cutting off the excess.
Run the leaves through the die cutting machine in the Leafy Accents
Shaping Mold after misting. Let leaves
dry.
Arrange flowers around circle and when you like the
arrangement, start gluing the flowers to the card. Insert leaves and glue in place. Add glitter to flower petals. Use some white Liquid Pearls or Nuvo to make
little dots around flowers.
Thanks for visiting!!
Robin
John 1
1 "In the beginning was the Word, and the Word was with God, and the Word was God. 2 He was in the beginning with God.
14 And the Word became flesh and dwelt among us, and we beheld His glory, the glory as of the only begotten of the Father, full of grace and truth".
The Word is Jesus and He became flesh on Christmas Day when God sent Him to deliver us from our sin and give us life.
4 comments:
Wow, Gorgeous!
Eye popping Gorgeous!!
Two very beautiful cards. Your flowers are just gorgeous!!
Beautiful cards I love your flowers
Post a Comment