Good morning!
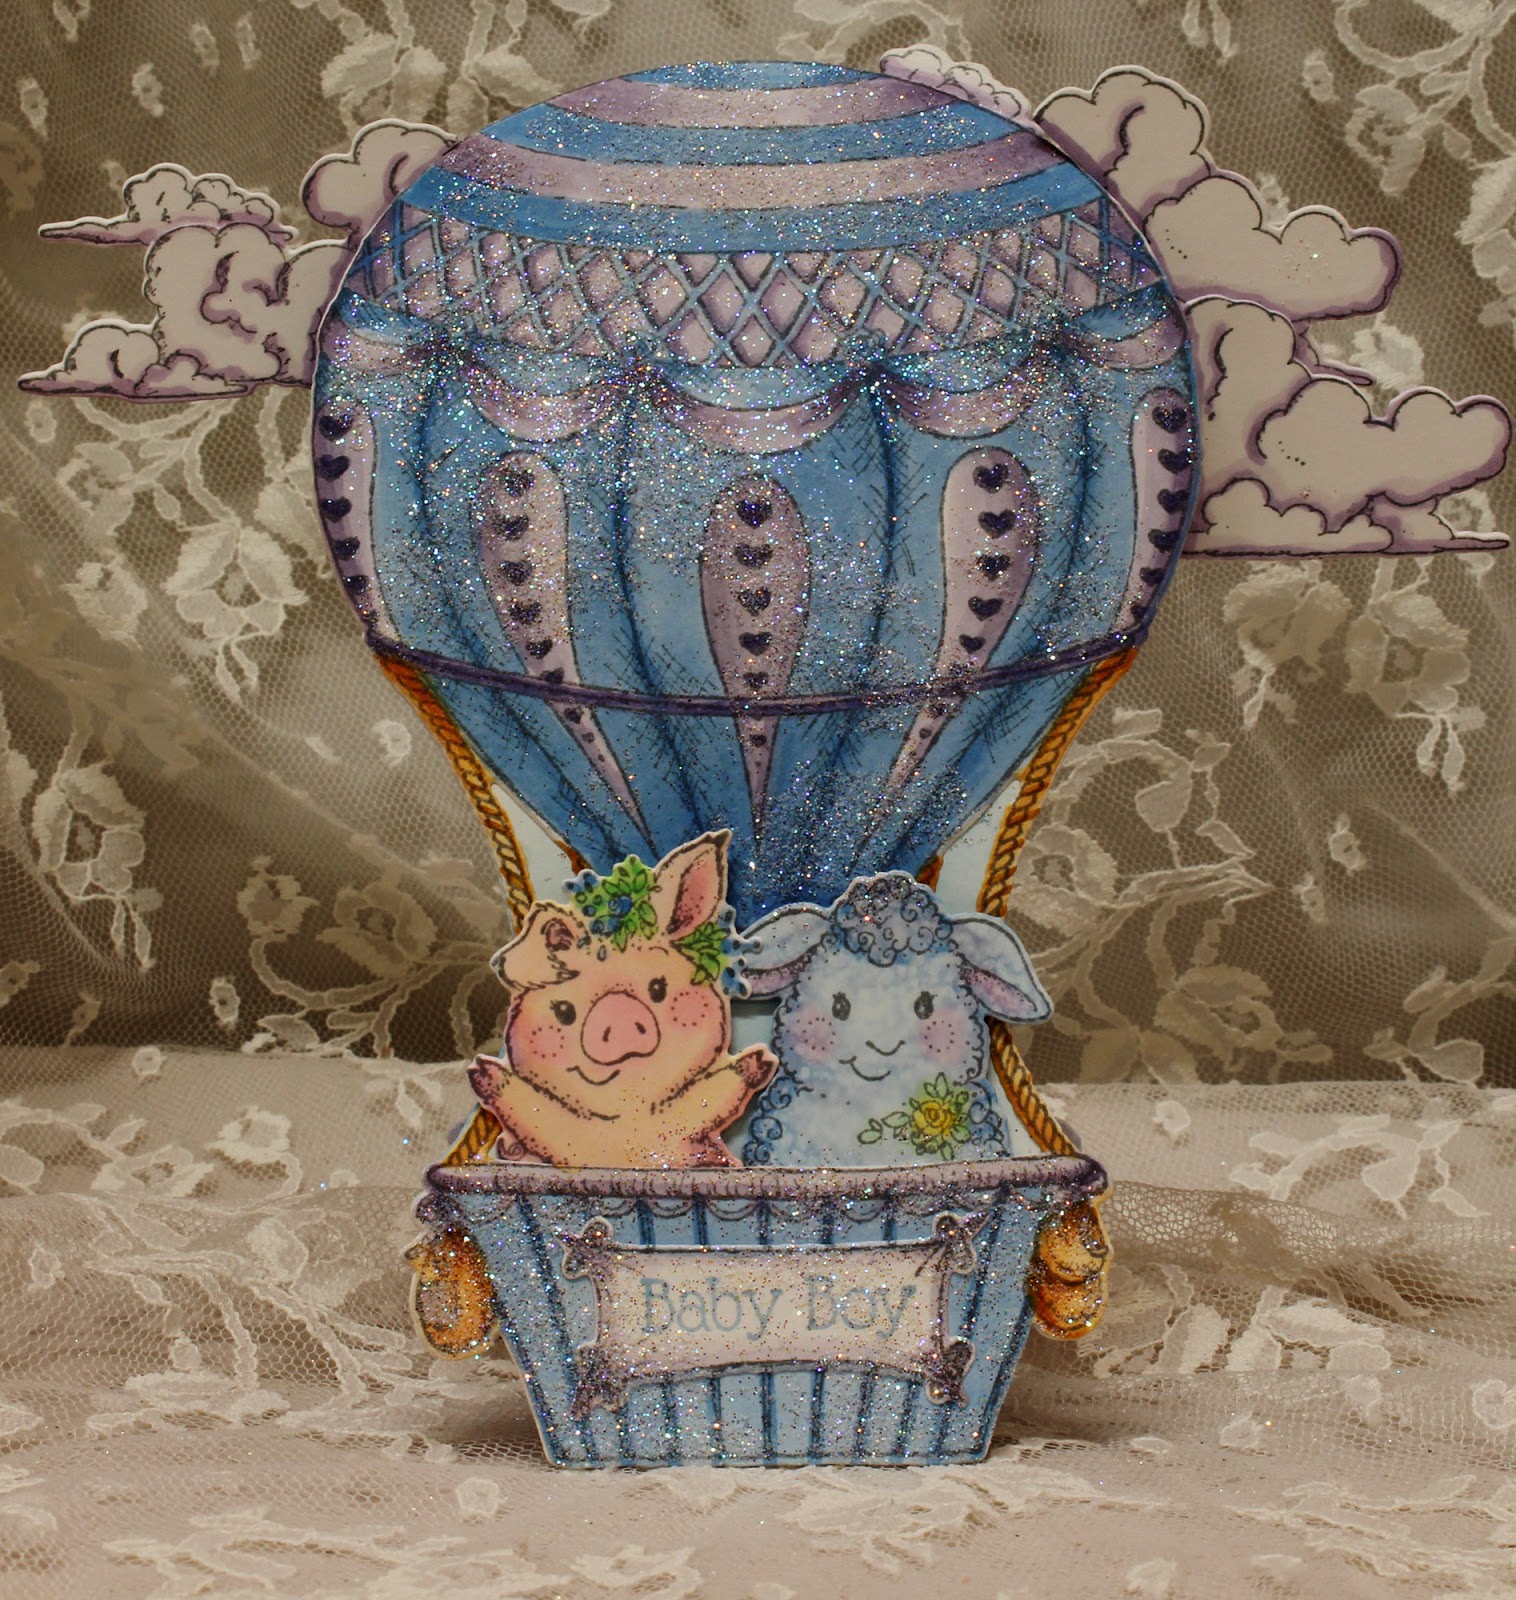
We are finally able to show you these precious
Tender Moment stamps and dies.

HC PRODUCTS USED
Other Products:
Foam Tape, white cardstock, Copic Markers: B00, B000,
B02, BV000, BV00, BV01, RV00, RV10, E00, E01, YG11, YG41, Y11, Y15, E53, E51,
E21, London Fog Memento Ink
For more tips on creating with shaped cards, watch the
tutorial at https://youtu.be/kJO5LdNFxgE.
Instructions:
Card size: 6 X 6 1/2" . Fold 11 X 4” cardstock in half then die cut
card base with the outer balloon die leaving the top 1/4 – 1/2” of die off the
folded end. Stamp the balloon, die cut
and color it (this will be card front but do not glue it to the card until
later. Stamp, die cut, and color two of
baby’s friends, the baby boy sign and 3 sets of clouds. Cut a piece of decorative paper (blue stars
used here) for the inside of card.
Cut the 2
inside ropes of balloon at the bottom so that you can easily insert the 2
little animal friends, glue the bottom part of the animals inside balloon
basket and put some foam pop-ups (foam tape used) at the tops (back side). Now glue the stamped balloon with friends to
the front of the card matching sides and bottom.
For the inside and back of card: Glue the decorative star
paper inside. Glue the clouds to the
back of card toward the top. Trim away
clouds at the top just so that they do not interfere with opening the card,
leave the rest as is. Cut another back
to cover just up to the fold (this is optional for a complete look and to
reinforce).
Glitter entire balloon front.

HC PRODUCTS USED
Other Products:
Star punch, white cardstock, yellow cardstock, yellow
sheer 3/8” ribbon, foam tape, Copic Markers: B00, B21, B41, E43, E79, E31, E33,
E35, C1, C2, C3, RV00, RV10, RV02, E00, E01, E93, E51, E21, E53, YG11, YG41,
G12, Y11, Y115, R81, R83, YR61, E97, E99, medium green ink from Ranger called
Electric Green.
For more tips on creating with the flower shaping molds,
watch the tutorial at https://youtu.be/FSdPL7nXvQE
For more tips on creating with the border dies &
foldout cards, watch the tutorial at https://youtu.be/wxX94X84kUo.
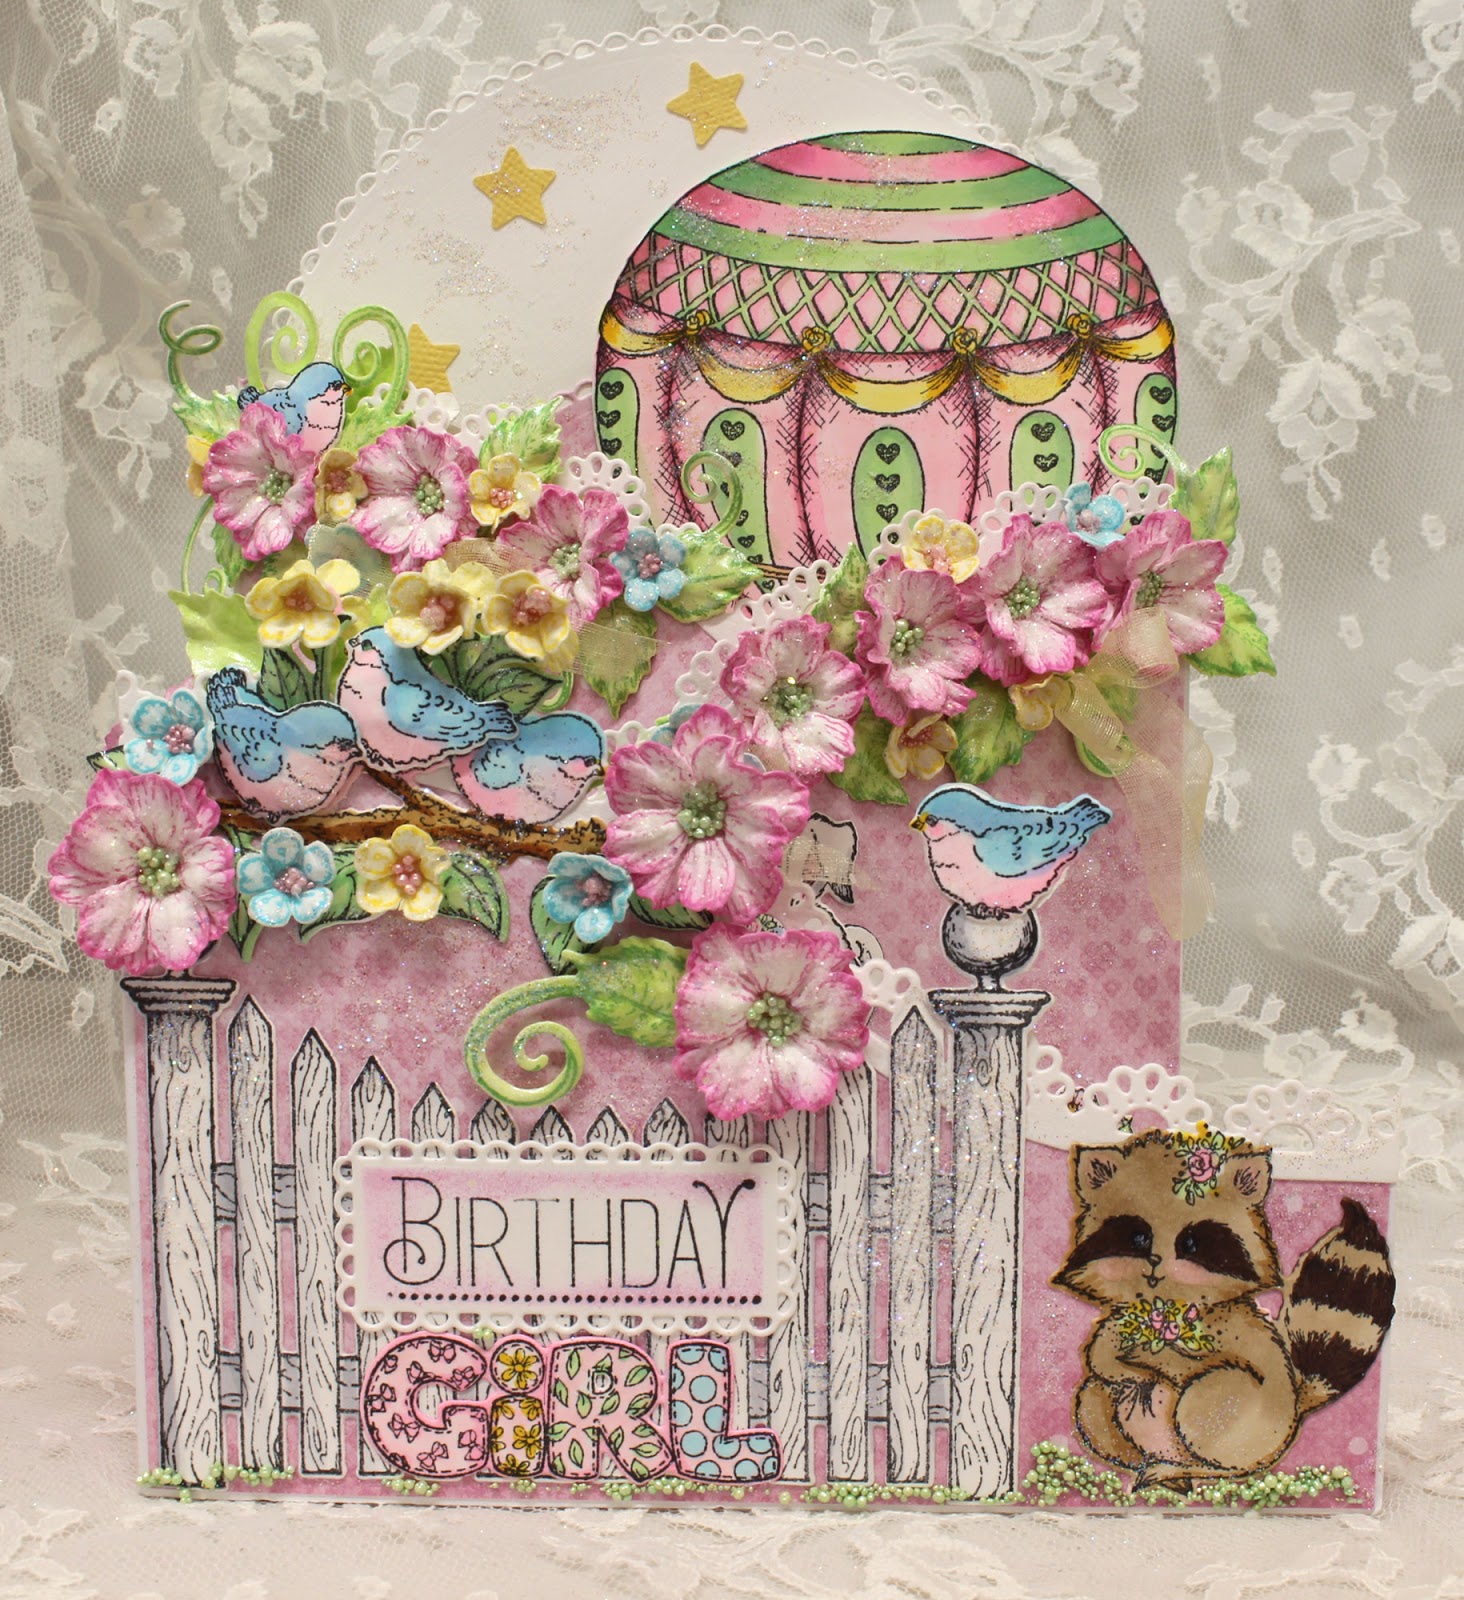
Card size: 6 X 7 3/4". Start with the 6 X 6” Foldout card base. Use the Fleur Border Basics to cut pink
decorative paper to match each panel front and back. Use the Classic Border Basics to cut the top
of the back panel and to cut paper to match.
Use the Rounded Lattice Window Die (half circle with eyelet edge) to cut
a white topper for the back. Glue the
white to the front side of the back panel then glue the pink paper on top (this
makes a nice finish front and back of card).
Glue all the pink paper panels to their respective card panels front and
back. Cut scallop eyelet white borders
for each top edge (except the back as it has its own topper).
Stamp
using Black Memento ink, the balloon, 1 “girl”, 1 each of the lamb, bunny,
pigs, raccoon, and 2 each of the deer and elephant. Stamp 2 fence, 5 birds, 1 flower pot, 1 cart,
1 bench, 1 branch with birds using Black, die cut all and color. Using Magenta Hue, stamp several small Wild
Rose die cut and sponge the edges. Use
the mold to form then glue 2 together for each flower. Fill centers with light
green Prills. Using Forget-Me-Not and
Buttercup ink, stamp several small cherry Blossoms for the filler flowers. Fill
each center with light pink Prills.
Using a medium green color ink, stamp 3 leaf sets and sponge with
Chartreuse, die cut then form in mold.
Use a star punch to punch 3-5 stars out of yellow.
Cut 4 various small tags for pockets and cut 2 white
pockets using the Fleur Borders and Pockets.
With everything stamped and colored it is time to decorate the card.
Starting at the back: glue 1 elephant and a deer inside
the balloon basket (cut the bottom of the ropes to fit as needed) then glue the
balloon to the card. Glue 1 corner to
the bottom left. Insert 2 tags and glue
stars onto the background. Stamp Happy Birthday
and cut with the eyelet long die shortening as needed, sponge the inside with
Magenta Hue then glue to the balloon basket.
Next panel
in to the left, Glue the 2 pigs inside of cart then glue card to the
panel. Glue the little lamb next to the
handle as if it was pulling the cart and stopped for a pic. Glue flowers and leaves to the top right
side.
Next panel
to the left, Glue the bench to the panel then glue the bunny sitting on the
bench. Glue the pot to the right side of
bench and the little deer to the left side of the bench. Glue 1 bird sitting on top of the bench
back. Glue more flowers and leaves to
the top right side.
Last panel
(on the inside), Glue 1 pocket to the right bottom and insert 2 tags. Glue the remaining elephant to the left
side. Glue a small bit of flowers and
leaves to the top right. Close card.
For the
front (when card is closed). Glue fences
pieces together back to back then glue to the front of card on the left
side. Match 2 birds (as close as
possible) back to back and glue to the fence post on the right, inserting fence
post between birds at the bottom. Glue
the branch with birds above the fence, pop up 2 of the birds, decorate the
branch with flowers and leaves. Glue the
raccoon to the bottom right side. Stamp
part of the sentiment saying “Birthday” onto white and die cut with the long eyelet
die shortening as needed. Sponge inside
then glue it to the fence leaving room for the decorative “Girl” beneath. Glue some light green Prills along the bottom
on all “scene” panels for grass.
While card
is closed, decorate the remaining showing panel top with flowers, leaves and a
bird. Now all panels showing when open and when closed should be
decorated. Add glitter to all the
flowers, gloss the leaves and add sheer yellow ribbon where desired in flower
arrangements and tags. Randomly glitter
card panels as well.
Thanks for visiting today!
Robin
Thanks for visiting today!
Robin
Mark 8:36 New King James Version (NKJV)
36 For what will it profit a man if he gains the whole world, and loses his own soul?
3 comments:
Two very sweet cards - love your colouring and the gorgeous flowers!
Wow...two absolutely gorgeous cards Robin! You are definitely the queen of fold out cards!
Super cute, Robin. I know you spent some time on these and they are vry pretty!!!!
Post a Comment