Pages

Comments are welcome and very much appreciated!

Tuesday, September 22, 2020

High Sierra Happy Birthday


Good morning!
Bendi cards are so fun to make!
Today I've featured the new Stamp and die sentiment sets!


Elaborate Birthday Die

Elaborate Birthday Stamp Set

Create a ‘scape Backcountry Die

Create a ‘scape Backcountry Stamp Set

Create a ‘scape Wilderness Die

Create a ‘scape Wilderness Stamp Set

Create a ‘scape Trout Lake Die

Create a ‘scape Trout Lake Stamp Set

Create a ‘scape Nature Die

Create a ‘scape Nature Stamp Set

Wilderness Retreat Paper Collection

Woodsy Critters Die

Woodsy Critters Stamp Set

Memento Tuxedo Black Ink

Metal Tip for Adhesive Bottle

Dries Clear Adhesive

Rajni Chawla’s Crystal Clear

Crystal Ultrafine Transparent Glitter

Go Man Go Prills

I Cannot Tell A Lilac Prills

Minnie Pearl Pearls

Deluxe Flower Shaping Paper Pack of 50-White

Other products:

White cardstock, Dark green cardstock, Acrylic Shimmer additive, Brilliance Copper Ink, Copic Markers: C1, C2, C3, C5, W1, W3, W5, E53, E31, E33, E35, E97, E99, E51,E93,YR04, R43, R24, R39, G94, YG63, YG03, YG17, YG05, B91 ,93, B41, YR82

Card size: 6 X 6 3/4".  Make card base from dark green cardstock: Back is 6 X 6”, side flaps are 3 1/2 X 6” and 4 1/2 X 6”.  Score 1/2" on 1 side of both flaps, fold down and score well.  Draw a line on the other side of both at 1/4" then drawn in a tab (both flaps).  Cut away above and below each tab (to reinforce tabs glue acrylic packaging [like dies are packaged in normally] over the tab and inward about 1”, this will be covered by paper later).  Make a slot for the right flap in the back at 1 1/2"from left side by lining up the bottom of flap and back then drawing a line at the top and bottom of the tab made earlier.  Use a ruler and craft knife to cut.  Make a slot for the left flap into the right side flap at 2” from right side using the same method of lining up the bottoms then drawing lines at top and bottom of tab.  (Nothing is glued together at this point because side flaps still have to be die cut with the mountains). 

Using 2 pieces of the same paper design, cut panels for the inside back and both flaps (a continuous lake used in this sample). Save the sky for the inside mountains (die cut only because they are backwards) and for the die cut base of the large sentiment.  The outside of the flaps are stamped scenes pieced together.  Start with the mountains, you need 5 1/2" of mountains on each side so you have to stamp it once then mask the end and stamp again to lengthen mountains.  When you die cut, be careful to only cut the tops not too far down so that you keep mountains together.  You will want each mountain scape to be the width and height of the side flaps.  Die cut a piece of sky paper along with the stamped mountains so that you have mountains for the inside of flaps (add a little color to make them look more like mountain ridges).  Now place the die cut mountains on the dark green flaps then draw a line on cardstock, now cut the dark green cardstock flaps to match mountains.  Color the mountains and tree line then color the rest of the panel green to blend in with other stamped elements.  Glue the backward mountains on then glue the inside decorative paper lake on both side and the back. Now glue each flap to the back panel (in back) using the 1/2" scored tab.

To finish the inside: Stamp the ducks and 2 extra ducks, the deer set, bunny, squirrel, 2 cardinals, 2 sets of cattails and pine tree using Tuxedo Black, color with Copic markers. Glue deer over paper deer, bunny and squirrel on far left, ducks to the back right side.  Glue cattails where needed.

Die cut large sentiment base from dark green (as well as the sky colored decorative paper die cut, glue them together then glue to the back panel over hanging top of back by about 3/4".  Stamp and die cut sentiment using black then glue it to the sentiment base layer.  Sponge copper ink on the edges of the sentiment base. Now glue the cardinals top right and bottom left of sentiment base, glue 1 extra duck to the bottom right and the other extra duck on top of scene duck.  Add white and lavender Prills to the ground sections.

To finish the outside (front) of flaps: Stamp 2 sets of deer, Trout Lake, extra trees of Trout Lake, flowers, rock landscapes, die cut and color all with Copics.  For the right side, glue the Trout Lake extra trees, deer, flowers (cut apart) and rock landscapes and 1 deer piecing together to look best. For the left flap, glue more extra trees, rock landscapes, flowers and 3 deer.   Add Prills to the bottoms of both flaps.  Glitter mountain ridges and lakes inside and out, glitter Happy Birthday panel. Tuck small tabs into the slots to close card, card stands while closed because of the bowed front.


My second card uses another of the new 
sentiment stamps and dies.


Large Garden Zinnia Die

Small Garden Zinnia Die

Large Garden Zinnia Stamp Set

Small Garden Zinnia Stamp Set

Large 3D Zinnia Shaping Mold

Small 3D Zinnia Shaping Mold

Summer’s Garden Paper Collection

3D Leafy Accents Shaping Mold

Leafy Accents Die

Leafy Accents Stamp Set

Groove Golf Tool Set

Decorative Circle Frames Die

Eyelet Circle & Basics Small Die

Fancy Special Day Die

Fancy Special Day Stamp Set

Archival Ink-Majestic Violet

Archival Ink-Buttercup

Archival Ink-Cactus Flower

Archival Ink-Leaf Green

Archival Ink-Fern Green

3-D Crystal Lacquer

Metal Tip for Adhesive Bottle

Dries Clear Adhesive

Rajni Chawla’s Crystal Clear

Crystal Ultrafine Transparent Glitter

Go Man Go Prills

Deluxe Flower Shaping Paper Pack of 50-White

Other products:

White cardstock, Acrylic Shimmer additive, Fun Foam sheet

For more tips on creating with the flower shaping molds, watch the tutorial at https://youtu.be/FSdPL7nXvQE.

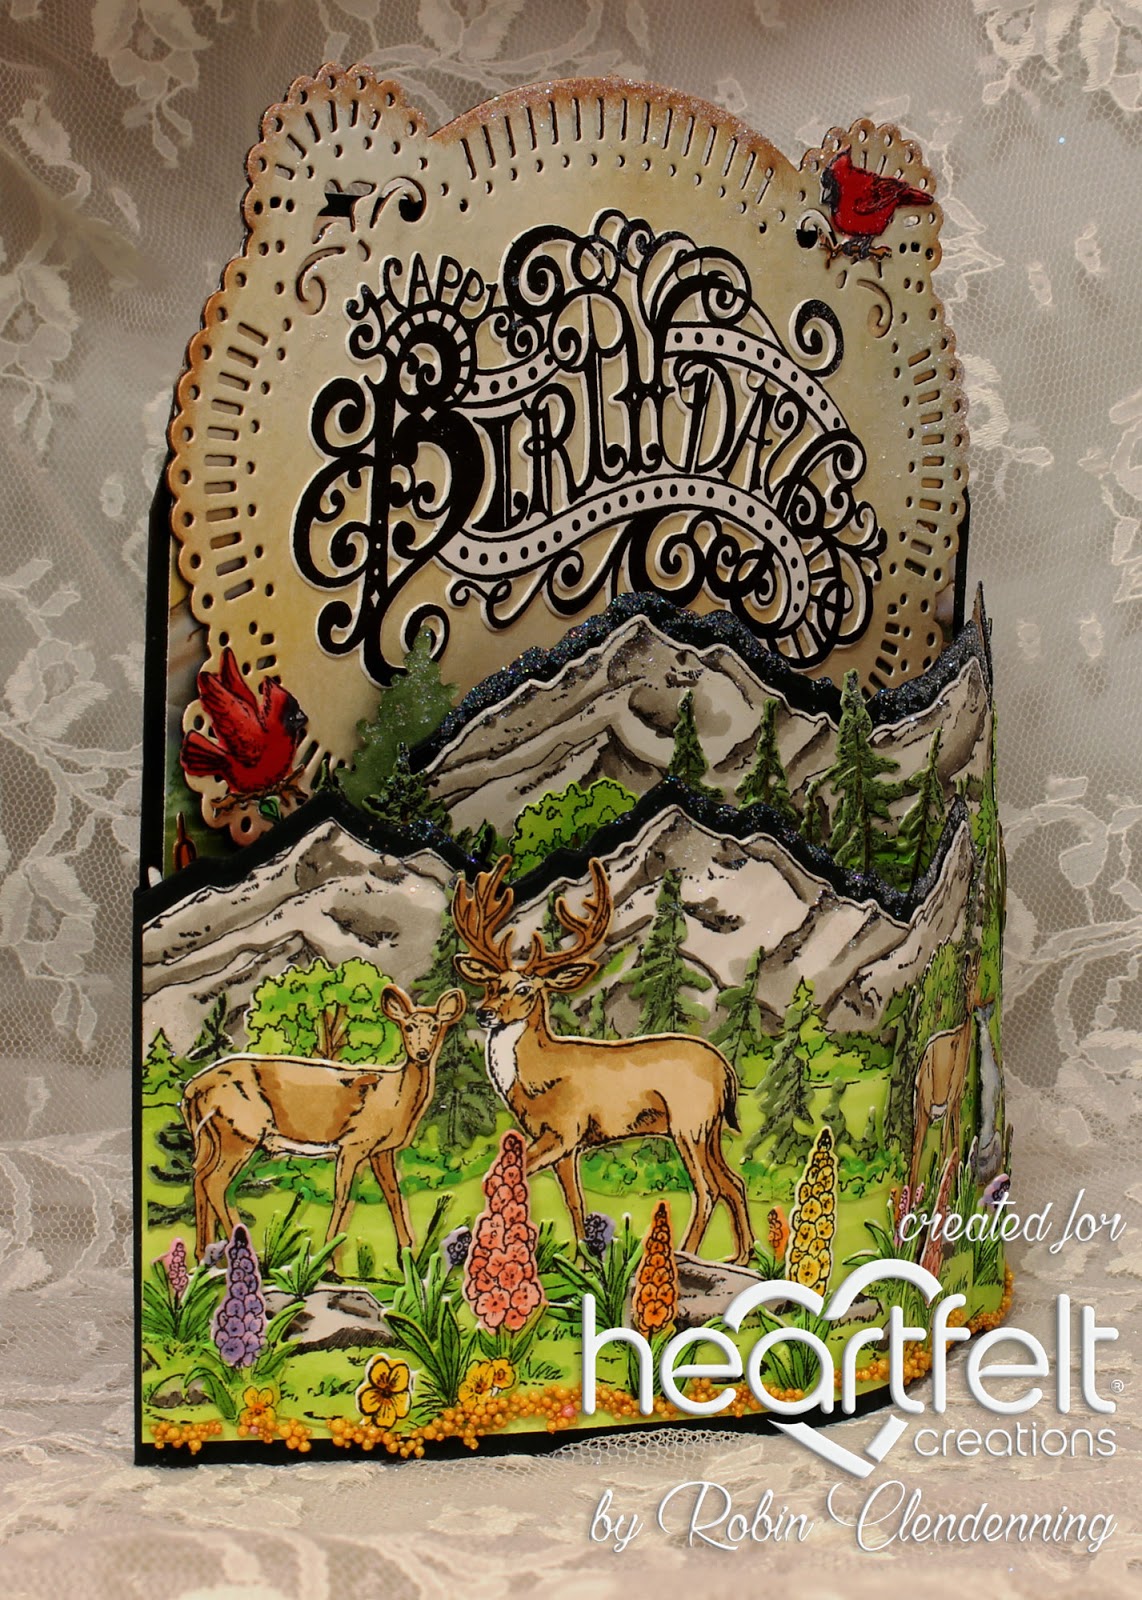
For more ideas on creating with the 5 x 7 Decorative Frame Dies, watch the tutorial at https://youtu.be/qdBFA5VpmSo

Card size: 4 3/4 X 6 3/4".  See video for making shaped cards then cut another front from purple decorative paper.  Cute large decorative die from white also from Fun Foam sheet.  Cut 2 eyelet circles from the die set from purple decorative paper and 1 circle in between eyelet circle sizes out of white along with another Fun Foam sheet circle to fit.  Stamp sentiment using Majestic Violet, die cut and die cut sentiment base from white.  Stack all layers together and glue. Tip, when using foam sheets for dimension, after gluing, lay a book or something with weight on top so that it dries nice and flat, if needed put a piece of wax paper on top before book so that nothing sticks).

Stamp medium and small zinnia using Majestic Violet, sponge with the same plus some Cactus flower in the centers.  Stamp smallest zinnia again using Buttercup, sponge with Buttercup, die cut all the flowers, shape in molds.  Use Groove Golf tool for shaping the tubular yellow centers of the zinnia (larger flower).  Glue 4-5 layers together for each flower and fill centers with Prills.  Stamp leaves with Fern Green, sponge with Leaf Green, die cut, shape in the leaf mold then cut apart to use as needed.  Arrange flowers and leaves on the right and left sides of the circle with sentiment.  Glitter the card front and use Rajni’s Crystal Clear to glitter the flowers.

Thanks for visiting today!

Robin

Psalms 139:23-24

23 Search me, O God, and know my heart;
Try me, and know my anxieties;
24 And see if there is any wicked way in me,
And lead me in the way everlasting.


2 comments:

Jan's Paper Flowers said...

Two stunning cards Robin! Love how you created both a masculine one and a feminine one. Brilliant!!!

Patricia Manhire said...

Two very different beautiful cards!! Love them both.