Pages

Comments are welcome and very much appreciated!

Wednesday, February 14, 2018

Heartfelt- Lovely Lilac Foldout

Good morning!
Look at these lilac!
The elegant, and well known lilac blossom takes center stage early in the spring season and is one of the first flowers to usher in the season of new beginnings! Enchanting clusters of tiny blossoms come together to create quaint floral displays with amazing color and a sweet-smelling fragrance that brings with it a feeling of gentility and old world charm! Join us in celebrating a perennial favorite…Introducing the Lush Lilac Collection by Heartfelt Creations! Venture out for a springtime stroll through a dreamy, garden themed paper collection filled with soft hues of luscious lavenders, deep purples, sky blues and pastel pinks accented with dreamy and romantic illustrations of cozy cottages, lilac filled parasols and lovely lilac filled garden settings! Softly scrolling swirls, vintage script and lace like details bring an old fashioned charm to this soft and innocent assembling of decorative papers, while three graceful cling stamp sets along with coordinating dies boast lush lilac sprays, a fetching lilac laden scroll, several endearing sentiments, as well as a winsome lilac filled parasol perfect for paper craft creations celebrating a multitude of occasions! A wonderful mix of lilac buds and blossom petal illustrations lend themselves beautifully to creating realistic and dimensional lilac blossoms when paired with the coordinating die and will bring a gentle touch of spring to all of your garden creations! So come along with us as we celebrate new beginnings and springtime beauty with the new Lush Lilac Collection!


HC PRODUCTS USED      

Other Products:
Lavender card stock, lavender rhinestones, lavender sheer ribbon, VersaMagic-Pretty Petunia, white card stock

For more tips on creating with the flower shaping molds, watch the tutorial at https://youtu.be/FSdPL7nXvQE.

Instructions:
Card size: 4 ¼” X 6 1/4”, Sponge Pretty Petunia ink on edges of foldout card. Cut back panel top to a curve.  Cut decorative paper to fit each panel inside and out, cut an extra panel for the back to make a pocket.  Cut 2 pockets from lavender card stock using the Fleur Borders and Pockets.  Cut one sheet of blossoms, the scroll and the long Sweet Lilac spray from decorative paper.  Stamp color and die cut 1 short Lilac spray from Lush Lilac.  Cut out 2 small tags, 1 large tag, 1 ticket and 1 oval tiny tag from decorative paper to match your decorative paper panels.  Cut 4 tag hole re-enforcers from lavender card stock (using the Luggage and tags Die).  Cut 4 lavender borders with the Fleur Border Basics to match curves on panel tops.  Cut the extra back panel into a pocket using the Fleur Border Basics at about ½ the size and at an angle.  Use the Lilac Shaping Mold to shape all your blossoms. 
Glue each piece of decorative paper to the correct panel and then glue the borders on top.  Glue the pockets on by using glue only on the two sides that make a corner.  Starting with the front, decorate each panel.  Use the cut out scroll stamped with “for My Friend” on the front (I used it right over the scroll which was there). Pop it up with foam tape.  Add shaped blossoms to the front then glue a single gold Prill to each center.  Sponge glue onto blossoms and randomly on paper then glitter with Crystal Clear.  The next panel has a pocket, add small tag, glitter and rhinestones. Next is the house panel, add the small spray at top right, extra blossoms and glitter.  Add large spray to back of 3rd panel (you can see it from the front when the card is closed), glue on extra blossoms and glitter.  On the inside of 3rd panel is another pocket, add another small tag, rhinestones and glitter.  For the back (4th panel), decorate the decorative paper and pocket with blossoms, glitter and rhinestones then make the large tag by adding the ticket “Birthday Wishes” and tiny oval tag “With Love” to the front with a few blossoms at the top and glitter of course!

These classic foldout cards always look good!  You can decorate any way you like it and your friends will all love it!!  Whoever is lucky enough to receive one will be thrilled!
Thanks for visiting today!
Robin


1 Corinthians 13:1-3 (NKJV)

The Greatest Gift

13 Though I speak with the tongues of men and of angels, but have not love, I have become sounding brass or a clanging cymbal. And though I have the gift of prophecy, and understand all mysteries and all knowledge, and though I have all faith, so that I could remove mountains, but have not love, I am nothing. And though I bestow all my goods to feed the poor, and though I give my body to be burned,[a]but have not love, it profits me nothing.

Wednesday, February 7, 2018

Heartfelt Creations- Singing in the Rain Basket

Good morning!!!

I love this little gift basket and it is very easy to make!
I used Spellbinders Octagon dies for this one.
Cut the Octagon then measure how long it is from one flat side to the other and cut you bottom about 1/8" longer to make up for score lines.
score every 2" (or however long each side of the octagon is that you cut).
Make your bottom wide enough to make a score on each long side about 1/4" in from the edges (these will be the tabs to glue to the front and back).  Cut on each score line up to the 1/4" score line that you made.
Glue the tabs to the inside from one side to the other following the octagon line,
that is the basic basket.


HC PRODUCTS USED     


Other Products:
Spellbinders Octagon die, Spellbinders Octagon Scallop, white card stock, foam tape, acetate, ribbon, Copic: Y21, E50, Y24, Y11, Y00, R02, R10, E000, E00, E01, E93, BVOO, BV01, BV02, BV13, V01, V12, V15, B21, B24, R20, R22, YG61, G82, YG11, YG41, G02,

Instructions:
Project size: 3 ¾” X 4 ½” X 2 ½” Gift basket.  Cut two of the largest size Octagons and a strip of card stock 3 ¼” X 7 ½” from white heavy card stock.  Score the white strip every 1 ½” along the long side.  Turn to short side and score at 3/8” on both sides.  Cut along 1 ½” score lines on both sides only just to the 3/8” score line and then cut each little flap at each end to make a V type flap (V with a flat bottom) You will need them cut like this to go around the corners of the octagons.  Fold along each score line and fold flaps inward to glue to inside of octagons then set aside until both octagon tops are decorated.
Cut a straight edge octagon about 1/8” smaller all the way around than your white, from decorative paper then cut another piece of coordinating decorative paper with the scallop edge octagon and glue to white octagons.  Stamp, die cut and color images and shape slightly then adhere with foam tape and glue to both sides of basket.  Attach bird with a strip of acetate.  Decorate the bottom scored strip to coordinate with basket front and back.
Glue bottom strip to basket front and back using tabs that you made on each side of 7 ½” strip and let dry thoroughly.  Glue Festive Holiday Die cuts to inside and outside of both sides at the top.
Attach ribbon to make a handle by punching holes on each end and threading ribbon through then tying a knot on each end (on the inside of box).  Fill with Opalescent grass and candies or some other small gift.

Thank you for visiting today and may God bless you!
Robin

Galations 5:19-23
19 When you follow the desires of your sinful nature, the results are very clear: sexual immorality, impurity, lustful pleasures, 20 idolatry, sorcery, hostility, quarreling, jealousy, outbursts of anger, selfish ambition, dissension, division, 21 envy, drunkenness, wild parties, and other sins like these. Let me tell you again, as I have before, that anyone living that sort of life will not inherit the Kingdom of God.
22 But the Holy Spirit produces this kind of fruit in our lives: love, joy, peace, patience, kindness, goodness, faithfulness, 23 gentleness, and self-control. There is no law against these things!
You always think of a sinful nature as being a murderer, thief, liar, but look at that list...quarreling, jealousy, anger, selfish ambition, envy? wow, makes you think and makes you do a little self examination doesn't it?? Let's see, do I envy, well yes, sometimes...hmmm do quarrel?   I guess I should be more careful when I am tempted to judge someone else's perceived sin, eh?
I think I better concentrate more on the fruit of the spirit like love, kindness, goodness, gentleness etc...Yup, that is where my heart and head should be and I will keep my eyes on Jesus my Lord, He showed us while on earth and He continues to teach us now, if we let Him. 

Saturday, February 3, 2018

Lantern Tutorial

Let's get started!
Directions
Step 1
To make this lantern start by cutting 5 Gift of Love Box die cuts out of white card stock. Fold along the score lines and sponge gold metallic ink to the score lines and edges.
Step 2
Cut windows from each panel with the insert die that come with the Gift of Love Dox Die. Adhere vellum inside of each window opening.
Step 3
After the glue is dry, adhere the box together (start with the long straight edges, gluing all panels together before starting on the middle section of tabs). This makes it much easier to put together.
TOP TIP Adhere the top section of tabs together last.
Step 4
Cut out 3 each of the Sweetheart dies (you will need about 2 2/3 of the wide border and 2 1/3 of the narrow border). Score the wide borders at 1 1/2 " then 4" on all 3 pieces (The last piece will be cut to fit, either 2 ends over-lapping a bit in the center or just center 2 1/2 " section for the last side of lantern).
The narrow border is scored in 1 7/8" sections to fit the top sides of each panel.
Glue the pieces to the lantern (top narrow border will need to be clipped at each corner to lay flat). Add pearls to the top of the narrow border and add larger pearls to key points of the wide border.
Step 5
Make several roses to decorate the lantern. There is a video here to show you how you can easily make EZ beautiful flowers with the 3D Rose Shaping Mold.


After shaping and gluing together several roses (gold metallic ink was used to stamp the roses), adhere leaves where you want the roses to go on the lantern and then glue the roses on top of the leaves to finish decorating.
Just add a battery operated tealight to finish! We love to see the projects you make, please share them with us on our Facebook page HERE.
Tutorial by designer Robin Clendenning
Heartfelt Creations products used
3D Rose Shaping Mold


Other products:
Pearls, white card stock, Galaxy Gold Brilliance

Wednesday, January 31, 2018

Heartfelt Creations- Shaped Fairy Easel Card

Good morning!
It's time to vote for 5 or more of your favorite design team members and I sure hope I'm one of them!!
 Click here: http://hcgo.co/DesignTeamVote2018. You can only vote one time and you have to select 5 or more to be eligible to participate. Voting ends on February 9th, 2018.

I love easel cards and I love shaped cards 
Today I have a shaped easel card and aren't those birdie just too cute!!
I love this umbrella and bird stamp  and actually, I use the birds 
alone quite often!  They are the perfect size for a number 
of projects I've done recently!


The bow is the stop on this easel card.


HC PRODUCTS USED      


Other Products:
Spellbinder dies: Victorian Medallion 2, Labels 32, Octagons, Scalloped Octagons, Curved Squares, Foam tape, Stickles-Star Dust, ribbon, Copic Markers: BG10,BG11, BG32, Y32, YR31, YR12, YR15, YG61, G82, RV00, RV10, RV02, R00, R11, R20, White card stock, light blue card stock.

Instructions:
Card size: 5 X 5  Make the easel base using the Curved Square die having about ½” off the edge of the fold to keep top and bottom as one piece and then score again on top part to create easel.  Cut another single Curved Square to use as the card top first layer.  Cut 2 more Curved Square from light green decorative paper (Singing in the Rain paper collection) one for the top and one for inside. Cut two Victorian Medallion 2 from light pink decorative paper, layer on top of light green paper top and inside.  Cut 4 Festive Holiday die cuts from white card stock and glue 2 to top and 2 inside.  Cut 2 Scalloped Octagon from light blue card stock and 2 straight edge Octagon from decorative paper.  The scalloped octagon will be flat side facing up and the straight edge octagon will be point facing up so they will be off set.  Do the same top and inside.
Stamp, die cut and color one bird on branch and one umbrella with birds.  Pop up the umbrella with birds for the card top.  Add sparkle to the flowers.  Glue the bird on branch to the bottom of inside.  Die cut a tag sentiment from decorative paper and glue to the bottom of a wrinkled pink bow (the bow will be the card front “stop” part of your easel. Glue the bow down to the inside of card above bird on branch.  This completes the easel card.  Now tuck the card front point at the top of bow to keep the card open.

Thanks for visiting today!
Robin

Matthew 25:34-40
34 “Then the King will say to those on his right, ‘Come, you who are blessed by my Father, inherit the Kingdom prepared for you from the creation of the world. 35 For I was hungry, and you fed me. I was thirsty, and you gave me a drink. I was a stranger, and you invited me into your home. 36 I was naked, and you gave me clothing. I was sick, and you cared for me. I was in prison, and you visited me.’
37 “Then these righteous ones will reply, ‘Lord, when did we ever see you hungry and feed you? Or thirsty and give you something to drink? 38 Or a stranger and show you hospitality? Or naked and give you clothing?39 When did we ever see you sick or in prison and visit you?’
40 “And the King will say, ‘I tell you the truth, when you did it to one of the least of these my brothers and sisters,[f] you were doing it to me!’


Wednesday, January 24, 2018

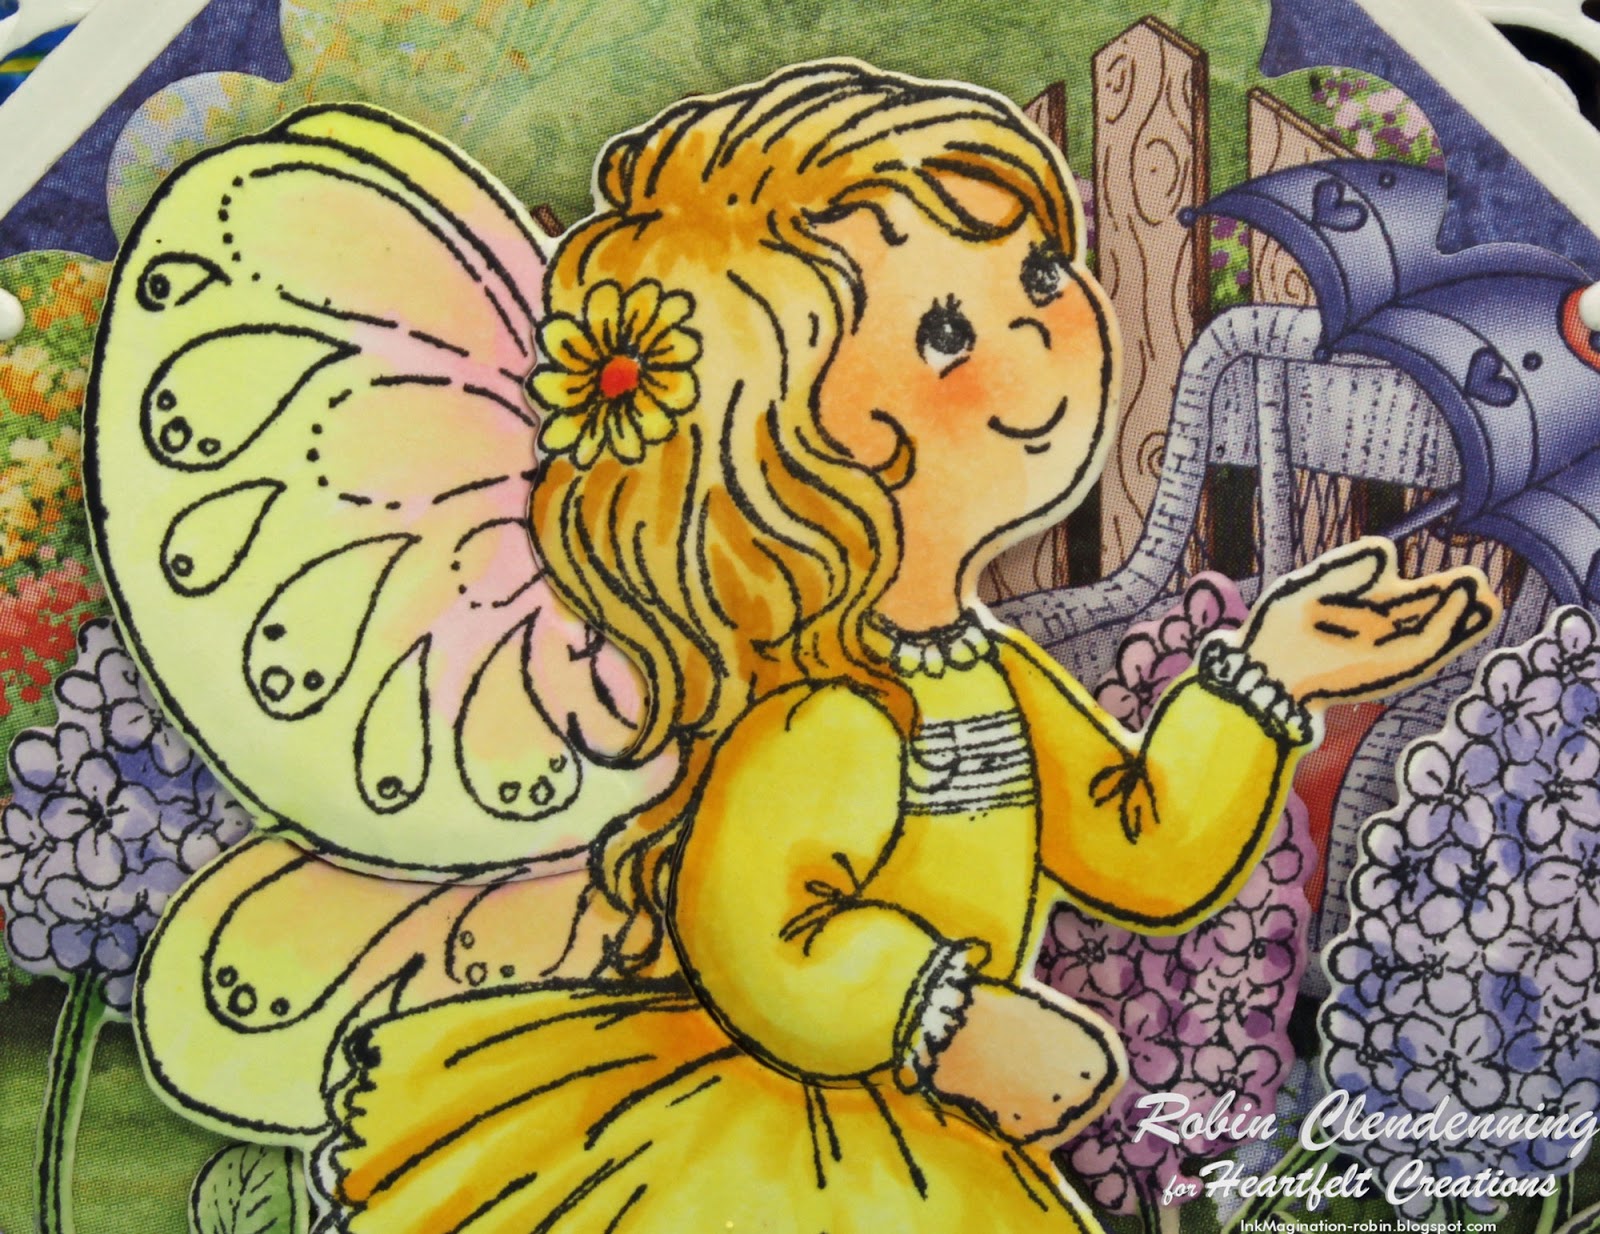
Heartfelt Creations- Fairy Bendi Card

Good morning!

This morning I have combined 4 sets to make this little Bendi card.
The new Singing in the Rain, Wildwood Cottage, Flowering Dogwood and Doves and Woodsy Wonderland.
They all have super fun components that make a wonderful fairy garden.
For a fairy garden you have to have some foliage hanging down, bunnies hopping, Birds singing and a wonderful little fairy cottage, right?
The paper for Singing in the Rain is so perfect that I was able to use just it for my inside scenes without the addition of anything else.


HC PRODUCTS USED      


Other Products:
Brick embossing folder, Foam Tape, Lavender card stock, Copic markers: RV10, RV00, RV02, Y11, Y15, Y17, BV00, BV01, BV02, R00, R11, R21, R22, E53, E33, E35, E000, E00, E01, E93, V00, V01, B00, B02, B04, Y21, Y24, Y23, White Fun Flock, white card stock

Instructions:
Card size:  6 X 6 ½”   Cut white card stock 6 X 5 ½” and cut decorative paper 6 X 5 ½” to cover (die cut and glue Regal Border from Lavender  and glue to top before adding paper so that it is sandwiched between). Cut two side panels front and back (4 pieces) 6 X 5” and use curved border from Fleur Basics to cut the tops.  Cut a Fleur Border from lavender card stock for both sides.  Sandwich border between two layers for both sides. Score ½” from edge on both sides (along tallest side on both) for tabs to glue to back of card.  Draw a ¼” line on the short end of both and make a tab on both.  On center panel, cut a slit to coincide with left flap tab, 4 ½” from left side.  On left flap, make a slit to coincide with right flap tab, 2 ½” from left edge.  Glue flaps to center in the back using the ½” scored tabs you made on each long end.
I used decorative paper with a scene on the inside of each flap so I did not add anything else this time.  For the center and outside of flaps I stamped, die cut and colored cottage, cottage accents, dogwood, wildwood florals, blossoms, fairy, bird in branch, birds, birdbath, and wheel barrel.   Emboss cottage with bricks and rub Worn Lipstick over the embossing.  Add windows and door and glue to center of card.  Add slightly shaped dogwood to each side of center and some flowers at the bottom (avoiding slit).  Add Prills to center of flowers, glue Fun Flock to round blossoms.  Glue bird to dogwood branch at top right.
For left flap, glue a piece of left over dogwood to left side, glue wheel barrel to right side and pop up fairy with a bird in her hand to left over part of dogwood.  For right flap, glue birdbath with bird to center area and pop up bird in branch to right top. (Always avoid slits for ease of opening and closing Bendi Card.).   Glue ultrafine glitter to wings of fairy.

Thanks for Visiting today!!
Robin


1 Corinthians 10:13New King James Version 

13 No temptation has overtaken you except such as is common to man; but God is faithful, who will not allow you to be tempted beyond what you are able, but with the temptation will also make the way of escape, that you may be able to bear it.

Galatians 6:7-8

Do not be deceived, God is not mocked; for whatever a man sows, that he will also reap. For he who sows to his flesh will of the flesh reap corruption, but he who sows to the Spirit will of the Spirit reap everlasting life.
Walk in the light of God's word!


Wednesday, January 17, 2018

Heartfelt Creations- Fairy Single Display Card

Good morning!

This little tree fairy is so darling!  Her best friend is sitting right next
 to her and telling her secrets!  
This card was super easy.  The paper already has her on it so I stamped her again and popped her up over the paper image.

Closed view

I saw something like this on Pinterest and made up a template
 to make what I saw (sort of!)
Open view 


Foam tape, white embossing powder,  VersaMark Ink, VersaMagic  Purple Hydrangea, Copic Markers: E50, E53, E35, V00, V01, V12, V15, BG10, BG11, BG32, BG34, Y11, E00, E01, E000, E93, YG11, G03, YG41, B00, B02, B04, Y23, Ribbon

Card size: 4 ¼” X 5 ½”  Card base is 5 ½” X 8 ½” (see template for dimensions, scores and cuts).   After scoring and cutting, decorate each panel with decorative paper including center display panel.  Die cut 2 Window Box Elements decorative dies and place one on each side panel.
Stamp, die cut and color fairy sitting in branch, flower box fillers, and Wildwood Florals (Wildwood Floral flowers are embossed with white then colored.  Add the Fairy to the center panel with foam tape, Wildwood Florals to the top center and both sides and the Flower Box Filler flowers to the sides at the bottoms and add a bow to stems.  Glitter the flowers and fairy wings with ultrafine clear.  Stamp sentiment with chalk ink and die cut with circle then sponge edges with sentiment color.   Pop up sentiment circle bottom center.

Single Display Template


Thanks for visiting today!
Robin

Isaiah 1:16-17 (NKJV)


16 
“Wash yourselves, make yourselves clean;

Put away the evil of your doings from before My eyes.
Cease to do evil,
17 
Learn to do good;
Seek justice,
Rebuke the oppressor;[a]
Defend the fatherless,
Plead for the widow.