Pages

Comments are welcome and very much appreciated!

Wednesday, June 24, 2020

HC Congratulations!

Good morning!


HC PRODUCTS USED      
HCD1-7299             Baby’s Air Balloon Die
HCD1-7300             Welcome Baby Die
HCD1-7301             Baby’s Friends Die
HCPC-3914              Baby’s Air Balloon Stamp Set
HCPC-3915              Welcome Baby Stamp Set
HCPC-3916              Baby’s Friends Stamp Set
HCDP1-2116            Tender Moments Paper Collection
HCD1-7281              Stairway Gardens Die
HCD1-7202              Album Tags and Accents Die
352854                      Metal Tip for Adhesive
159723                      Dries Clear Adhesive
85-glitter                  Crystal Ultrafine TransparentGlitter
PGM15015              Rajni Chawla’s Crystal Clear
RACP656                   Sky Blue Archival Ink

Other Products:
White cardstock, foam tape, cloud embossing folder, blue cardstock, London Fog, white pigment ink pad, Copic Markers: YG11, YG41, G12, B00, B01, B41, B21, C1, C2, C3, E53, E51, E21,Y11, Y15, RV00, RV10,

video:
Instructions:
Card size: 6 X 6”.  Fold 6 X 12” white cardstock to make a 6 X 6 card base.  Cut a medium blue square with the eyelet edge of the Stairway Gardens Die and layer onto white base.  Cut a 5 5/8 X 5 5/8” light blue panel and run it through a cloud embossing folder (it may need to be run through 1 side at a time which is ok since the entire center is covered).  Cut 4 corners out of medium blue.  Brush raised clouds with white pigment ink and heat to dry.  Glue corners to the embossed layer.

Stamp roses, balloon, deer and elephant using London Fog stamp basket part of balloon again the stamp Baby Boy using Sky Blue and die cut.  Color all stamped images.  Pop up balloon, pop up elephant and deer.  Pop up the roses on each side of the balloon basket.  Glue the “Baby Boy” sign on the basket.  Glitter the card, balloon and flowers.

Thanks for visiting today!

Robin

Isaiah 40:31 New King James Version (NKJV)

31 But those who wait on the Lord
Shall renew their strength;
They shall mount up with wings like eagles,
They shall run and not be weary,
They shall walk and not faint.

Tuesday, June 23, 2020

Tender Moments Debut

Good morning!
We are finally able to show you these precious 
Tender Moment stamps and dies.


HC PRODUCTS USED       

Other Products:
Foam Tape, white cardstock, Copic Markers: B00, B000, B02, BV000, BV00, BV01, RV00, RV10, E00, E01, YG11, YG41, Y11, Y15, E53, E51, E21, London Fog Memento Ink

For more tips on creating with shaped cards, watch the tutorial at https://youtu.be/kJO5LdNFxgE.
Instructions:
Card size: 6 X 6 1/2" .  Fold 11 X 4” cardstock in half then die cut card base with the outer balloon die leaving the top 1/4 – 1/2” of die off the folded end.  Stamp the balloon, die cut and color it (this will be card front but do not glue it to the card until later.  Stamp, die cut, and color two of baby’s friends, the baby boy sign and 3 sets of clouds.  Cut a piece of decorative paper (blue stars used here) for the inside of card.

Cut the 2 inside ropes of balloon at the bottom so that you can easily insert the 2 little animal friends, glue the bottom part of the animals inside balloon basket and put some foam pop-ups (foam tape used) at the tops (back side).  Now glue the stamped balloon with friends to the front of the card matching sides and bottom.

For the inside and back of card: Glue the decorative star paper inside.  Glue the clouds to the back of card toward the top.  Trim away clouds at the top just so that they do not interfere with opening the card, leave the rest as is.  Cut another back to cover just up to the fold (this is optional for a complete look and to reinforce).

Glitter entire balloon front.


HC PRODUCTS USED       

Other Products:
Star punch, white cardstock, yellow cardstock, yellow sheer 3/8” ribbon, foam tape, Copic Markers: B00, B21, B41, E43, E79, E31, E33, E35, C1, C2, C3, RV00, RV10, RV02, E00, E01, E93, E51, E21, E53, YG11, YG41, G12, Y11, Y115, R81, R83, YR61, E97, E99, medium green ink from Ranger called Electric Green.

For more tips on creating with the flower shaping molds, watch the tutorial at https://youtu.be/FSdPL7nXvQE
For more tips on creating with the border dies & foldout cards, watch the tutorial at https://youtu.be/wxX94X84kUo.

Card size: 6 X 7 3/4".  Start with the 6 X 6” Foldout card base.  Use the Fleur Border Basics to cut pink decorative paper to match each panel front and back.  Use the Classic Border Basics to cut the top of the back panel and to cut paper to match.  Use the Rounded Lattice Window Die (half circle with eyelet edge) to cut a white topper for the back.  Glue the white to the front side of the back panel then glue the pink paper on top (this makes a nice finish front and back of card).  Glue all the pink paper panels to their respective card panels front and back.  Cut scallop eyelet white borders for each top edge (except the back as it has its own topper).

Stamp using Black Memento ink, the balloon, 1 “girl”, 1 each of the lamb, bunny, pigs, raccoon, and 2 each of the deer and elephant.  Stamp 2 fence, 5 birds, 1 flower pot, 1 cart, 1 bench, 1 branch with birds using Black, die cut all and color.  Using Magenta Hue, stamp several small Wild Rose die cut and sponge the edges.  Use the mold to form then glue 2 together for each flower. Fill centers with light green Prills.  Using Forget-Me-Not and Buttercup ink, stamp several small cherry Blossoms for the filler flowers. Fill each center with light pink Prills.   Using a medium green color ink, stamp 3 leaf sets and sponge with Chartreuse, die cut then form in mold.  Use a star punch to punch 3-5 stars out of yellow. 

Cut 4 various small tags for pockets and cut 2 white pockets using the Fleur Borders and Pockets.  With everything stamped and colored it is time to decorate the card.

Starting at the back: glue 1 elephant and a deer inside the balloon basket (cut the bottom of the ropes to fit as needed) then glue the balloon to the card.  Glue 1 corner to the bottom left.  Insert 2 tags and glue stars onto the background.  Stamp Happy Birthday and cut with the eyelet long die shortening as needed, sponge the inside with Magenta Hue then glue to the balloon basket. 

Next panel in to the left, Glue the 2 pigs inside of cart then glue card to the panel.  Glue the little lamb next to the handle as if it was pulling the cart and stopped for a pic.  Glue flowers and leaves to the top right side.

Next panel to the left, Glue the bench to the panel then glue the bunny sitting on the bench.  Glue the pot to the right side of bench and the little deer to the left side of the bench.  Glue 1 bird sitting on top of the bench back.  Glue more flowers and leaves to the top right side.

Last panel (on the inside), Glue 1 pocket to the right bottom and insert 2 tags.  Glue the remaining elephant to the left side.  Glue a small bit of flowers and leaves to the top right.  Close card.

For the front (when card is closed).  Glue fences pieces together back to back then glue to the front of card on the left side.  Match 2 birds (as close as possible) back to back and glue to the fence post on the right, inserting fence post between birds at the bottom.  Glue the branch with birds above the fence, pop up 2 of the birds, decorate the branch with flowers and leaves.  Glue the raccoon to the bottom right side.  Stamp part of the sentiment saying “Birthday” onto white and die cut with the long eyelet die shortening as needed.  Sponge inside then glue it to the fence leaving room for the decorative “Girl” beneath.  Glue some light green Prills along the bottom on all “scene” panels for grass. 

While card is closed, decorate the remaining showing panel top with flowers, leaves and a bird. Now all panels showing when open and when closed should be decorated.  Add glitter to all the flowers, gloss the leaves and add sheer yellow ribbon where desired in flower arrangements and tags.  Randomly glitter card panels as well.

Thanks for visiting today!
Robin

Mark 8:36 New King James Version (NKJV)

36 For what will it profit a man if he gains the whole world, and loses his own soul?

Tuesday, June 2, 2020

HC Must Be Love Cascading Petals

Good morning!
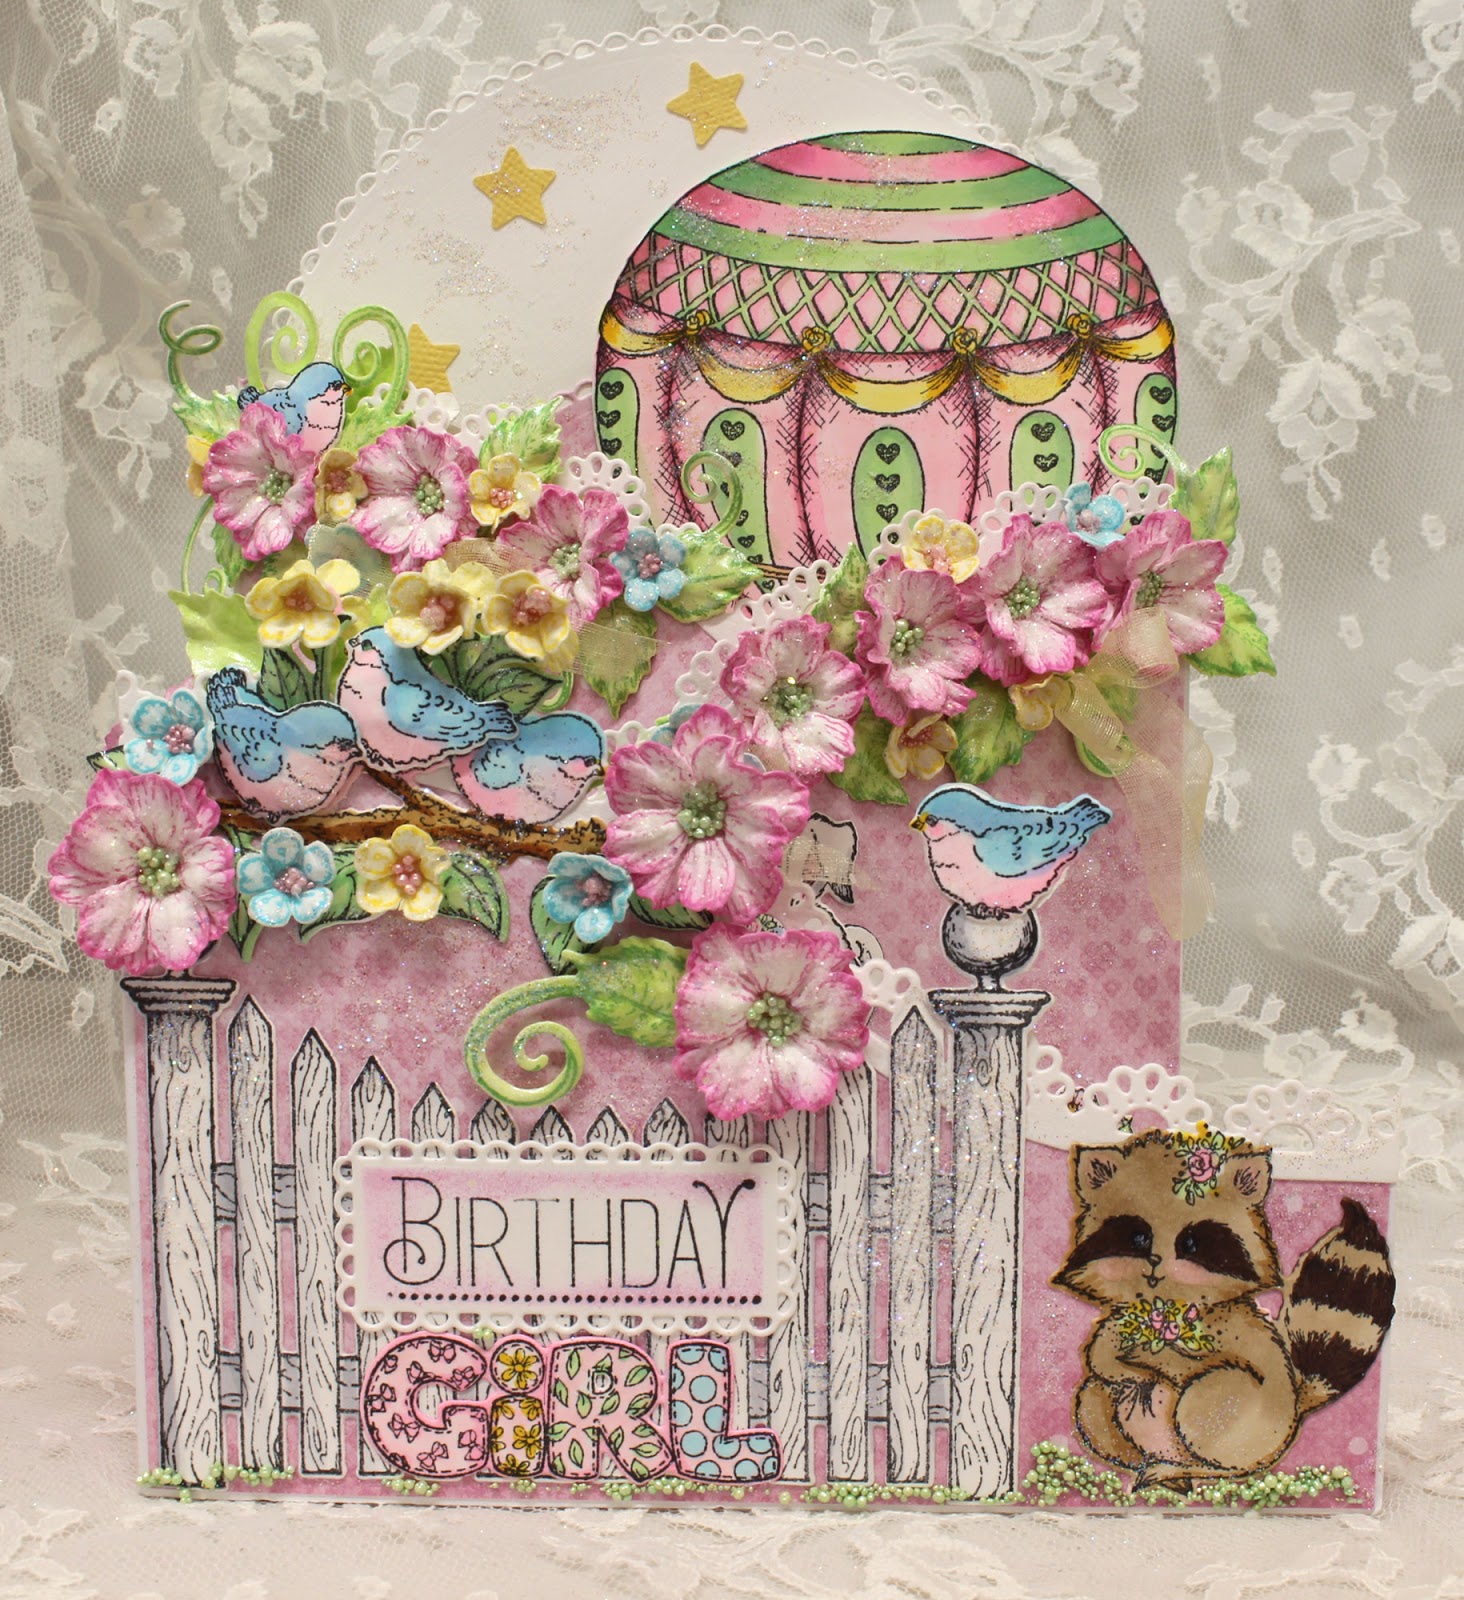
I love doing this love bird card this month.

I used vellum to soften the birds and put them inside the card.
HC PRODUCTS USED      
HCD1-7295                Wisteria Petals Die
HCPC-3911                 Wisteria Petals Stamp Set
HCD1-7296                 Cascading Wisteria Die
HCPC-3912                 Cascading Wisteria Stamp Set
HCD1-7297                 Floral Song Die
HCPC-3913                 Floral Song Stamp Set
HCD2-7306                 Decorative Circle Frames Die
HCD1-7162                 Eyelet Hearts Die
HCD1-7157                 Eyelet Oval & Basics Large Die
HCD1-7156                 Eyelet Oval & Basics Small Die
HCGP1-488                 Luxe Gold Cardstock
242174                         Vellum Paper-10 Sheets
3D1844                        3-D Crystal Lacquer 4Oz
352854                         Metal Tip for Adhesive
159723                         Designer Dries ClearAdhesive
85-glitter                      Crystal UltrafineTransparent Glitter
359760                          Embossing Powder-Gold
HCPC-3847                   Celebrate Love SentimentsStamp Set
TSMP900                      Tuxedo Black Memento

Other Products:
White cardstock, Top Boss Embossing ink pad, Gold Painty Pen, embossing folders, Copic Markers: V12, V15, BV00, BV02, Y15, Y35, RV10, E50, B21, B41, B45, E53, E33, E35, YG11, YG05, YG07, C3, C5
 video
For more tips on creating with the booklet frame dies, watch the tutorial at https://youtu.be/kJO5LdNFxgE.
Instructions:
Card size: 4 3/4 X 6 3/4".   The video above shows how to make a shaped card with dies.  Fold a piece of white cardstock the size of card then place the die so that it hangs over the folded edge about 1/8” (just so that it does not cut the whole fold off), cut through both layers for your base.  Cut another white top but this time cutting the full die on a single layer.  Glue the full die cut to the card base matching all bottom and side curves.   Cut a piece of vellum with the same outer die and cut off the very top so that it fit’s inside card.  Put a line of glue just at the top then wipe off with your finger to make a super think layer of glue before laying the vellum down on it.

Cut a Gold Luxe layer with the outer and the inner decorative die (no circles yet).  The outer gold die cut will be used inside the card and the inner decorative die is for the front.  Before gluing the gold to the front, cut a medium sized heart out of the middle.  Now glue the gold onto the front.  Cut a white heart frame using the same size heart as before and also a large eyelet heart together.  Also cut the largest eyelet circle and then cut that with the largest basic circle to make a very thin circle frame for the gold circle in the center.  Glue both frames on (be careful not to get glue on the gold paper as it will mess up the finish but you can clean it pretty well by applying a wet a Q-tip then use a soft cloth to rub it dry). 

For the inside:  Emboss the medium heart left when making the heart frame.  Cut an eyelet gold mat for the heart inside.   Cut another white panel to match the card shape then emboss it and trim it to fit.  Glue it to the inside, glue the gold outer edge on, glue the heart in the center (tip, place the heart upside down over the heart opening glue the gold mat to it upside down then put glue on the back which is face up and close the back of the card down onto it.  Now your heart will be in the exact right place to show from the front of the card through the vellum).  When dry, turn the card over and continue to decorate.

Stamp and emboss with gold, 2 sentiments on white cardstock.  Die cut each out with smallest oval possible then edge with the gold painty pen.  Glue one above the heart inside and the other at the bottom of the heart on the front.

Stamp, die cut and color 1 vine with hanging wisteria, right and left side of vine making a heart, and 1 of each bird.  Glue the heart shaped vines to the front heart frame.  Shape the vine with hanging wisteria a bit from the back then glue it to the top of the circle and heart, leave some wisteria up loose or use foam dots to pop up.  Now glue both birds inside so that their heads are together and showing through the heart hole in front.  Some flowers will be covered, not to worry.  Glitter all the flowers and gloss all the leaves.

Thanks for visiting today!
Robin
Romans 12:2
And do not be conformed to this world, but be transformed by the renewing of your mind, that you may prove what is that good and acceptable and perfect will of God.