
|
|
Good morning!
This is a step by step tutorial for making a daffodil easel card. This tutorial can also be seen at Heartfelt Creations Blog site Saturday March 13, 2021 as well, just click on the blog tab.
Finished project


Step 10 See photo above Use a large pearl inside to mark your spot for the easel stop then glue last daffodil to the inside so that petals rest at card front. Cut petals as needed to get the look you like best. Add some filler and make sure you can still see the sentiment.
Heartfelt Creations Products:
Spring Daffodil Paper Collection
Album Tags and Accents Die
Ornate Ovals Die
Decorative Circle Frames
Floral Shoppe Fillers Die
Floral Shoppe Fillers Stamp Set
Pastel Pollen Stamen-Medium
Bright Pearl Stamen-Medium
Deluxe Flower Shaping Paper Pack of 50-White
You are so thoughtful Sentiments Stamp Set
Rajni Chawla’s Crystal Clear
Dries Clear Adhesive
Metal Tip for Adhesive Bottles
Cantaloup Memento Ink
Buttercup Archival Ink
New Sprout Memento Ink
Groove Golf Tool Set
Deluxe Flower Shaping Kit
Scor-Pal Measuring & Scoring Board
Other Supplies:
White cardstock, foam sheet (like Fun Foam), pearls
Thanks for visiting!
Robin
|
Cottage Garden Hydrangea Stamp Set Deluxe Flower Shaping Paper Pack of 50-White Opaque Embossing Powder -White |
|
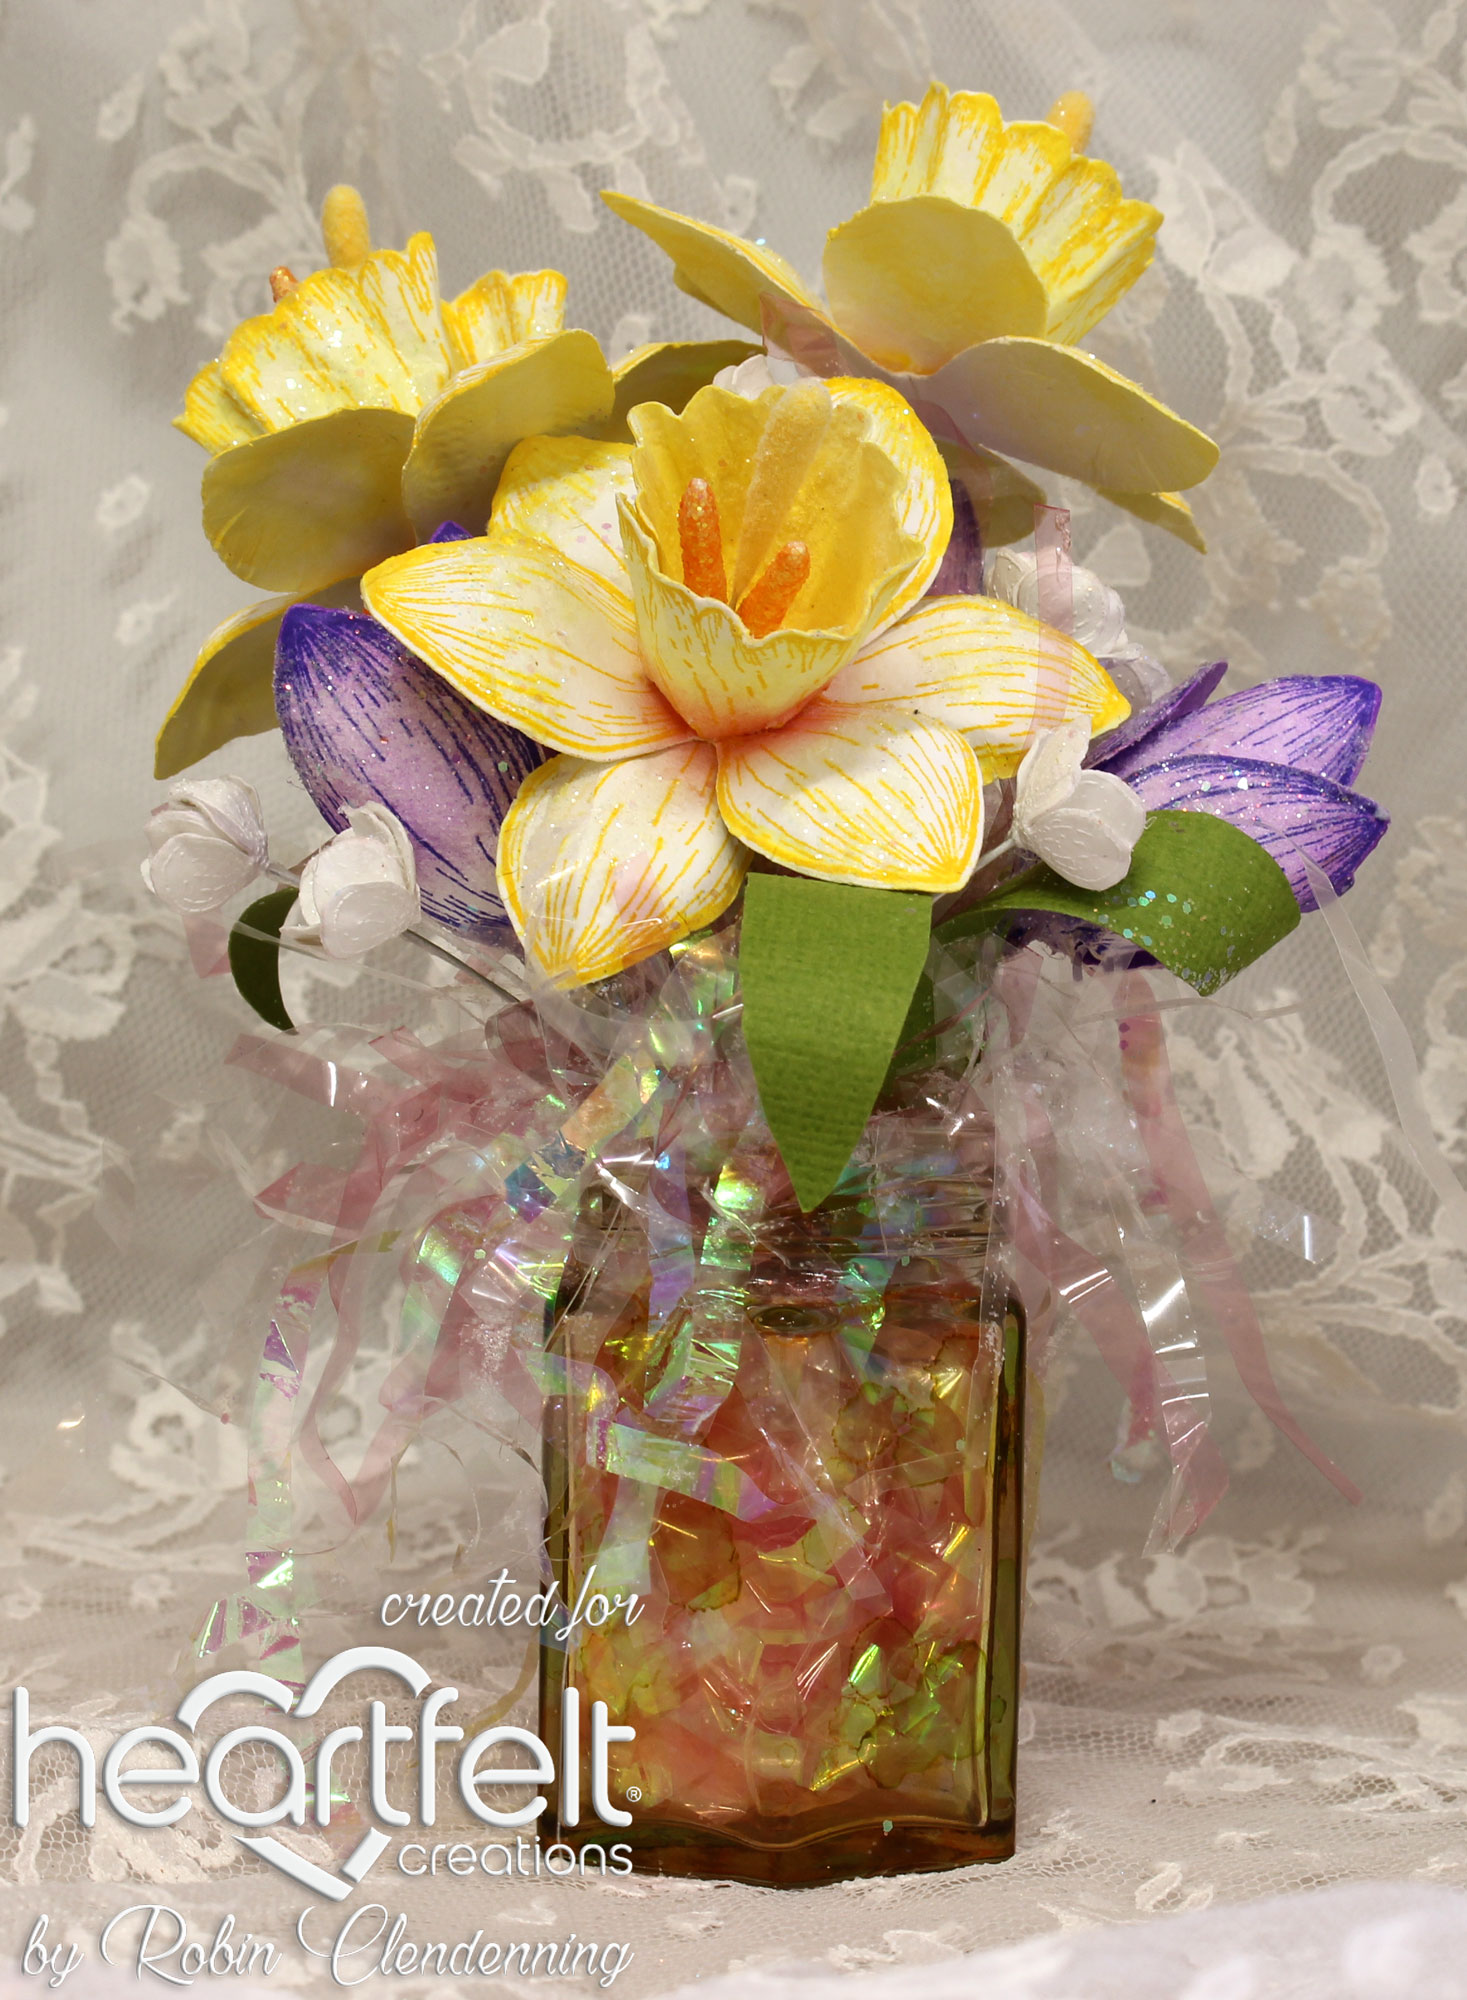
White Cardstock, green cardstock, Alcohol Inks-Yellow, green, orange and pink, jelly jar, iridescent Easter basket filler, embossing Ink Pad For more tips on creating with the flower shaping molds, watch the tutorial at https://youtu.be/FSdPL7nXvQE Jar is 2 X 2 ½”, Project 6 ½” tall. Stamp enough small daffodils (both parts) for 3 flowers using yellow. Sponge backs and edges with yellow. Run flowers through the shaping mold. Glue 2 bottom pieces together for each flower. Glue half circle top part of daffodil together at ends and fold bottom tabs up. Glue the top “cup” onto the bottom base. Stamp enough small daffodil (bottom only) using purple to make 3 “crocus”, sponge with purple on both sides and on edges. Glue 2 bottoms together for each flower make a small bowl stamp side out. Stamp Hydrangea using embossing fluid pad and emboss with white on white. Make 7 flowers with 2 layers each. For the small white flowers use 1 white beaded stamen in each. For the daffodil use the yellow pollen stamen and for the purple crocus use orange pollen and orange medium pearl stamen (dye the pearl stamen with orange alcohol ink). Make long Daffodil leaves with green cardstock, hand cut about 5 leaves and curl ends. Color jar with alcohol inks. Fill with Iridescent filler then fill with flowers and leaves (glue in place with hot glue). Glitter flowers. My second card uses the new Gateway Fold cards with this month's release AND last month's. |


|
Spring Garden Paper Collection Delightful Daffodil & Hyacinth
Die Delightful Daffodil & Hyacinth
Stamp Set Delightful Daffodil Spray Stamp Set Elegant Gateway Sentiments Stamp Set 5 X 7” Gateway Fold Card-White Deluxe Flower Shaping Paper Pack of 50-White Crystal Ultrafine Transparent Glitter White cardstock, London Fog Memento Ink, Copic Markers: Y11, Y15, Y19, YG03, YG23, YG17, BV00, V12, V15, RV00, BV20, For more tips on creating with the flower shaping molds, watch the tutorial at https://youtu.be/FSdPL7nXvQE. Card size: 5 X 7”, open: 7 X 15”. Use the 3 panel Gateway Fold Card base. Cut 3 white Teardrop Lattice Gateway decorative parts inside and out. Cut 3 yellow decorative paper panels to fit the card base using the plain outer die. Glue the yellow panels on then the decorative white panels. Cut 1 small bottom and 1 small daffodil top using Buttercup ink to make one flattened small Daffodil. Cut 2 large bottoms and 2 large daffodil tops using Buttercup to make 1 large flattened daffodilish type flower. Stamp 2 small Zinnia using green for flower bases. Use several yellow beaded stamen for each flower (leave wires to make stems). Wrap “stems” with floral tape. Stamp the little butterflies using purple and sponge with purple, die cut. Stamp 2 arched and 2 straight Daffodil Sprays using black memento (if using Copic Markers). Stamp 1 large daffodil from Delightful Daffodils & Hyacinth. Die cut all and color. Stamp the swan and Sentiment using London Fog (or black) die cut and color. On the first panel (showing when closed) add a bit of blue decorative paper to the bottom of the inside arched gateway (for a lake). Glue and pop up swan on lake, add Calla Lilies on both side. Add 1 arched daffodil sprays to the bottom but before gluing the left side slide stems in under left side then glue. Glue a double butterfly at the top right. Glue the sentiment to the middle of panel 2 then glue an arched spray to the top and a straight spray at the bottom. Glue the large daffodil to the bottom of the 3rd panel and the last straight spray over the stem at the very bottom. Glue the butterfly to the top left side. Glitter the flowers with Crystal Clear and randomly glitter the card panels with Ultrafine. Thanks for visiting today! Robin
Psalm 139:23-24 New King James Version 23 Search me, O God, and know my heart; I love these verses but more, I love Psalm 139 in whole, it also tells of God's intimate knowledge of our being... 13 For You formed my inward parts; So much I love. I thoroughly LOVE the whole WORD of GOD. |


|
Delightful Daffodil & Butterfly
Die Delightful Daffodil & Butterfly
Stamp Set Delightful Daffodil Spray Stamp Set Delightful Daffodil Paper Collection Tweet Cherry Blossoms Stamp Set 3D Cherry Blossom Shaping Mold Just for You Sentiments Stamp Set Eyelet Oval & Basics Large Die Eyelet Oval & basics Small Die Crystal Ultrafine Transparent Glitter White cardstock, Yellow cardstock, Fun Foam, Enamel blue dots, Foam Tape, Yellow pearl half, Copic Markers: R81, R83, R85, Y11, Y15, B21, B24, YG03, YG23, YG17, Card size: 5 1/4 X 6 3/16”. Cut white cardstock 6 3/16 X 10 1/2" then fold in half. Cut plaid decorative paper 5 X 6 and distress edges, sponged distressed edges with Summer Sky Memento Ink. Cut an oval from the center (Keep cut out oval). Cut a piece of blue decorative paper 3 1/2 X 4 1/2" then cut a little bit smaller oval from the center. Cut a white oval frame for the top plaid piece by using 2 ovals 2 sizes apart. Glue the frame onto plaid oval cut out. Cut a piece of foam sheet 4 3/4 X 5 3/4" and cut an oval from the center a little larger than plaid oval opening, glue it under the plaid paper. Glue the blue oval cut out under the foam and plaid paper so that ovals are centered (the blue acts as an inside mat for the oval). Die cut the Decorative Oval from white and glue it to the plaid oval piece saved. Glue this under the blue oval opening then glue the stack onto the card base. Stamp 2 upper Daffodil Sprays using black, die cut and color with preferred method (Copics used here). Glue to the top and bottom of oval openings over oval frame. Stamp the butterfly 2 times, die cut and color. Die cut decorative butterfly die out of vellum. Cut the head off the bottom layer, cut the outer edges of the wings off the top butterfly layer. Glue the 2 layers together at the body center only. Use 2 layers of foam tape between the 2 layers at the base of the wings. Glue the vellum layer onto butterfly at the center only. Glue butterfly right wing to the card right center. Left wing will be over oval opening so use foam under the wing to keep it level with the right wing. Stamp Cherry Blossoms on white and yellow cardstock using Buttercup, die cut and form in shaping mold. Fill centers with light yellow Prills. Glue the flowers around the oval as desired. Glitter card, flowers and butterfly. Add an enamel blue dot to each corner. Add a yellow pearl to center, left meeting of sprays. Stamp sentiment using black, cut it with the Ticket and Tags long die then fish tail both ends. Pop up to same level as top and glue at an angle to the oval opening. Thanks for visiting today! Robin 1 Timothy 1:7 7 For God has not given us a spirit of fear, but of power and of love and of a sound mind. This was our go to verse when we were going through some really hard times with a loved one, we would not have survived I think if it had not been for the fact that we knew we could trust God even when things were the worst. And we prayed this verse almost everyday for ourselves and our loved one. The trial/hardship lasted over 2 years so this was not an easy one to cope with and at times wondered if we would be able to endure. Thank you Lord Jesus that you helped us through every difficulty and brought good from a horrible situation. 1 Timothy 1:9-10 ... 9 who has saved us and called us with a holy calling, not according to our works, but according to His own purpose and grace which was given to us in Christ Jesus before time began, 10 but has now been revealed by the appearing of our Savior Jesus Christ, who has abolished death and brought life and immortality to light through the gospel, HE is our peace and comfort, our shield and defense in whom we trust our lives. |
