Pages

Comments are welcome and very much appreciated!

Tuesday, June 2, 2020

HC Must Be Love Cascading Petals

Good morning!
I love doing this love bird card this month.

I used vellum to soften the birds and put them inside the card.
HC PRODUCTS USED      
HCD1-7295                Wisteria Petals Die
HCPC-3911                 Wisteria Petals Stamp Set
HCD1-7296                 Cascading Wisteria Die
HCPC-3912                 Cascading Wisteria Stamp Set
HCD1-7297                 Floral Song Die
HCPC-3913                 Floral Song Stamp Set
HCD2-7306                 Decorative Circle Frames Die
HCD1-7162                 Eyelet Hearts Die
HCD1-7157                 Eyelet Oval & Basics Large Die
HCD1-7156                 Eyelet Oval & Basics Small Die
HCGP1-488                 Luxe Gold Cardstock
242174                         Vellum Paper-10 Sheets
3D1844                        3-D Crystal Lacquer 4Oz
352854                         Metal Tip for Adhesive
159723                         Designer Dries ClearAdhesive
85-glitter                      Crystal UltrafineTransparent Glitter
359760                          Embossing Powder-Gold
HCPC-3847                   Celebrate Love SentimentsStamp Set
TSMP900                      Tuxedo Black Memento

Other Products:
White cardstock, Top Boss Embossing ink pad, Gold Painty Pen, embossing folders, Copic Markers: V12, V15, BV00, BV02, Y15, Y35, RV10, E50, B21, B41, B45, E53, E33, E35, YG11, YG05, YG07, C3, C5
 video
For more tips on creating with the booklet frame dies, watch the tutorial at https://youtu.be/kJO5LdNFxgE.
Instructions:
Card size: 4 3/4 X 6 3/4".   The video above shows how to make a shaped card with dies.  Fold a piece of white cardstock the size of card then place the die so that it hangs over the folded edge about 1/8” (just so that it does not cut the whole fold off), cut through both layers for your base.  Cut another white top but this time cutting the full die on a single layer.  Glue the full die cut to the card base matching all bottom and side curves.   Cut a piece of vellum with the same outer die and cut off the very top so that it fit’s inside card.  Put a line of glue just at the top then wipe off with your finger to make a super think layer of glue before laying the vellum down on it.

Cut a Gold Luxe layer with the outer and the inner decorative die (no circles yet).  The outer gold die cut will be used inside the card and the inner decorative die is for the front.  Before gluing the gold to the front, cut a medium sized heart out of the middle.  Now glue the gold onto the front.  Cut a white heart frame using the same size heart as before and also a large eyelet heart together.  Also cut the largest eyelet circle and then cut that with the largest basic circle to make a very thin circle frame for the gold circle in the center.  Glue both frames on (be careful not to get glue on the gold paper as it will mess up the finish but you can clean it pretty well by applying a wet a Q-tip then use a soft cloth to rub it dry). 

For the inside:  Emboss the medium heart left when making the heart frame.  Cut an eyelet gold mat for the heart inside.   Cut another white panel to match the card shape then emboss it and trim it to fit.  Glue it to the inside, glue the gold outer edge on, glue the heart in the center (tip, place the heart upside down over the heart opening glue the gold mat to it upside down then put glue on the back which is face up and close the back of the card down onto it.  Now your heart will be in the exact right place to show from the front of the card through the vellum).  When dry, turn the card over and continue to decorate.

Stamp and emboss with gold, 2 sentiments on white cardstock.  Die cut each out with smallest oval possible then edge with the gold painty pen.  Glue one above the heart inside and the other at the bottom of the heart on the front.

Stamp, die cut and color 1 vine with hanging wisteria, right and left side of vine making a heart, and 1 of each bird.  Glue the heart shaped vines to the front heart frame.  Shape the vine with hanging wisteria a bit from the back then glue it to the top of the circle and heart, leave some wisteria up loose or use foam dots to pop up.  Now glue both birds inside so that their heads are together and showing through the heart hole in front.  Some flowers will be covered, not to worry.  Glitter all the flowers and gloss all the leaves.

Thanks for visiting today!
Robin
Romans 12:2
And do not be conformed to this world, but be transformed by the renewing of your mind, that you may prove what is that good and acceptable and perfect will of God.

Tuesday, May 26, 2020

In Our Thoughts & Prayers

Good morning!
I've made an easel card from the Bi-Fold card base.

These birds remind me of the birds I hear singing every morning for hours before I have to leave
for work.  Such happy songs.


HC PRODUCTS USED      
HCD1-7295           Wisteria Petals Die
HCPC-3911            Wisteria Petals Stamp Set
HCD1-7296            Cascading Wisteria Die
HCPC-3912            Cascading Wisteria Stamp Set
HCDP1-2115         Cascading Petals Paper Collection
HCD1-7297           Floral Song Die
HCPC-3913            Floral Song Stamp Set
HCD1-7292            French Doorway Die
HCD1-7272            Rounded Sunlight Window Die
HCD1-7271            Rounded Window Frame Die
HCD1-7156            Eyelet Oval & Basics Small Die
HCPC-3848            Cheerful Note Sentiments Stamp Set
HCCB1-481            6 X 6” Round Bi-Fold Card- White
RACP985                Cactus Flower Archival Ink
RACP494                Majestic Violet Archival Ink
RACP430                Deep Purple Archival Ink
ANC825                   Ribbit Prills
HCPP1-475              Deluxe Flower Shaping Paper Pack of 50-White
85-glitter                  Crystal Ultrafine Transparent Glitter
352854                     Metal Tip for Adhesive Bottle
159723                     Designer Dries Clear Adhesive
3D1844                    3-D Crystal Lacquer 4 oz

Other Products:
London Fog Memento Ink, White Cardstock, Purple Cardstock, lavender cardstock, foam tape, Copic Markers: YG11, YG05, YG07, E53, E33, E35, B21, B41, B45, RV10, E50, C1, C3, C5, white colored pencil, Fun Foam

Video
For more tips on creating with the Window Scene cards & dies, watch the tutorial at https://youtu.be/LnM95GR92ao.
Instructions:
Card size: 6 X 6”. Start with the B-Fold card base.  Cut circle using the Rounded Sunlight outer die for the front and for the inside of card using a piece of lavender decorative paper.  Score and fold the center circle the glue left side circle to just the bottom half of center circle (This forms the easel).  Cut the outer circle of the Rounded Window Frame die out of purple then use the 2 half circles of the Sunlight die to cut out the center.  Cut off piece in the center that is left then glue to the outer edge of the card front.  Die cut 2 lavender decorative circles (the next size down) from the Rounded Window Die.  Glue one to the front and one inside.  Sponge the edges of card with Deep Purple.

Die cut a purple inner door from the French Doorway Die, cut a back for it from white.  Lightly sponge purple on the door then glue it to the center of the card front.

Stamp, sponge and die cut the Wisteria blossoms in Cactus Flower, Majestic Violet and Deep Purple.  Stamp 2 vines, the vine with 6 wisteria shoots and the bird facing left using London Fog.  Die cut and color with Copics.

To decorate: Determine the center when easel is propped open then make sure you glue everything straight so that it looks good when recipient opens and displays your card.  Glue the bird toward the bottom right side and pop up the bird itself.  Glue one vine to each side then glue the vine with hanging wisteria at the top.  Form some of the blossoms into flowers with 2 blossoms for each one, add Prills in the centers then glue to stamped flowers on the bird image.  Add more flowers to go partly up vines. For the wisteria:  Use the Groove Tool make each petal curve.   Use a lavender beaded stamen to thread blossoms together, put a tiny bead or a drop of glue to separate each blossom on the stamen.  (see photos on my blog for a detail of this).  When each Wisteria shoot is between 1” and 1 1/2" then set aside to dry completely.  Once dry, snip off excess wire and glue one to each of the stamped hanging wisteria at the top of card.

Stamp the sentiment using Deep Purple on white then die cut with the small oval.  Die cut a mat with purple.  Die cut a piece of Fun Foam with the same oval as mat.  Glue the layers together then glue to the spot on the inside of card which best props the card open.  This sample has the popped up oval close to the bottom of the lavender solid part of the circle.  Add one flower to the oval.

Randomly glitter card and glitter all flowers.  Gloss all the leaves.
Thanks for visiting today!
Robin

John 3:17 New King James Version (NKJV)

17 For God did not send His Son into the world to condemn the world, but that the world through Him might be saved.


Tuesday, May 19, 2020

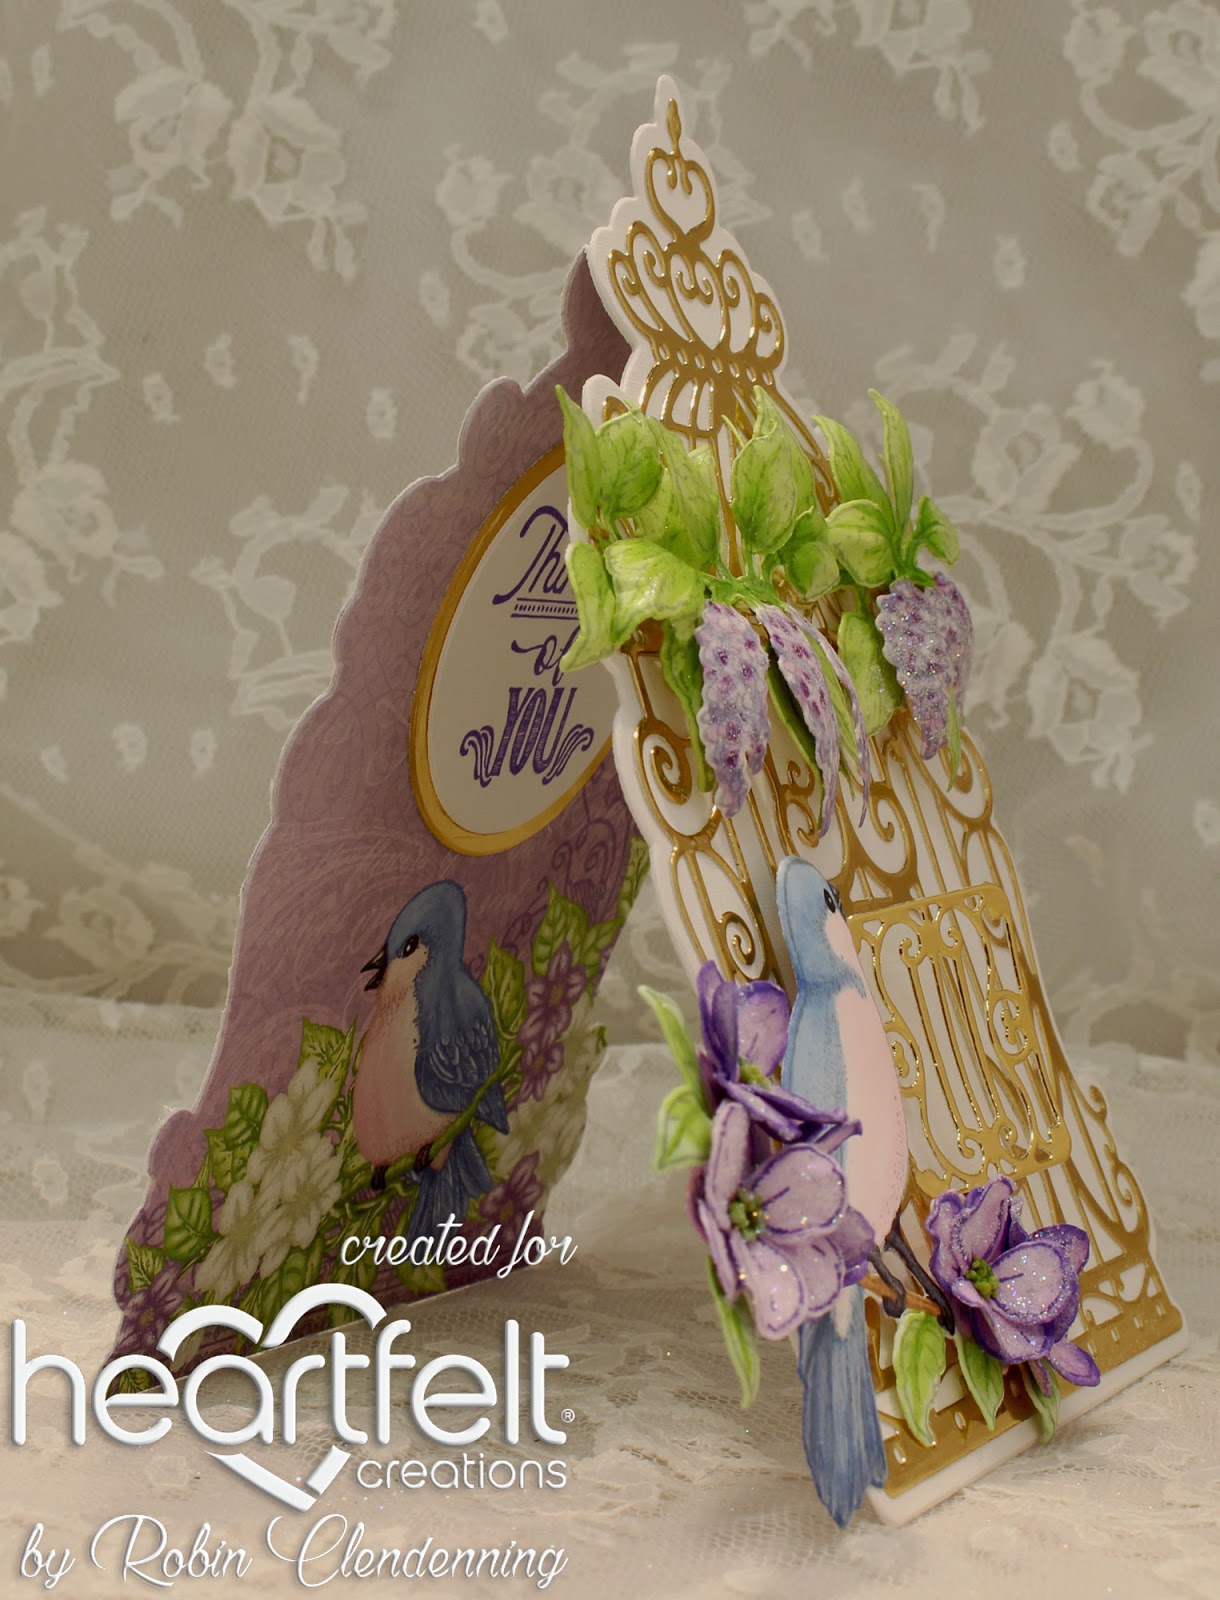
Thinking Of You Bird Cage

Good morning!
Today I have 2 beautiful bird cards.
This first one features the lovely large birdcage in 
Gold with the Lilacs. 

Inside the card has a sentiment

HC PRODUCTS USED      
HCD1-7295           Wisteria Petals Die
HCPC-3911            Wisteria Petals Stamp Set
HCD1-7296            Cascading Wisteria Die
HCPC-3912            Cascading Wisteria Stamp Set
HCDP1-2115         Cascading Petals Paper Collection
HCD1-7297           Floral Song Die
HCPC-3913            Floral Song Stamp Set
HCD1-7298            Decorative Cage Die
HCD1-7154            Eyelet Circle & Basics Small Die
HCD1-7155            Circle Basics Large Die
HCPC-3845            Just For You Sentiments Stamp Set
RACP494                Majestic Violet Archival Ink
RACP430                Deep Purple Archival Ink
TSMP707                Bamboo Leaves Memento Ink
ANC825                 Ribbit Prills
HCGP1-488            Luxe Gold Cardstock
HCPP1-475            Deluxe Flower Shaping Paper Pack of 50-White
85-glitter              Crystal Ultrafine Transparent Glitter
352854                  Metal Tip for Adhesive Bottle
159723                  Designer Dries Clear Adhesive
3D1844                  3-D Crystal Lacquer 4 oz

Other Products:
London Fog Memento Ink, White Cardstock, foam tape, Copic Markers: YG11, YG05, YG07, E53, E33, E35, B21, B41, B45, RV00, E50, C3, C5, white colored pencil, lace, 

For more tips on creating with the flower shaping molds, watch the tutorial at https://youtu.be/FSdPL7nXvQE
Instructions:
Card size: 4 X 6 3/16”.  Use the outer die of cage to cut a white card base folded in half, hanging the top of die over folded edge about 1” so that the fold stays intact.  Cut another white cage with outer die then glue it to the front of folded card base.  Now cut a gold decorative cage with the inner die, glue it to the front of card.  Cut a piece of decorative paper with the bird on it for the inside (cut the top off so that it fits inside the fold). 

Stamp 1 vine, the bird facing right, the 3 and the 2 wisteria shoots using London Fog or black.  Color with Copic Markers.  Stamp wisteria blossoms using Deep Purple and Majestic Violet, sponge, die cut and form then glue in sets of 2.  Fill centers with green Prills.  Glue a flower onto each stamped flower.  Pop bird up onto cage on the left side bottom.  Pop up vine and leaves with wisteria shoots across the top part of the cage.  Stamp the sentiment on white using Deep Purple, die cut with circle and die cut a mat with gold then glue it to the inside.

Glitter flowers and gloss leaves with lacquer.


My second card features the lovely French door
with Lilacs.  The fence features 2 halves
of a heart with the Lilac.
Inside has 2 large pockets for multiple tags.  I like writing person messages on these tags.

HC PRODUCTS USED      
HCD1-7295           Wisteria Petals Die
HCPC-3911            Wisteria Petals Stamp Set
HCD1-7296            Cascading Wisteria Die
HCPC-3912            Cascading Wisteria Stamp Set
HCDP1-2115         Cascading Petals Paper Collection
HCD1-7297           Floral Song Die
HCPC-3913            Floral Song Stamp Set
HCD1-7221            Tulip Cart & Fence Die
HCPC-3861            Tulip Cart & Fence Stamp Set
HCD1-7201            Tickets and Tags Die
HCD1-7203            Ornamental Tags Die
HCD1-7272            Rounded Sunlight Window Die
HCPC-3845            Just For You Sentiments Stamp Set
HCD1-7281           Stairway Gardens Die
HCD1-7283           Courtyard Elegance Die
HCCB1-482            6 X 6 Swing Fold Card- White
RACP494                Majestic Violet Archival Ink
RACP430                Deep Purple Archival Ink
TSMP707               Bamboo Leaves Memento Ink
TSMP900               Tuxedo Black Memento Ink
ANC825                 Ribbit Prills
HCPP1-475            Deluxe Flower Shaping Paper Pack of 50-White
85-glitter              Crystal Ultrafine Transparent Glitter
352854                  Metal Tip for Adhesive Bottle
159723                  Designer Dries Clear Adhesive
3D1844                   3-D Crystal Lacquer 4 oz

Other Products:
London Fog Memento Ink, White Cardstock, foam tape, Copic Markers: YG11, YG05, YG07, E53, E33, E35, B21, B41, B45, RV10, E50, C3, C5, white colored pencil, ribbon.

Instructions:
Card size: 6 X 6 1/4".  Start with the Swing Fold Card Base.  Pick a decorative paper panel with the purple doorway then use the Rounded Sunlight Window outer die to cut it out.  Cut out a round panel for the backside as well using another lavender color sheet of paper.  Cut out 2 more square panels out of this same paper (all 3 inside pieces should coordinate when using a single sheet).  Glue all the panels to the card base.  With the last 1/4 of the inside sheet of paper, make 2 pockets for the square panels 2 3/4 X 5 1/2".  Glue the bottoms and sides to the bottoms of 2 square panels.
Stamp fence, 2 vine with 6 wisteria shoots, 1 bird facing left and both sides of the vine [making a heart] using London Fog then die cut and color.  Glue the vine with hanging wisteria to the top and both sides of the circle panel.  Cut the fence in half and pop up one side to each of the front circle panel wrapping the heart shaped vines around each fence post.  Stamp small sentiment for the front using Deep Purple then die cut with very small circle, circle die cut a purple mat, glue the 2 together then glue it to the right side of the front circle.  Open card and finish decorating by gluing and popping up the bird to the bottom right side of the inside circle panel.
Stamp sentiment using Deep Purple and die cut it with Ornamental Tags Die, cut the mat with purple paper.  Glue it to the inside circle panel above bird, below wisteria.

Stamp flower blossoms, sponge, die cut then pleat outer edges and glue in sets of 2.  Fill centers with green Prills.  Glue flowers to the stamped flowers with bird.

Die cut 2 Courtyard Elegance [just the small square] and 1 full Stairway Gardens die from white.  Cut the Stairway Gardens in half then glue one half to each of the pockets on the square panels.  Glue the small square die cuts at the diamond (instead of square) onto the top center of each pocket letting half the diamond hang off the top.

Cut 4 large tags with 4 purple mats using Tickets and Tags Die set, cut some smaller ones to add to the tops of tags.  Add a purple bow to the top of each tag.  Slide tags into the pockets.

Randomly glitter card and tags, glitter all flowers and gloss all the leaves.
Thank you for visiting today!
Robin
Romans 11:33
33 Oh, the depth of the riches both of the wisdom and knowledge of God! How unsearchable are His judgments and His ways past finding out!

Tuesday, May 12, 2020

Cascading Petals debut

Good morning!
Yay! Don't you love Wisteria? 
I am so happy Heartfelt Creations came out with these flowers!!
This is one way to do these wonderful Wisteria.


Card held closed with a front flap with a magnet.
Front flap opens


Then sides open


Another way is to string them on a wire stamen like this


HC PRODUCTS USED      
HCD1-7295           Wisteria Petals Die
HCPC-3911            Wisteria Petals Stamp Set
HCD1-7296            Cascading Wisteria Die
HCPC-3912            Cascading Wisteria Stamp Set
HCDP1-2115         Cascading Petals Paper Collection
HCD1-7297             Floral Song Die
HCPC-3913            Floral Song Stamp Set
HCD1-7293            French Cottage ‘scapes Die
HCPC-3909            French Cottage ‘scapes Stamp Set
HCD1-7280             Cottage Window & Hydrangea Die
HCPC-3902            Cottage Window & Hydrangea Stamp Set
HCD1-7252            Starry Night Decorative Die
HCD1-7202            Album Tags and Accents Die
HCD1-7272            Rounded Sunlight Window Die
HCD1-7279            Fresh Cut Hydrangea Die
HCPC-3901            Fresh Cut Hydrangea Stamp Set
HCPC-3844            For My Friend Sentiments Stamp Set
HCCB1-480            Shutter Fold Card- White
RACP985                Cactus Flower Archival Ink
RACP494                Majestic Purple Archival Ink
RACP430                Deep Purple Archival Ink
TSMP900               Tuxedo Black Memento Ink
ANC825                 Ribbit Prills
486490                    Bottle Cap Inc Vintage Magnets .5 Inch 12/Pkg
HCPP1-475            Deluxe Flower Shaping Paper Pack of 50-White
85-glitter                 Crystal Ultrafine Transparent Glitter
352854                    Metal Tip for Adhesive Bottle
159723                    Designer Dries Clear Adhesive
3D1844                  3-D Crystal Lacquer 4 oz

Other Products:
London Fog Memento Ink, White Cardstock, foam tape, Copic Markers: YG11, YG05, YG07, E53, E33, E35, B21, B41, B45, RV10, E50, C1, C3, C5, white colored pencil, lace,  

For more tips on creating with the Window Scene cards & dies, watch the tutorial at https://youtu.be/LnM95GR92ao.
Instructions:
Card size: 6 1/8 X 6 1/2".    The card base, glue outer 1/2 circle sides together so that the base is a regular gatefold (or cut off the outer 1/2 circles).  Use  the outer die of the Rounded Sunlight Window die set to cut inside and outside 1/2 circles out of paper (Cut 2 full circles then cut each circle in half) out of decorative paper.  Cut another set from the striped decorative paper (used at the bottom of card).  Cut a panel for the back of card and another from stripe, make sure all levels are the same for the lower striped panels Don’t glue anything yet.  Cut a band for the front out of white heavy cardstock 2 1/2 X 7 1/8”  Cut matching panels out of decorative paper for the front and back.  Score the band at 1” on left side and glue the 1” tab to the back of card.  Now, before gluing any decorative paper on, it is time to glue the magnets on.  1 half goes on the inside right side (choose a spot that will be covered by the bird) glue it down and tape it while it dries.  Place the other magnet on the other side (magnets sticking together) then put a little glue on it and close the band down over it (this will mark the spot because of the glue left behind), take the magnet off the side (be careful not the move the one underneath on the other side, it should be fine if it is taped down) then glue that magnet to the place where the glue spot is on the band and tape it down to dry thoroughly.

Die cut 1 Starry Night 1/2 circle and 6 straight Starry Night out of white.  Glue decorative paper panels on all panels inside and out, remember to make sure all the striped panels are level inside and out.  Use the straight Starry Night die cuts between all the intersections where stripe meets lavender decorative paper EXCEPT the inside of band, that is reserved for sentiment.  Use 2 of thee Starry Night straight die cuts for the top back panel, one facing up and one facing down.  Cut the half circle Starry Night so that it is just the scallop and stars then glue ½ of the half circle to each inside sides from the top to the striped paper on each side.

Stamp the sentiments using Deep Purple ink, die cut the back panel sentiment with the Album Tags and Accents, also die cut the outer eyelet frame out of dark purple paper, glue to the center of the back panel.  Cut the other sentiment in a strip 6” long then glue it to the inside of the band at the same height as the Starry Border.

Stamp the Window using black memento, stamp the vines, birds, pots using London Fog Memento, die cut all and color with Copics.  Add white pencil to the tail and feathers of the large birds.  For the window, cut a piece of very light yellow for the inside, cut some lace for curtains then glue the lace to the back of the window followed by the yellow backing.  Glue it to the band on the outside then glue the branch with birds on at the bottom of the window.  On the outside of the half circle “gates”, glue the pots, one on each side at the bottom then glue one vine growing out of each pot.  Glue the wisteria with 2 shoots on the left top and glue the wisteria with 3 shoots to the right top.  Open the gates and glue one bird to each side (hide the bump from the magnet with right side bird if possible).  Avoid all score lines.  Glue the wisteria with the 6 shoots at the top over Starry Borders.

Stamp multiple wisteria petals using Cactus Flower, Majestic Violet and Deep Purple inks, sponge with stamp colors and die cut.  For the inside birds and flowers, use petals flat in single layers to make closing easier.  Add green Prills to the center of each flower.  For the blossoms on the band, pleat the ends of each petal and glue in sets of 2.  Add green Prills to the centers then glue in sets of 2 onto each stamped flower.

For the hanging wisteria: Start with a 3/8” strip of cardstock about 1 1/4" long or so.  Sponge with deep purple then starting at the bottom layer petals on, overlapping as you move up (Cut some apart so that you can use just 1 or 2 at a time or fold them down to accomplish this).  I used the Groove Tool to give each petal a curved appearance. Start going a bit wider toward the center then back narrow for the top.  Glue one wisteria shoot onto each stamped shoot (on the outside and top of the inside).

Randomly glitter the card and glitter all flowers.  Use some gloss (lacquer) on leaves.

Thanks for visiting today!
Robin
Ephesians 4: 31-32
31 Let all bitterness, wrath, anger, [i]clamor, and evil speaking be put away from you, with all malice. 32 And be kind to one another, tenderhearted, forgiving one another, even as God in Christ forgave you.