Pages

Comments are welcome and very much appreciated!

Wednesday, September 26, 2018

Heartfelt Creations Special Launch Tags and Sentiments


Good morning!
These new dies are heaven sent plus look at all the sentiments, 
wow, all you could ever want!
See all of them at the bottom of this post.


HC PRODUCTS USED      
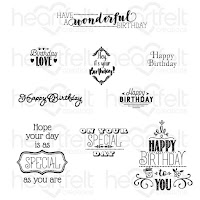
HCPC-3847      Celebrate Love Sentiments Stamp Set

Other Products:
Foam Sheets, pearls, Copic Markers: BV20, white card stock, London Gray Memento ink

For more tips on creating with the flower shaping molds, watch the tutorial at https://youtu.be/FSdPL7nXvQE.

Instructions:
Card size: 5 X 7”.  Cut a light pink piece of decorative paper 4 7/8 X 6 7/8 and glue to the white card base. Cut the Eyelet Lace Frame Die from white and glue it to the light pink paper.   Cut 2 eyelet hearts from white.  Cut 2 Eyelet ovals from white and glue to light pink paper then cut with the heart die to fit inside of eyelet heart die cuts.   Stamp sentiment using Majestic Violet ink on one of the tags in the decorative paper from the Oakberry Lane Collection.  Use the new Album Tags and Accents Die to cut out the tag with sentiment.  Cut matching eyelet tag from white and glue the sentiment tag onto it.
Stamp doves using London Gray Memento and coloring with BV20, die cut.  Stamp flower blossoms with Majestic Violet and Rose Madder, leaves with Fern Green.   Form flowers using the 3D Mold (see Emma Lou’s video). Use the Leaves 3D mold as well.  Insert stamen add glitter and let dry.
Pop up sentiment tag with a layer of Foam Sheet, pop up right heart with 1 layer of foam sheet and the left heart with 2 layers of foam sheet.  Glue the tag centered toward the bottom and the hearts above centered.  Glue doves onto hearts. Tuck leaves under hearts and under the tag sentiment. Add flowers on top of leaves and then add pearls to card.

Below are all the new sets from this special release.


Thanks for visiting today!
Robin


Love is patient and kind. Love is not jealous or boastful or proud or rude. It does not demand its own way. It is not irritable, and it keeps no record of being wronged. It does not rejoice about injustice but rejoices whenever the truth wins out. Love never gives up, never loses faith, is always hopeful, and endures through every circumstance.
1 Corinthians 13: 4-7


Wednesday, September 19, 2018

Heartfelt Creations Squirrel Family Shadow Box Card

Good morning!

This momma has her hands full, eh? So many children and look, 
one of them is trying to steal a pie!


HC PRODUCTS USED       

Other Products:
White Card stock, black card stock, Distress ink-Tea Stain, 3M foam tape, Pearlescent Purple Brilliance ink, Copic Markers: RV02,RV10,RV04,E53,E51,V01,V12,V15,R20,R21,R22,YR18,E99,E97,C0,C1,C2,C3,C5,C7,B00,B02

For more tips on creating with the flower shaping molds, watch the tutorial at https://youtu.be/FSdPL7nXvQE.

Instructions:
Card size 6 1/4 X 8 1/4”  Cover black box with decorative paper and also glue one 6 X 6 piece on the inside before putting box together.  Construct box placing and gluing foam between each layer at the bottom so that layers stay apart properly.  Cover layers at the bottom with curved ground cut from decorative paper using the Fleur Border Basics plain edge die.  Cut a black Festive Holiday Die cut and a black cottage base shadow.
Stamp Squirrels, squirrel cottage, acorns, blossoms, bird bath, birds, and fence with black ink on white card stock, die cut and color with Copic Markers.  Stamp Cottage Lane flowers and leaves using Rose Madder, Majestic Violet, and Fern Green then sponge with Pink Peony, Pearlescent Purple and Leaf Green and die cut.  Stamp Wildwood Florals with Tiger Lily and Buttercup and sponge with the same and die cut.  Shape flowers using the 3D mold and the Deluxe Flower Shaping Kit.  Insert Stamen and add Prills to the tiny flowers.
Starting with the back of the box, decorate with the squirrels and blossoms until you get to the outside then glue your cottage black shadow down to left side of box and also the Festive Holiday die cut.   Glue the cottage base to shadow and the window frame layer. Pop up the mama squirrel and shelf.  Pop up fence along the bottom and glue the little squirrel reaching up so that it looks like he is trying to reach the pie.  Arrange flowers and acorns at the top and add extra beaded stamen at each end of the arrangements.  Add Nuvo drops as well to the ends. (Glitter all flowers before or after gluing to box).  Glue a 6 X 6” piece of decorative paper to the back of box to keep it together.

Thanks for visiting today!
Robin
Psalm 91:14-16
The Lord says, “I will rescue those who love me.
    I will protect those who trust in my name.
15 When they call on me, I will answer;
    I will be with them in trouble.
    I will rescue and honor them.
16 I will reward them with a long life
    and give them my salvation.”

Tuesday, September 11, 2018

Heartfelt Creations Squirrel Family Foldout -Oakberry Lane Debut

Good morning!

Come along as we head deep into the woodlands to explore the world of Oakberry Lane…the newest collection from Heartfelt Creations! Filled with delightful illustrations of lively, high spirited and lovable squirrels, this collection is one to capture your heart and creative imagination, and will appeal to both the young and the young at heart! Create irresistible outdoor themed scrapbook layouts preserving those precious moments experienced in the great outdoors, as well as charming handmade greeting cards ready to deliver well wishes and sentimental thoughts to friends and loved ones! Darling illustrations of squirrels at play on teeter totters and tire swings, gathering nuts, and bounding about in beautiful floral gardens with their tails held high, remind us that taking time to play, enjoying the company of others and banding together to make light work of the tasks at hand are important to a well balanced life! A stunning autumn themed color palette of acorn browns, woodland greens, sunset oranges, autumn leaf reds, along with deep plums and dark pinks, lay the foundation for decorative papers displaying delicate lace like patterns, vintage style barn wood patchwork backgrounds, as well as fascinating outdoor garden settings! Create your very own Oakberry Lane scenes with three cute and entertaining cling stamp sets and coordinating dies featuring a substantially sized acorn homestead, an assembling of lovable squirrels at play, and of course Oakberry Lane’s own signature wildflower blossom ready to be stamped, colored and assembled into a realistic 3D floral embellishment to accent all of your Oakberry Lane creations! So take a cue from our furry friends and make time to join in on the merriment! A creative adventure awaits you…we promise!


HC PRODUCTS USED      

Other Products:
Brilliance Pearlescent Purple, 3M Foam Tape, Copic Markers:
R20,R21,R22,V01,V12,V15,YG03,YG23,E51,E21,E53,E33,E35,E42,E43,E44,E93,B00,B01,B02,C0,C2,C3,C5,YR04, green card stock, kraft card stock, white card stock.

For more tips on creating with the flower shaping molds, watch the tutorial at https://youtu.be/FSdPL7nXvQE.
For more tips on creating with the border dies & foldout cards, watch the tutorial at https://youtu.be/wxX94X84kUo.

Instructions:
Card size: 5 X 7” Start by picking and cutting paper to fit all sides of foldout card, (see Emma Lou’s Video on perfectly matching curved edges when cutting paper).  Cut the top of the back section of card with the Plain edge of the Classic Border Basics Die.  Cut the scallop border from Fleur Border Basics X 3 for each side (to have a nice finish on both side, you could get by with just 3 for one side and leave the backs rough) out of kraft card stock to match card base.  Cut the back border with the 2 leaf borders from the Delicate Border Basics die set.  Glue papers and borders onto each side of the foldout panels.  Cut little grassy knolls for each page using the plain edge die of the Fleur Border Basics on green card stock, sponge Leaf Green on the edges then glue each to the bottom of each panel.  Cut 2 pockets from kraft card stock using the Fleur Borders and Pockets Die.  Fussy cut one label panel from decorative paper for a sentiment tag to place in 1 of the pockets. Cut 1 of the teeter totter squirrels out of the decorative paper
Stamp sponge color and die cut several sets of blossoms using both Rose Madder and Majestic Violet Inks, sponge Rose Madder flowers with Pink Peony and sponge Majestic Violet flowers with Pearlescent Purple.  Die cut.  Stamp Leafy Accents and the leaves from the Oakberry Blossoms set with Fern Green and sponge color with Leaf Green then die cut.  Use the Floral Basics Mold for the flowers and the Leafy Accent Mold for the Leafy Accent leaves (see Emma Lou’s Video for using the Shaping Molds).  Stamp and die cut all the squirrels and the squirrel cottage (on the cottage, stamp and die cut 2 or 3 times to do layers for dimension) using black ink on white card stock.  Use Copic Markers to color.  Stamp and die cut all the other flower blossoms then color.
Finish shaping flowers using the Flower Shaping kit, insert stamen, glue and let dry.  Start decorating each panel by placing the squirrels. Front panel outside and inside have the teeter totter squirrels (1 set cut from paper to make it easier). Place a few blossoms around coming from the ground then make a small flower arrangement at the top left (outside) and small acorn arrangement top right on the inside. 2ndpanel is just paper on the back and the squirrels with the acorn giving and acorn basket on the inside.  Make another small flower arrangement at the top right. 3rd panel on the outside, place the tire swing squirrel at the left top and some blossoms growing from the ground at the bottom then arrange flowers and leaves top left to right.  3rd panel inside, glue the kraft pockets to each side at the bottom leaving opening to place tags in. then glue the blossom squirrel sitting in a big flower and the reaching up squirrel on top of the right kraft pocket.  Place hand cut tag into the left pocket.  On the back panel, glue the base layer of the cottage on and then pop up a layer of the scaled bottom and a popped up layer of the window frame and mama squirrel on top of the base for more dimension.  Add another layer of the butterfly shaping wings up.  Add some coneflowers to the ground and then make another acorn and flower arrangement at the top right.  Most of the 3D flowers should show when panels are all the way closed and card should lay fairly flat.

Thanks for visiting!
Robin
Psalm 121:1-2

will lift up my eyes to the hills—

From whence comes my help?

My help comes from the Lord,
Who made heaven and earth.


Wednesday, September 5, 2018

Heartfelt Creations Cardinal Birdhouse

Good morning!

How about a birdhouse this morning?
I used a Manzanita branch from our yard and then added some branches 
from the Merry and Bright collection at the ends.  I glued some real pine
cones on as well as used some stamen for berries.
I had some crystal beads on ribbon to make icicles on the house,
lots of snow pen with glitter for snow.


HC PRODUCTS USED       

Other Products:
Beaded ribbon, white card stock, half gold beads, small pine cones, manzanita stick, Marvy Snow Pen, Chip board, Copic Markers: Yy31, Y32, RV00, RV02, RV04, E33, E35, YG11, YG05, Birdhouse template found on Pinterest: https://www.pinterest.com/pin/506232814335282715/ enlarged to 125%

For more tips on creating with the flower shaping molds, watch the tutorial at https://youtu.be/FSdPL7nXvQE.

Instructions:
Project size is approximately 6 1/2" X 5 1/2" X 5” including branch. Cut house out of white card stock using the template copied onto paper. Cut it out of decorative paper as well except for roof and floor.  Cover a chipboard coaster with decorative paper.  Glue decorative paper to cardstock and put the house together (use glue for strength). Hand cut a frame for the door.  Cut scallop border from Border Essentials to cover all edges and corners.  Cut a fence border from Border Essentials for all the way around the bottom.  Glue house to base (covered chipboard) and then glue roof on.  Cute scalloped border from the Window Box Elements several times for the tiles on the roof and glue tiles onto roof.  Glue beaded ribbon (found in the notions section of a fabric store) to underside of the roof all the way around house for icicles.  Glue branch onto base (I also wired it to the house).  Add rock candy stamen to the sides of house (like plants) and also glue a grouping in front of branch base.
Stamp, die cut and color the branches and the Cardinals and Holly using black ink on white card stock and Copic Markers to color.  Stamp, die cut and sponge color on the Poinsettias and Holly leaves using Magenta Hue and Fern Green ink on white card stock color with Orchid Brilliance and Leaf Green, then form using the mold (see video).  Glue some stamen (hot pink) to holly leaves in about 3 or 4 sets, let dry.  Use the Snow Pen to add snow to holly and berries, branches and pine cones, add glitter before heating to puff.  Add glitter to poinsettias and Prills to the centers of poinsettias.  Glue branches, Cardinals, pine cones, holly and berries to Manzanita branch then add poinsettias to Manzanita and to the little house front and left side near corner.  Glue piece of branch and poinsettia to lower right side of house to finish.
Thanks for visiting today!
Robin

Matt.25:34-40
34 “Then the King will say to those on his right, ‘Come, you who are blessed by my Father, inherit the Kingdom prepared for you from the creation of the world. 35 For I was hungry, and you fed me. I was thirsty, and you gave me a drink. I was a stranger, and you invited me into your home. 36 I was naked, and you gave me clothing. I was sick, and you cared for me. I was in prison, and you visited me.’
37 “Then these righteous ones will reply, ‘Lord, when did we ever see you hungry and feed you? Or thirsty and give you something to drink? 38 Or a stranger and show you hospitality? Or naked and give you clothing?39 When did we ever see you sick or in prison and visit you?’
40 “And the King will say, ‘I tell you the truth, when you did it to one of the least of these my brothers and sisters,[f] you were doing it to me!’