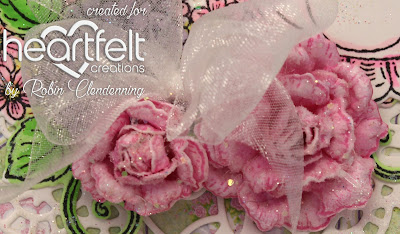
Good Morning!
Tea time easel card today.
My second card is a Christmas card, isn't it
elegant and different?
It's hard to photograph gold mirror type paper,
here is another photo

HC PRODUCTS USED
HCD1-7213 Elegant Pocket Accents Die
HCD1-7214 Ornate Pocket Accents Die
HCD1-7201 Ticket and Tags Die
HCPC3833 Silent Night Scroll Stamp Set
HCPC-3884 Candy Cane Cottage Stamp Set
HCPC-3881 Christmas Poinsettia & Holly Stamp Set
HCD1-7249 Christmas Poinsettia & Holly Die
HCFB1-478 3D Christmas Poinsettia Shaping Mold
HCDP1-2104 Candlelit Christmas Paper Collection
NU802 Indian Gold Nuvo Mousse
HCGP1-488 Luxe Gold Cardstock
85-glitter Crystal UltrafineTransparent Glitter
PGM15015 Rajni Chawla’s Crystal Clear
352854 Metal Tip for Adhesive
159723 Dries Clear Adhesive
359760 Embossing Powder-Gold
ANC804 Heart of Gold Prills
Other Products:
Ivory cardstock, gold ribbon
For more tips on creating with the flower shaping molds, watch the tutorial at https://youtu.be/FSdPL7nXvQE
For more tips on creating with the booklet frame dies, watch the tutorial at https://youtu.be/kJO5LdNFxgE.
Instructions:
Card size: 6 X 6 1/2”. Make card base with a 12 X 6” Ivory cardstock, fold in half and leave the die off the top of the fold so that it doesn’t cut the entire fold (see video). Cut and ivory solid piece with the longer of the Elegant Pocket Accent Die. Cut another including the insert out of Gold Luxe. Glue the solid piece and the gold together then glue to the top of the card. Cut one Ornate Pocket Die including the pie shaped piece out of Gold Luxe. Glue this piece to the card front leaving top open so that it makes a pocket. Cut 2 tag frames from Gold Luxe then 2 inside tags from the decorative ivory color paper. Glue the tags to their frames and punch a hole at the top of each (or use included die for the hole). Stamp and emboss sentiments and pine cone on each tag. Insert gold ribbon.
Stamp and emboss poinsettias and holly on ivory cardstock, die cut and shape in the mold. Layer 3-4 blossoms together for each flower brush with gold Nuvo and fill centers with gold Prills. Glitter the flowers and arrange on card bottom left. Glitter card and tags, when glue is dry insert tags.
My third card today is another pocket card
HC PRODUCTS USED
HCD1-7211 Decorative Pocket Accents Die
HCD1-7212 Petite Pocket Accents Die
HCD1-7213 Elegant Pocket Accents Die
HCD1-7201 Tickets and Tags Die
HCFB1-2110 CallaLily Paper Collection
HCD1-7275 Calla Lily Die
HCPC-3897 Calla Lily Stamp Set
HCFB1-484 3D Calla Lilly Shaping Mold
HCS1-485 Pastel Pollen Stamens-Medium
HCD1-7227 Eyelet Diamond Die
HCD1-7226 Diamond Basics Die
HCPC-3848 Cheerful Note Sentiments Stamp Set
HCPP1-475 Deluxe Flower Shaping Paper Pack of 50-White
RACP614 Magenta Hue Archival Ink
RACP531 Vivid Chartreuse Archival Ink
RACP962 Fern Green Archival Ink
PGM15015 Rajni Chawla’s Crystal Clear
85-glitter Crystal Ultrafine Transparent Glitter
352854 Metal Tip for Adhesive
159723 Dries Clear Adhesive
3D1844 3-D Crystal Lacquer
Other Products:
Black cardstock, floral tape, ribbon, black pearls
For more tips on creating with the flower shaping molds, watch the tutorial at https://youtu.be/FSdPL7nXvQE
Instructions:
Card size: 6 X 6”. 12 X 6 black cardstock folded in half for the card base. From black cut: 2 tag frames, Petite Pocket Accent narrow and wide, 2 corner, Eyelet Diamond and 1 Decorative Pocket Accent. Cut a 5 7/8 X 5 7/8 panel from bright pink decorative paper. Lay pieces out on pink so that you can see where to cut slit in pink paper to make a pocket. Draw a line with pencil, remove all pieces then cut the slit. Glue the pink paper to black card leaving pocket free.
Glue die cuts to card front the way you had them arranged so that slit of Decorative Pocket Die matches slit in paper. Cut 2 decorative paper tags then glue to black tag frames. Make the little hole enforcers from black and glue on top of holes. Cut Diamond from bright pink decorative paper then glue to black eyelet diamond. Stamp tags with sentiments using Magenta Hue. Stamp diamond sentiment using black. Glue diamonds to card in the center below Petite Pocket die. Glitter tags and card.
Stamp Calla Lilies using Magenta Hue, sponge and leaves using Fern Green, sponge with Chartreuse. Form flowers, insert stamen then wire 3 together. Glue leaf under last one and tape up wires to make it look more like a stem. Glitter the flowers and gloss the leaf. Glue them to the bottom of the card under pocket.
Thanks for visiting today!
Robin
One of my favorite verses from God's word.
Jeremiah 29:11-13 New King James Version (NKJV)
11 For I know the thoughts that I think toward you, says the Lord, thoughts of peace and not of evil, to give you a future and a hope. 12 Then you will call upon Me and go and pray to Me, and I will listen to you. 13 And you will seek Me and find Me, when you search for Me with all your heart.


1 comment:
Wow three such beautiful cards. Love how you have used all the pocket accent dies and your flowers are just so beautiful!
Post a Comment